

When to use CSV import
Use CSV import when you already have a spreadsheet of contacts — exported from another tool, a sales list, an event sign-up sheet — and want to bring them all into ChatSyncs at once, instead of adding them one at a time or waiting for each person to message the bot first. It’s the fastest way to seed Subscriber Manager with an existing contact list. Only have a handful of contacts, or contacts already living in a Google Sheet or your Google account? See Import Subscribers Manually or Import from Google Sheets instead.Import a CSV file
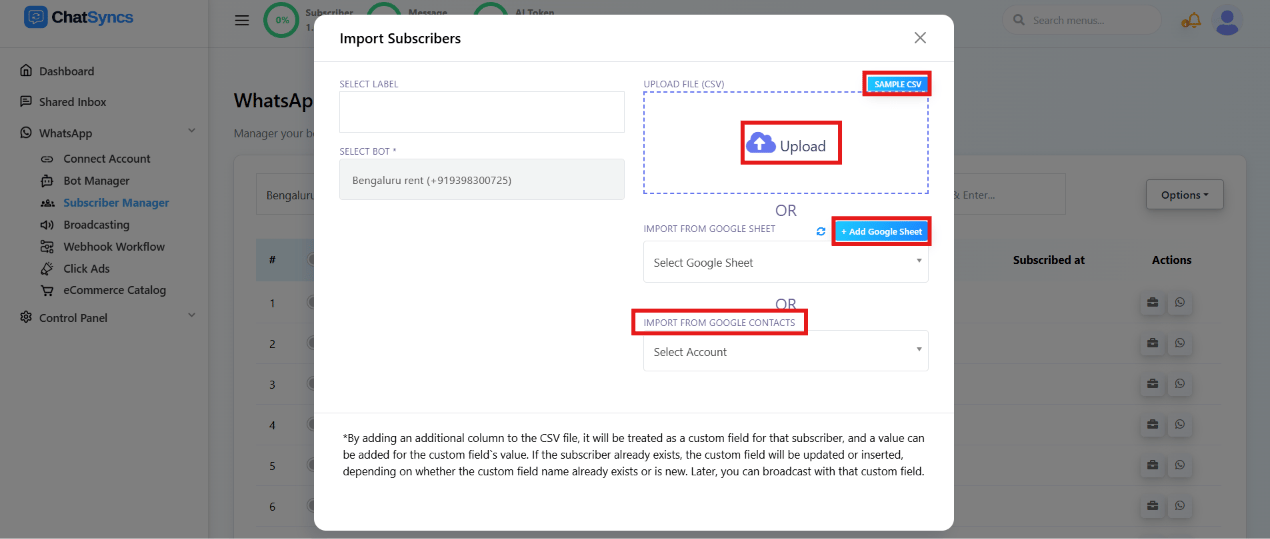
The Import Subscribers modal — Select Label, Select Bot, Upload File (CSV), or import from a Google Sheet or Google Contacts.
Open Options → Import Subscribers
Choose Upload File (CSV)
Prepare your file to match the required format
Upload the file
Map each column
Confirm the import
The CSV format
A CSV needs at minimum a phone number and name column, e.g.:8.8E+12 instead of
8801710000000), and a CSV exported in that state will import garbled or truncated numbers.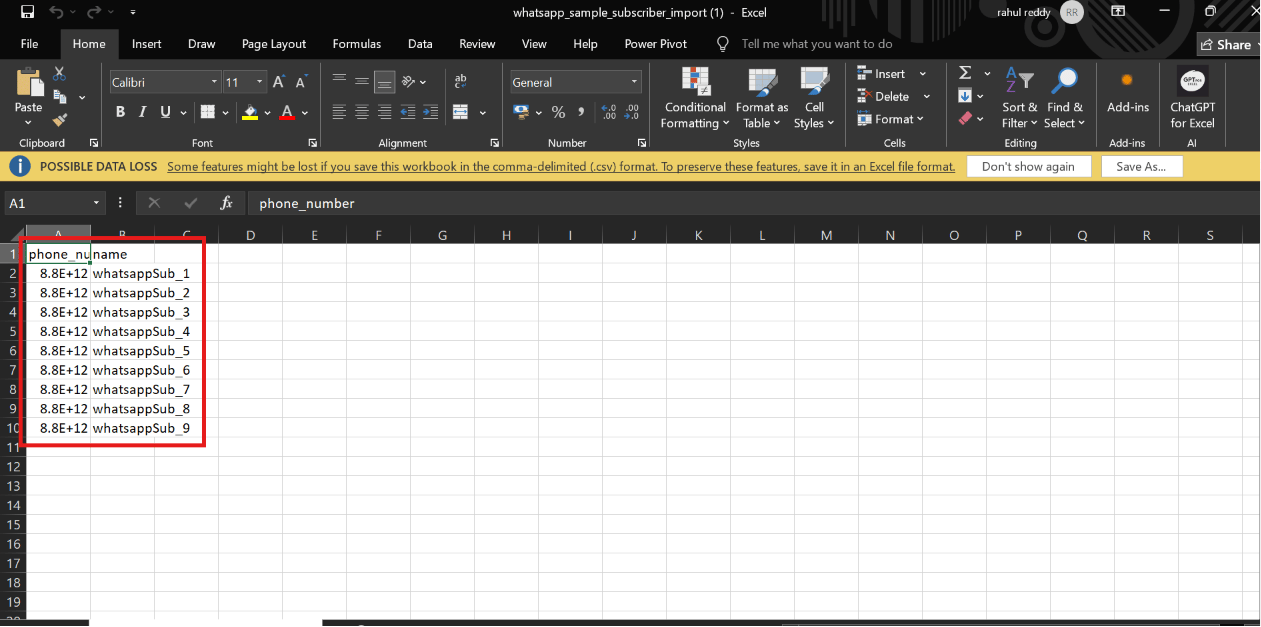
A phone_number column displayed in scientific notation (8.8E+12) before formatting.
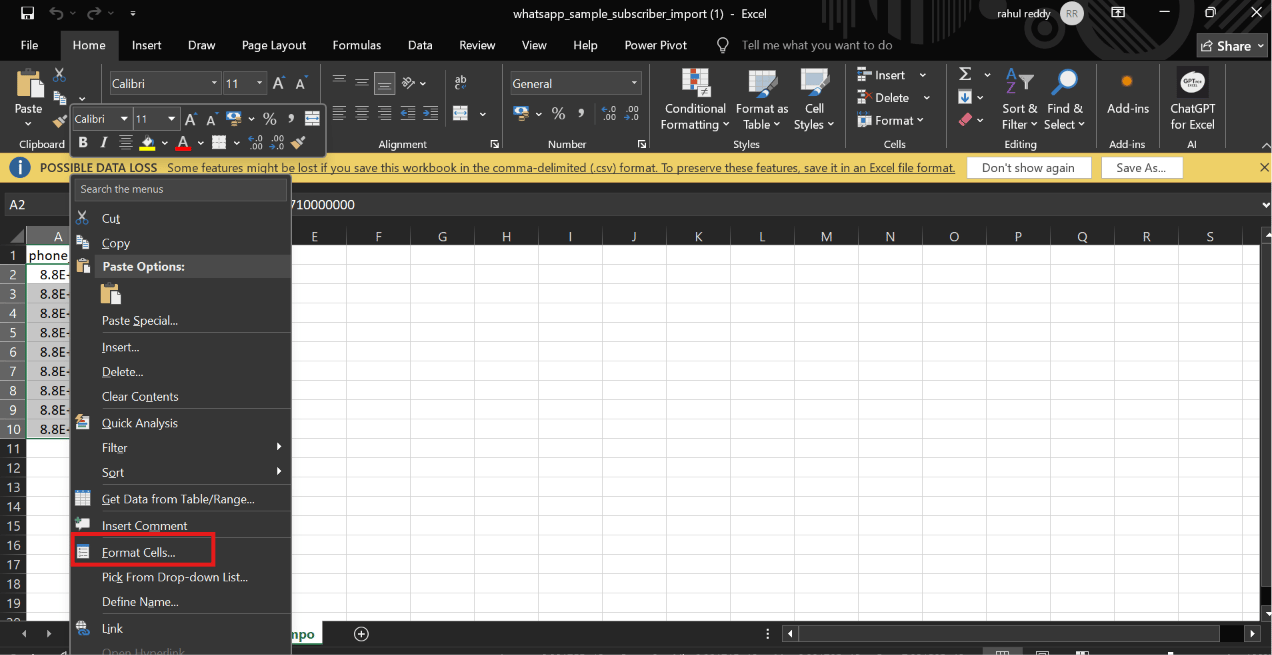
Right-clicking the phone_number column and selecting Format Cells to fix the display.
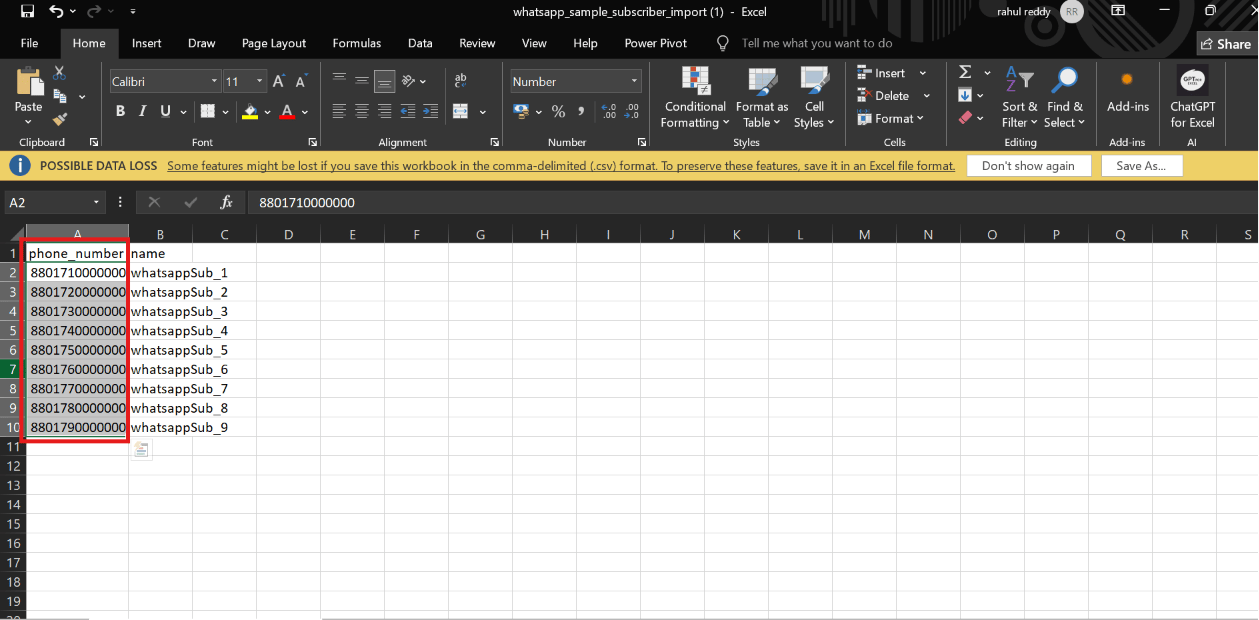
The phone_number column after formatting — full numbers like 8801710000000 instead of scientific notation.
Map the columns
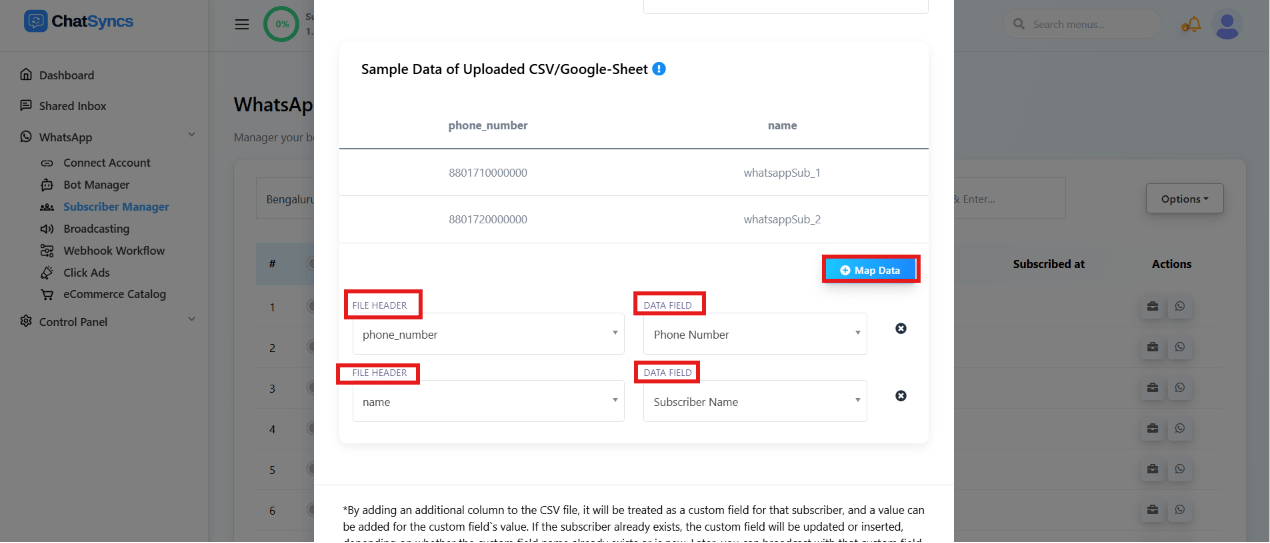
The Map Data step — mapping the file's phone_number and name columns to Phone Number and Subscriber Name.
- Map
phone_number→ Phone Number. - Map
name→ Subscriber Name. - Verify every mapping carefully before confirming — a wrong mapping imports the wrong data into the wrong field for every row.
Frequently asked
What columns does my CSV file need at minimum?
What columns does my CSV file need at minimum?
phone_number column and a name column. Any other column is imported automatically as
a custom field.Why do my imported phone numbers look wrong or truncated?
Why do my imported phone numbers look wrong or truncated?
8.8E+12). Format the
phone number column as Number (0 decimal places) or Text — right-click → Format
Cells — before saving the file as CSV, or the import will bring in the garbled value.What happens if I import a phone number that's already a subscriber?
What happens if I import a phone number that's already a subscriber?
Do I need the country code in the phone number column?
Do I need the country code in the phone number column?
+ or
spaces, e.g. 919876543210.Can I preview the expected file format before uploading?
Can I preview the expected file format before uploading?
Related Documentation
- Subscriber Manager — the subscriber list, Options menu, and Download(all) as CSV.
- Custom Fields and Labels — how imported columns become custom fields.
- Import Subscribers Manually — for adding one contact at a time instead.
- Import from Google Sheets — for importing without exporting a CSV file first.