

Open Bot Settings
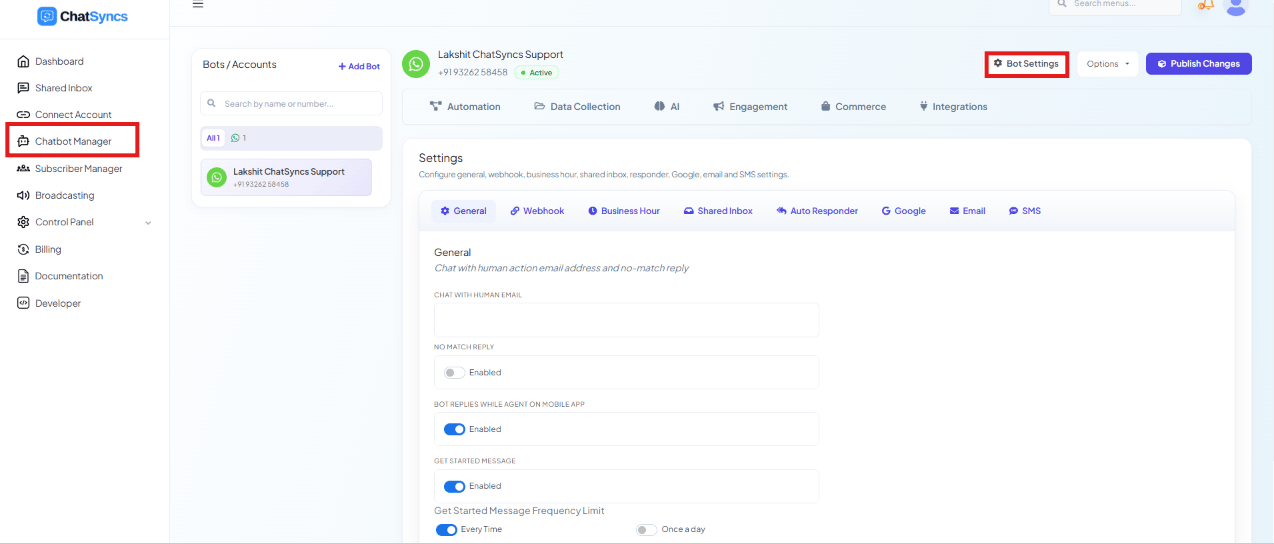
Chatbot Manager, with the Bot Settings button highlighted in the top-right corner.
1
Go to Chatbot Manager
Select Chatbot Manager.
2
Select your bot
Pick the bot from the Bots / Accounts list.
3
Open Bot Settings
Click the Bot Settings button in the top-right corner.
General
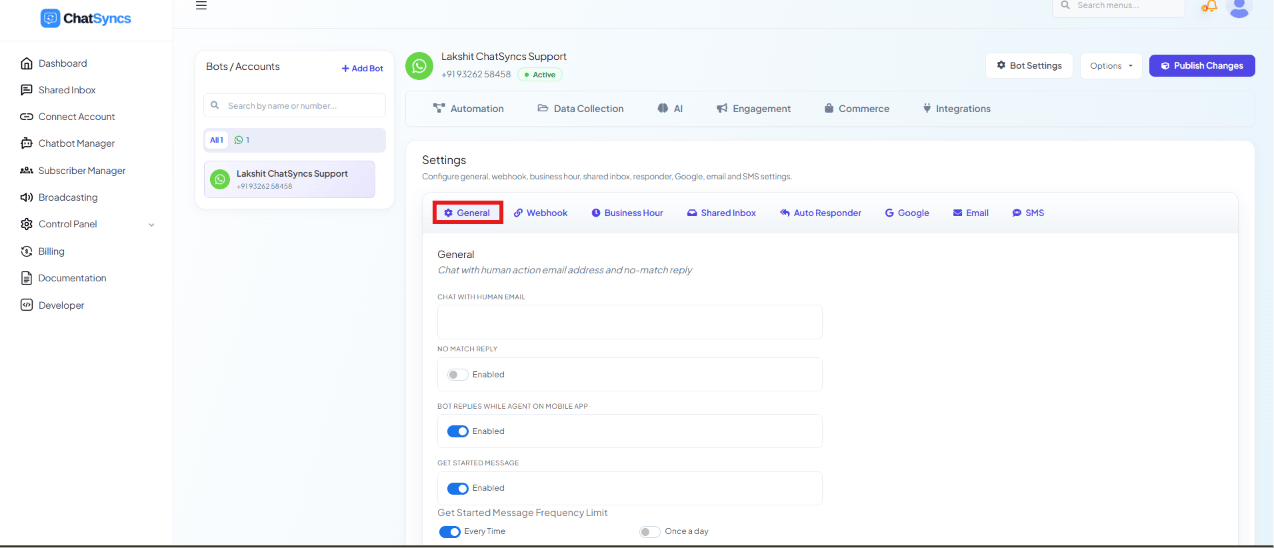
Chat with Human Email
Enter the email address that should receive a notification whenever a customer clicks Chat with Human. The button itself is set up as one of the System Default Action Buttons — see Chat with Human in Quick Actions for how to wire it into a flow. Example Email:support@company.com
support@company.com.
No Match Reply
Enable this to send a default reply when the bot can’t find a matching response. ExampleBot Replies While Agent Is Active
Enable this if the bot should keep replying even while a human agent is chatting with that customer. ExampleGet Started Message
Shows a welcome message when a customer starts a new conversation. ExampleWebhook
Connect ChatSyncs to your own server or application. Both directions live on the same Webhook tab — there’s no separate Incoming/Outgoing sub-tab to switch between.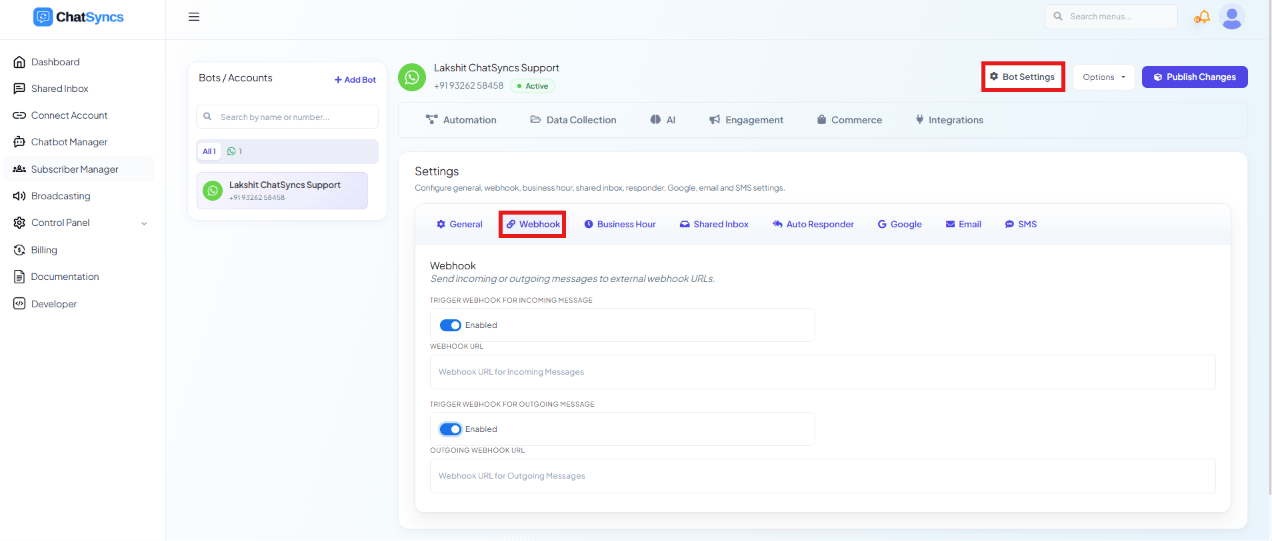
The Webhook tab, showing both the incoming and outgoing webhook toggles and URL fields on one screen.
Incoming Webhook
Sends every customer message to your server as it arrives.1
Open Webhook
In Bot Settings, select the Webhook tab.
2
Enable Trigger Webhook for Incoming Message
Turn the toggle on.
3
Enter your Webhook URL
The endpoint on your server that should receive the POST.
4
Publish Changes
Click Publish Changes.
Outgoing Webhook
Sends every bot reply to your server — configured right below Incoming Webhook, on the same tab.1
Open Webhook
In Bot Settings, select the Webhook tab.
2
Enable Trigger Webhook for Outgoing Message
Turn the toggle on.
3
Enter your Webhook URL
The endpoint on your server that should receive the POST.
4
Publish Changes
Click Publish Changes.
Business Hour
Set up your business hours, timezone, and off days, and control how the bot behaves inside vs. outside those hours.Timezone
Select the timezone your business operates in — all business-hours checks follow this timezone. Example If your business is in India, select:Off Day
Select the day(s) your business is fully closed. Example — if Sunday is set as the off day, customers who message on Sunday are treated as contacting you during non-business hours, regardless of the time.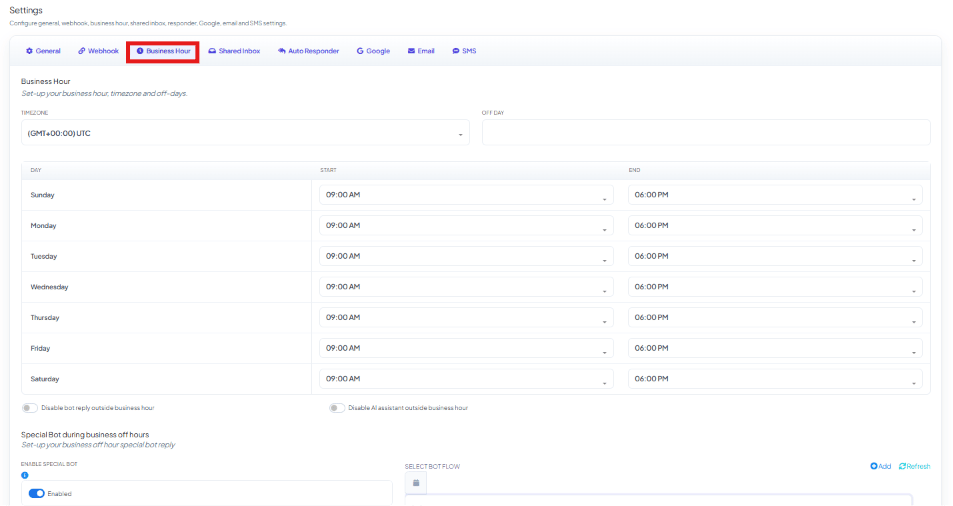
Business Hours Schedule
Set the working hours for each day of the week. Example
If a customer sends a message at:
- 11:00 AM (Monday) → business is open.
- 08:30 PM (Monday) → business is closed.
- Sunday 12:00 PM → business is closed (off day).
Disable Keyword Replies
Enable this if you do not want the bot to reply automatically during business hours. Example Business hours:09:00 AM – 06:00 PM
Disable AI Agent
Enable this to prevent the AI Agent from replying during business hours. ExampleSpecial Bot During Business Off Hours
Configure a special automated reply for customers who message outside business hours, via Enable Special Bot. Example Business hours:09:00 AM – 06:00 PM. Customer messages at 09:45 PM. The special bot replies:
Business Hour settings summary
Shared Inbox
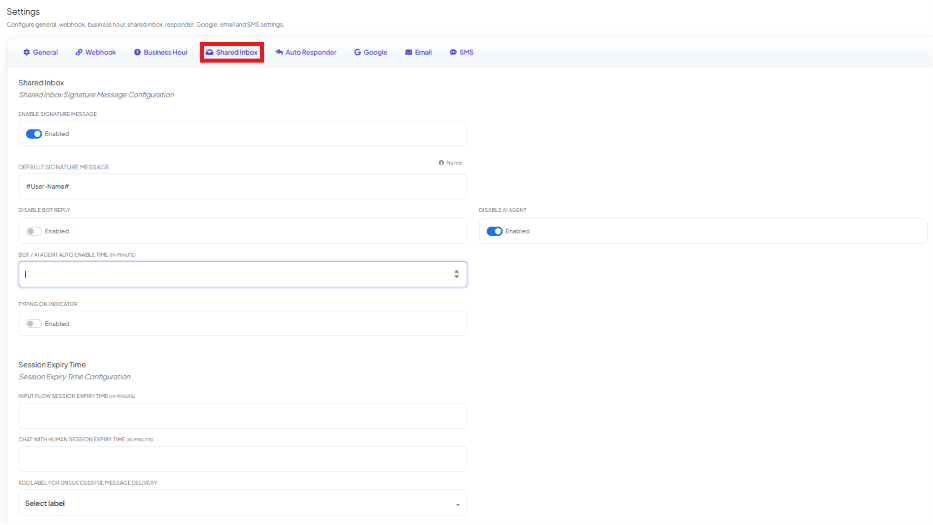
- Enable Signature Message — adds the agent’s name to their replies.
- Session Expiry Time — set to 60 minutes: after 60 minutes of inactivity, the chat session closes automatically.
- Add label for unsuccessful message delivery — automatically tags a contact when a message to them fails to deliver.
Auto Responder
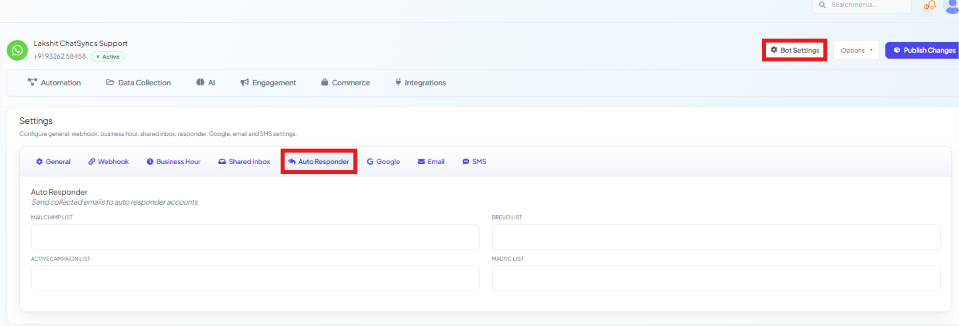
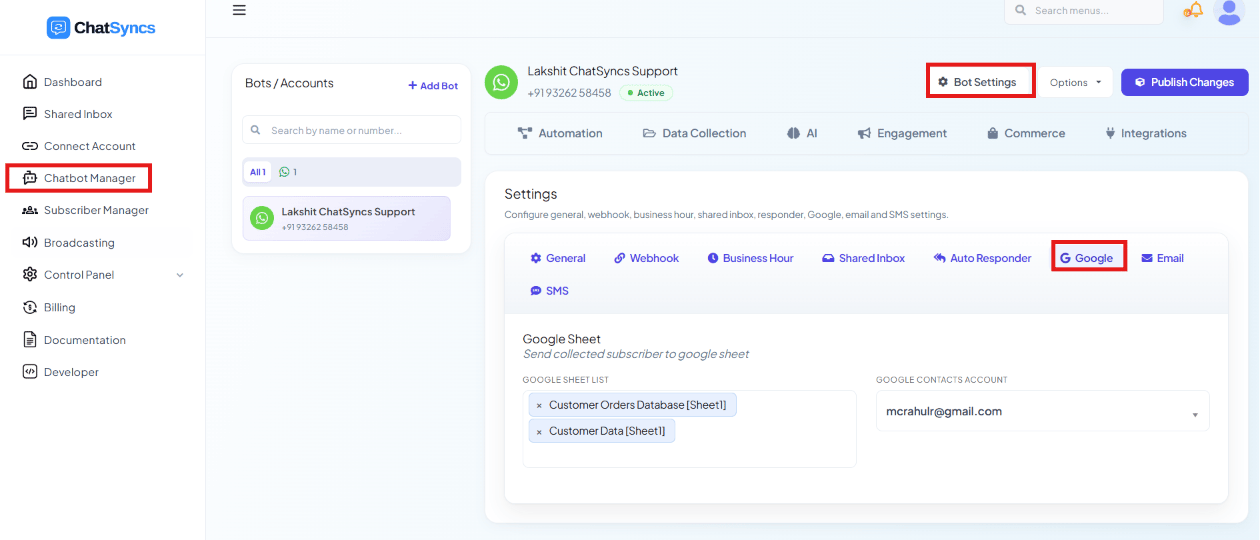
This row is automatically added to your connected Google Sheet.
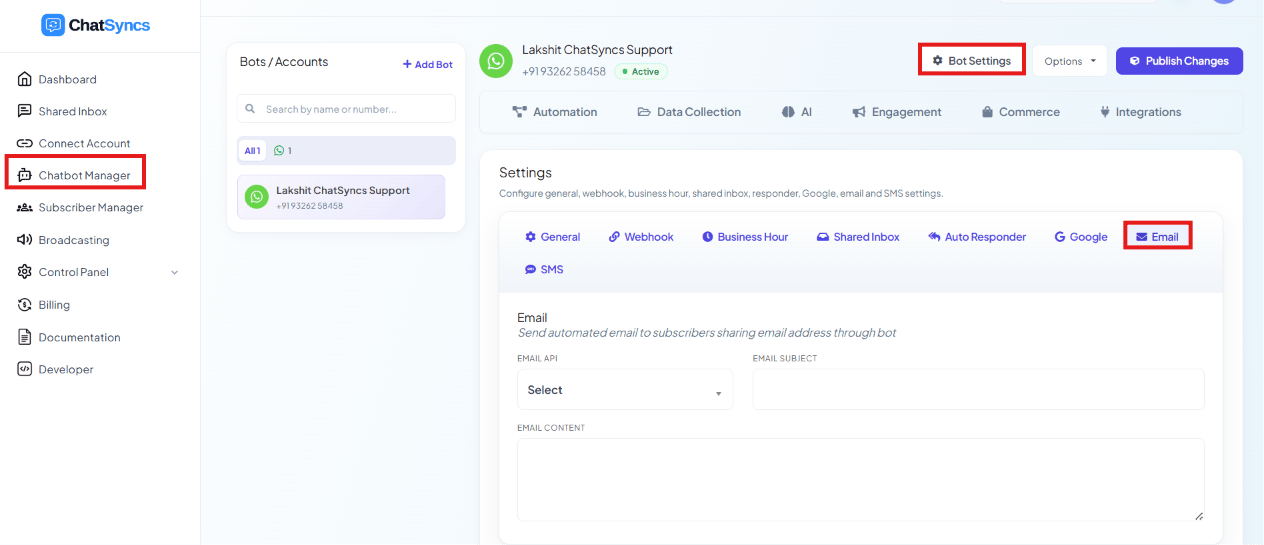
First name / Last name variables
personalize it per subscriber.
SMS
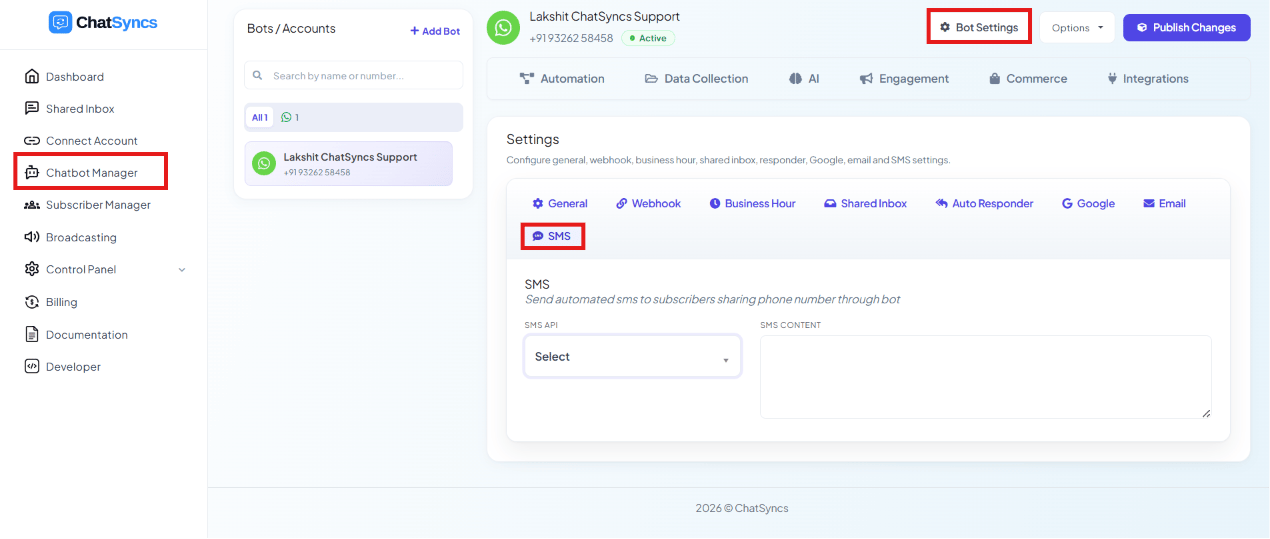
All Bot Settings tabs at a glance
Frequently asked
How do I make the bot send a welcome message to new customers?
How do I make the bot send a welcome message to new customers?
Turn on Get Started Message in the General tab and set its frequency to Every Time
or Once a Day, e.g.
👋 Welcome to ABC Store! Click Get Started to explore our products.How do I stop the bot from replying outside business hours, or send a different message instead?
How do I stop the bot from replying outside business hours, or send a different message instead?
Set your hours, timezone, and off days in the Business Hour tab, then enable Special
Bot during business off hours to send a custom auto-reply whenever a message arrives
outside those hours — e.g. telling the customer your hours are 9 AM–6 PM and you’ll respond
once you reopen.
How do I forward incoming WhatsApp messages to my own CRM or server?
How do I forward incoming WhatsApp messages to my own CRM or server?
Use the Incoming Webhook under the Webhook tab — enable it and enter your server’s
URL. Every incoming message (e.g. “Where is my order?”) is POSTed there with the customer’s
name, message, and other details.
What's the difference between Disable Keyword Replies and Disable AI Agent?
What's the difference between Disable Keyword Replies and Disable AI Agent?
Disable Keyword Replies stops the whole automated bot from replying during business hours, so
a human agent takes over entirely. Disable AI Agent only stops the AI-generated replies
specifically — your configured bot flow can still run.