This is a Meta-side step, done once per Business Portfolio. WhatsApp conversations are billed
by Meta directly — see Conversation Categories &
Pricing for how that billing actually
works — and Meta requires a valid payment method on file before it will let messages send past
the free tier.
Set it up
Open your Business Portfolio's settings
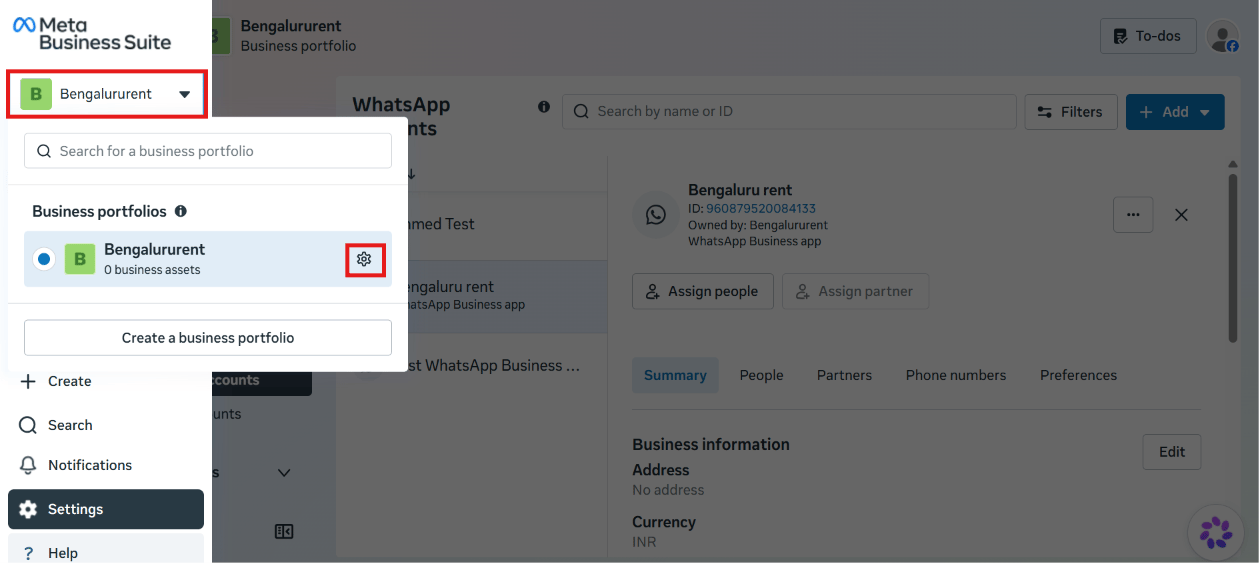
In Meta Business Suite, click your business portfolio name
in the top-left switcher, then click the gear icon next to it to open Settings. Open your WhatsApp account's payment settings
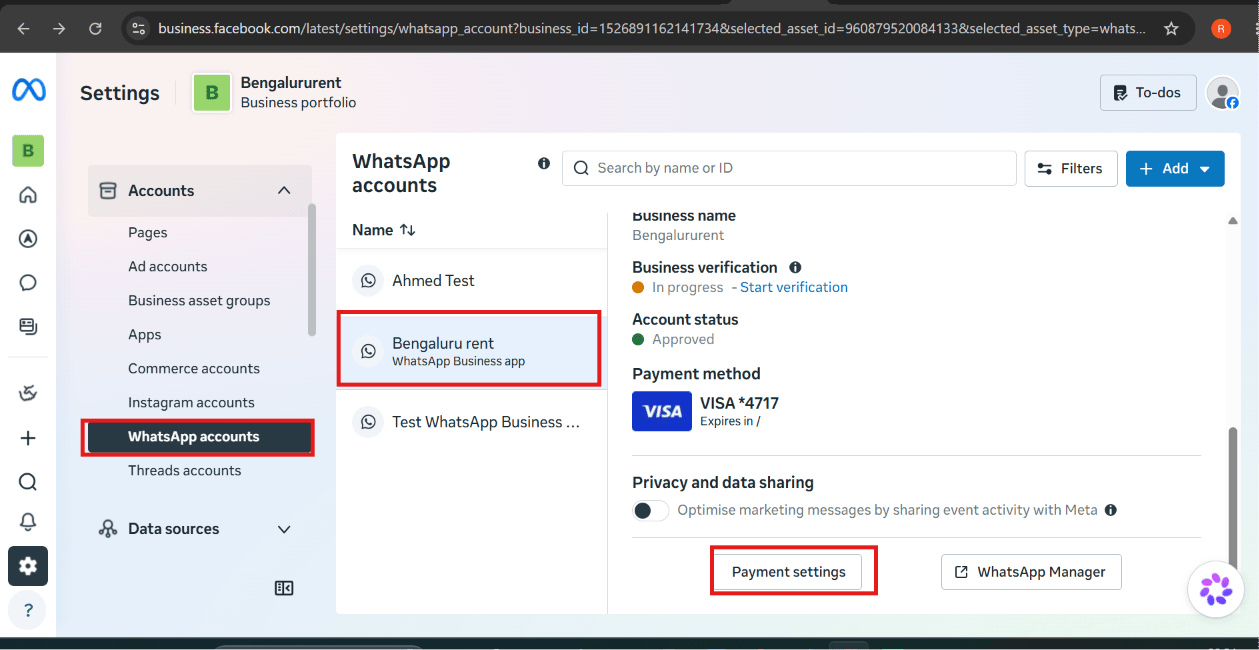
Under Accounts → WhatsApp accounts, select the WhatsApp Business account you want to
bill. Its current Payment method (if any) shows on the right. Click Payment
settings. Add a payment method
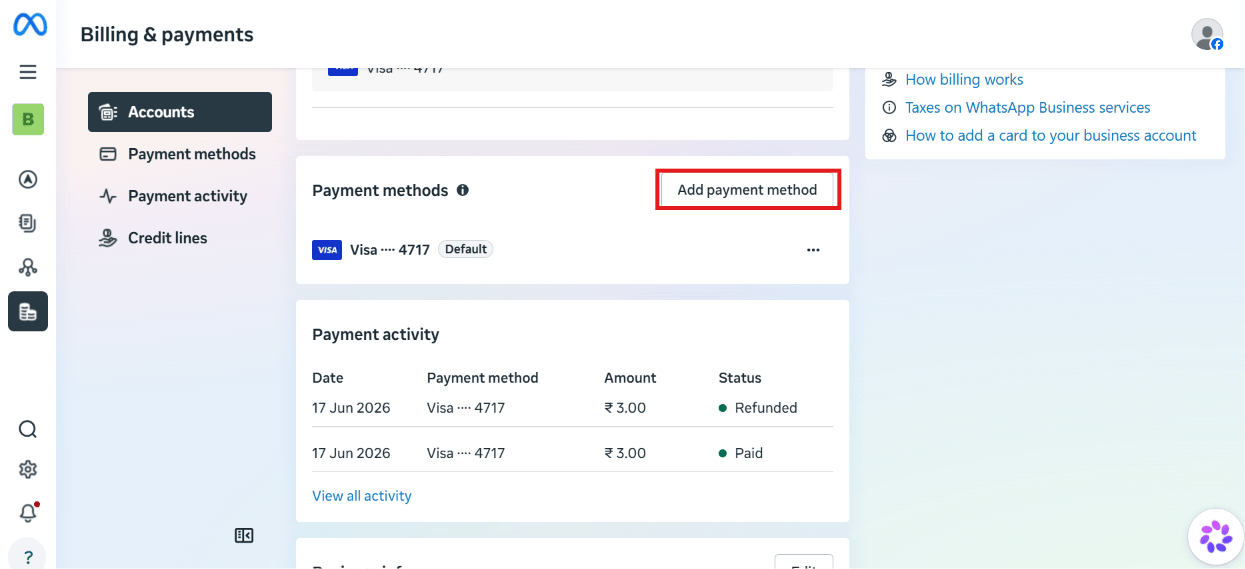
This opens Billing & payments. Under Payment methods, click Add payment method
and enter a card. You can have more than one on file — Meta uses whichever is marked
Default. This same Billing & payments page also has a Payment activity tab, showing every charge
against this payment method — useful for checking a charge without leaving Meta Business Suite.
What’s next
With a payment method on file, your number can keep sending messages past the free tier without
interruption. See Conversation Categories &
Pricing for what actually gets billed,
or head back to connecting your account if you haven’t
finished that yet.