

Open the builder
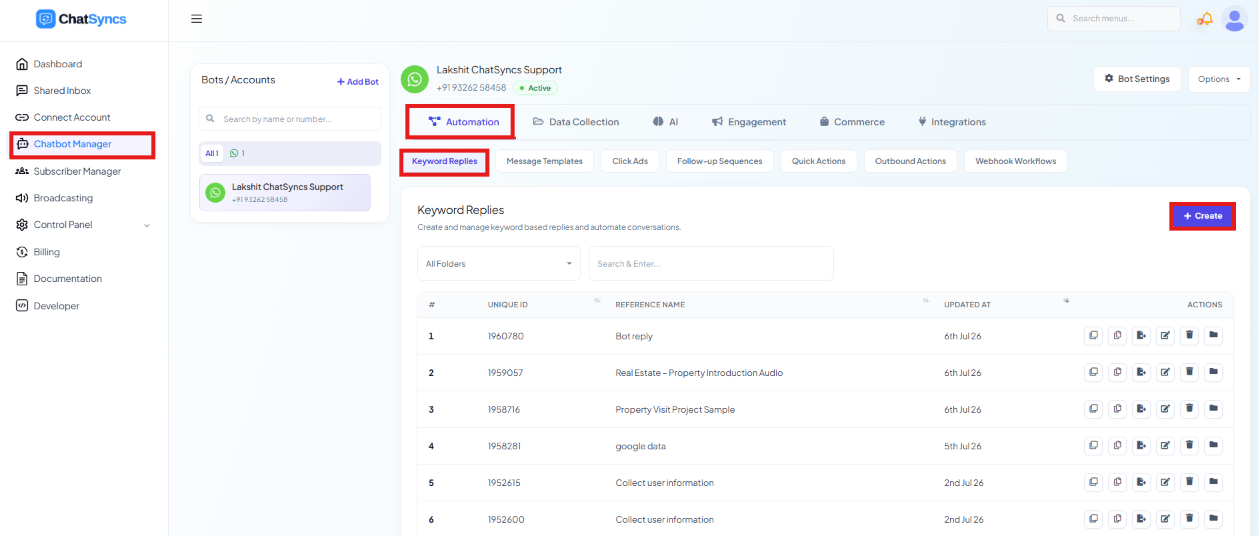
Chatbot Manager → Automation → Keyword Replies, showing the list of existing flows and the Create button.
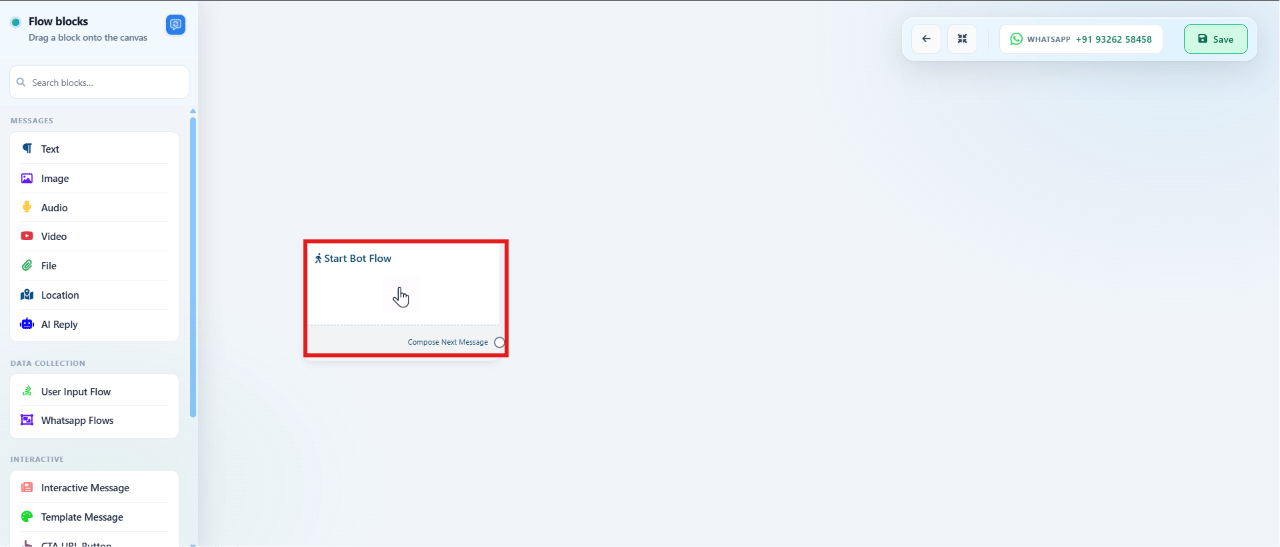
The Keyword Replies canvas with the Start Bot Flow block and the Flow blocks panel.
Configure the trigger
Double-click Start Bot Flow to open its configuration panel, then: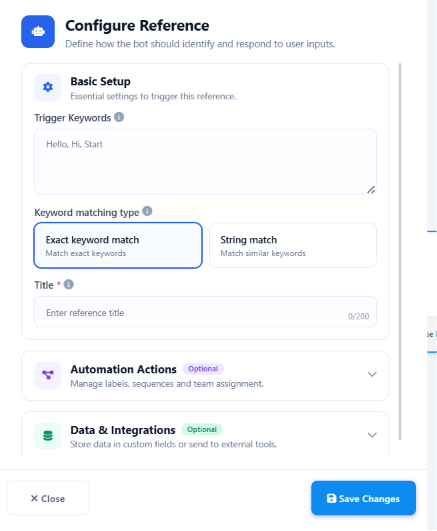
The Configure Reference panel — set Trigger Keywords, choose a keyword matching type, and give the flow a Title.
Set Trigger Keywords
hi, hello, hey, start, help.
To pause the flow later without deleting it, just remove its trigger keywords here and save —
with nothing to match, it stops firing but stays in your Keyword Replies list.Choose a keyword matching type
Give the flow a Title
welcome_bot, support_bot, or lead_capture_bot —
this is how you’ll find it later in the Keyword Replies list.Save
Automation Actions
The same configuration panel has an Automation Actions section for managing the contact without sending a visible message: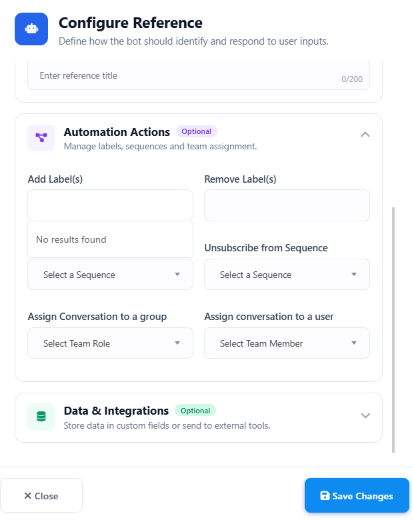
The Automation Actions section — add/remove labels, unsubscribe from a sequence, and assign the conversation to a team or team member.
- Add / Remove Label(s) — tag contacts by demographic, interest, lead status, or purchase history so you can target them later with segmented campaigns. Labels themselves are created in Subscriber Manager — this just applies an existing one automatically when the flow runs.
- Unsubscribe from Sequence — stop an automated message sequence (onboarding, lead nurturing, promotions, re-engagement) for this contact.
- Assign Conversation to a group — hand the conversation to a team (e.g. Sales, Support, Executive) so any member of that team can pick it up.
- Assign conversation to a user — hand the conversation to one specific team member.
Data & Integrations
The Data & Integrations section collects what the bot learns from the conversation and sends it where you need it: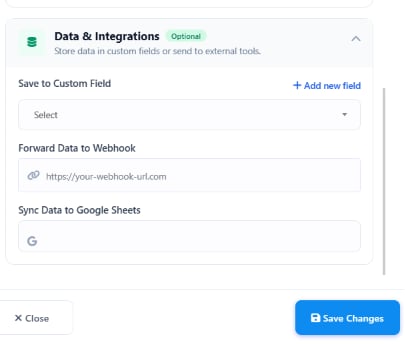
The Data & Integrations section — save responses to a custom field, forward them to a webhook, or sync them to Google Sheets.
- Save to Custom Field — store a user’s reply (name, email, phone, etc.) in a custom field you’ve created under Custom Fields.
- Forward Data to Webhook — POST the collected fields to an external URL (a CRM, database,
or custom app) as JSON, e.g.
{"name": "{{user_name}}", "email": "{{user_email}}"}. - Sync Data to Google Sheets — connect a Google account, pick a spreadsheet and worksheet, and map each custom field to a column; every new submission adds a row automatically.
User sends 'Hi'
Bot asks for Name, Email, and Phone
Responses save to custom fields
user_name, user_email, user_phone.Data forwards to a webhook
Data syncs to Google Sheets
Add flow components
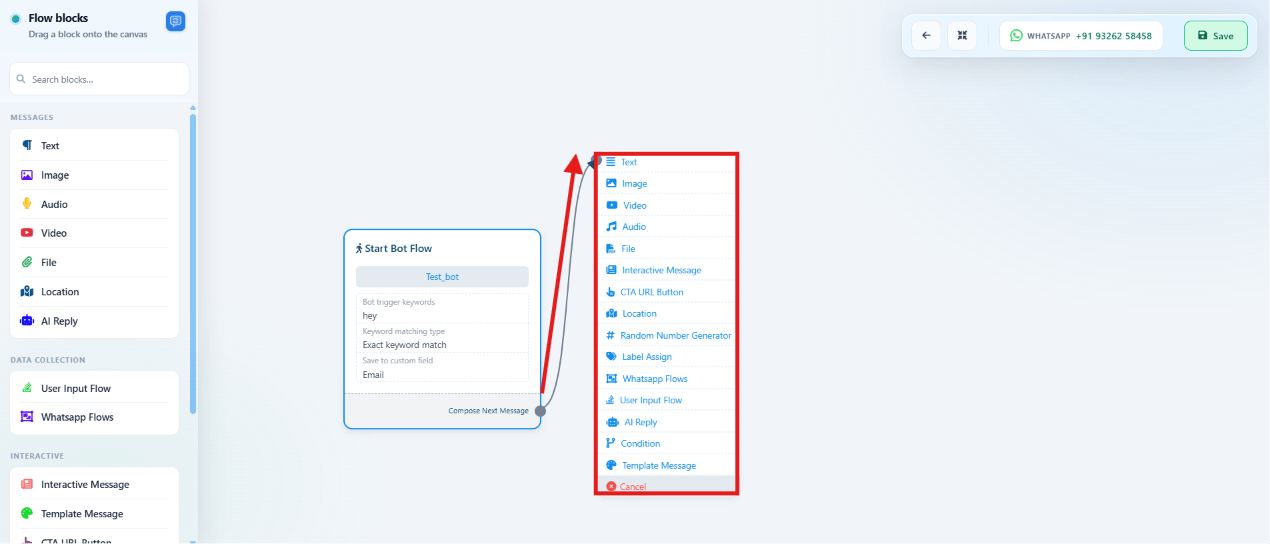
Flow blocks available to drag onto the canvas, connected to the Start Bot Flow block.
Personalize messages
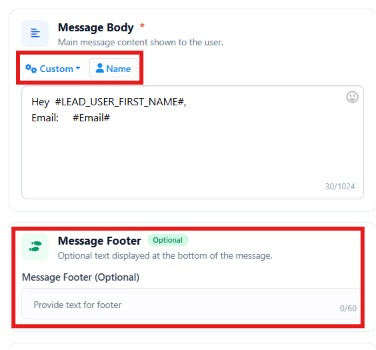
Personalizing a message body with custom-field variables and adding optional footer text.
# to insert any
custom field as a variable — e.g. Hey #LEAD_USER_FIRST_NAME#, welcome back!. You can also add
optional Message Footer text, commonly used for branding or disclaimers (e.g.
Powered by ChatSyncs).
Delivery options
Each message block has Delivery Options for a more natural pacing: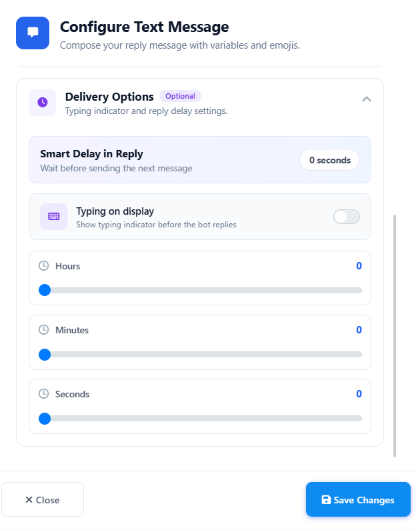
Delivery Options — a Smart Delay and a typing indicator toggle before the reply is sent.
- Smart Delay in Reply — wait a set number of hours/minutes/seconds before sending.
- Typing on display — show WhatsApp’s typing indicator before the reply lands.
Clone or delete a component
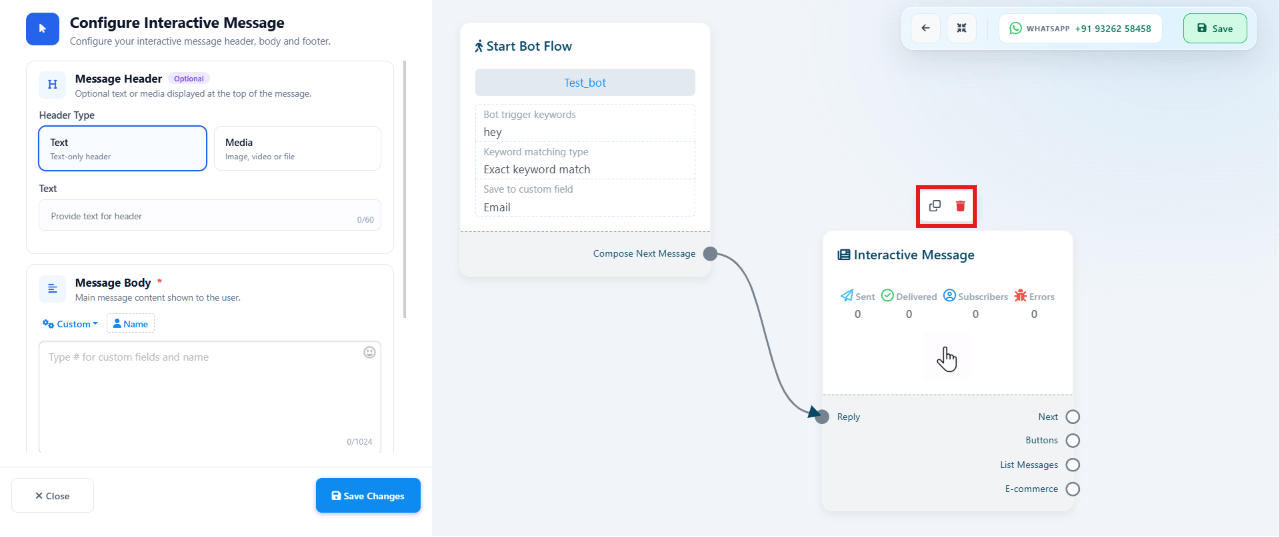
Hovering a flow block reveals the clone (duplicate) and delete icons used to copy or remove it.
Save & validation
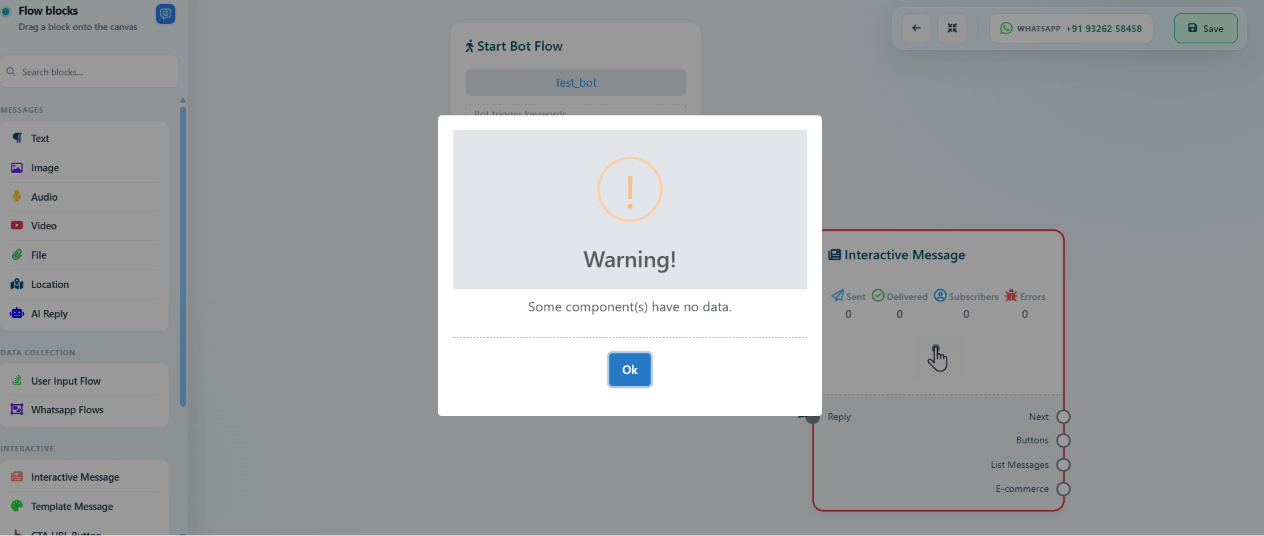
The validation warning shown when a connected component is missing required data.
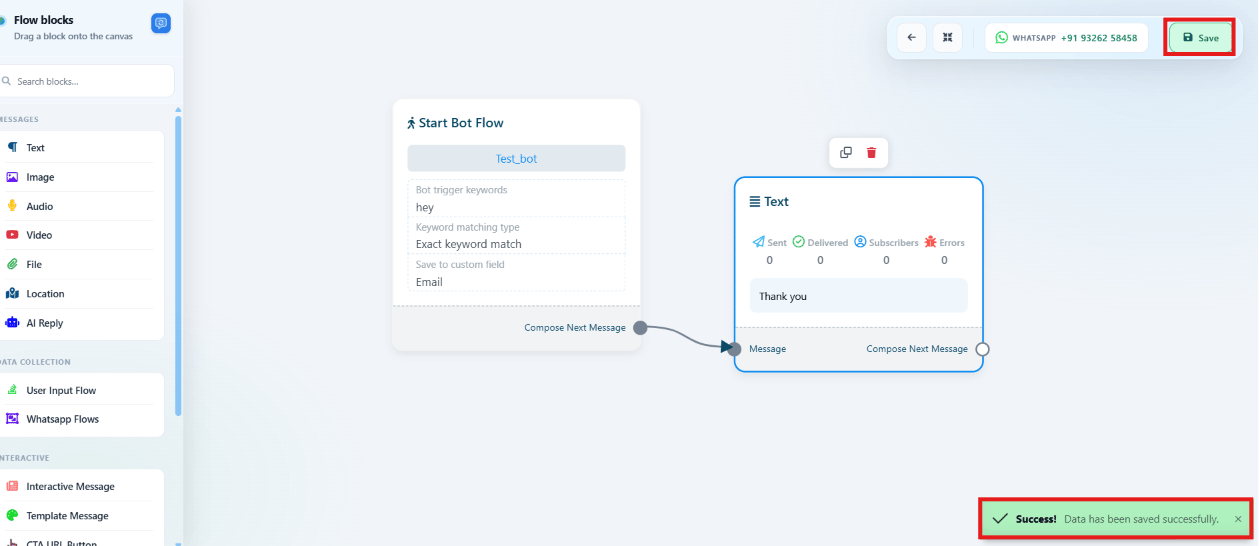
A saved flow, with the success confirmation after clicking Save.
Manage your flows
Back on the Keyword Replies list, each flow has its own row of action icons: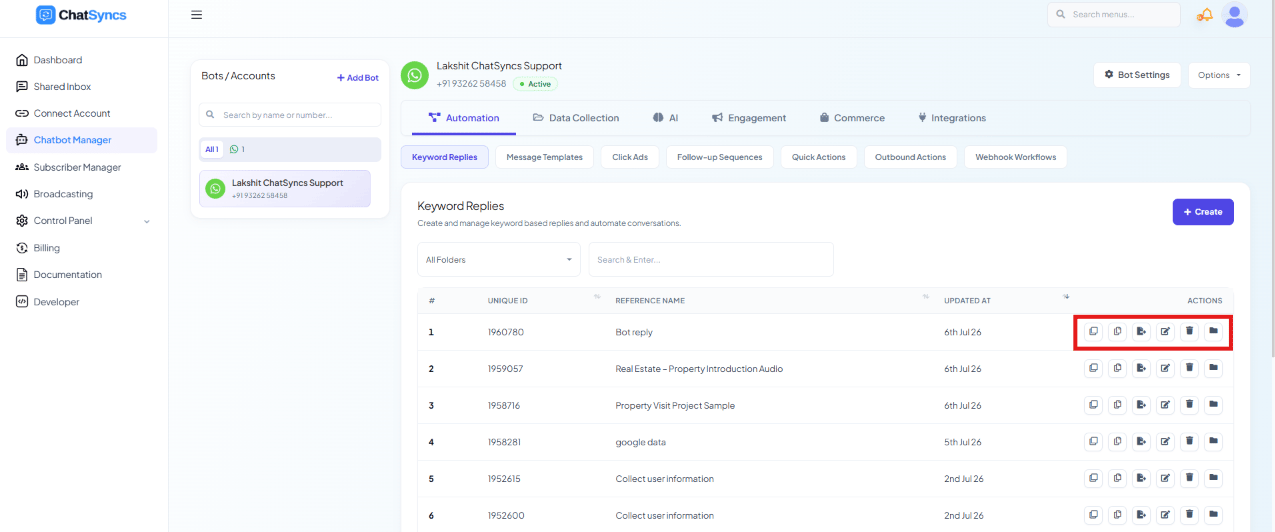
The action icons on a Keyword Replies list row — duplicate, copy to another bot, export, edit, delete, and move to folder.
Frequently asked
How do I make my bot reply to a customer's first message automatically?
How do I make my bot reply to a customer's first message automatically?
hi, hello, hey, start), and connect a Text Message or Interactive Message block after it.
Save the flow — it fires whenever a customer’s message matches a trigger keyword.Can I collect a customer's name, email, and phone number through the bot?
Can I collect a customer's name, email, and phone number through the bot?
Why won't my flow save?
Why won't my flow save?
What's the difference between Exact keyword match and String match?
What's the difference between Exact keyword match and String match?
What if I want to pause a Keyword Replies flow but not delete it?
What if I want to pause a Keyword Replies flow but not delete it?
Learn From a Use Case
- Gym Membership Plan Selector Automation — runs the whole plan-selection conversation.
- Travel Assistant — runs the structured Human Support handoff flow.
- Clinic Appointment Booking Automation — runs the welcome menu and the whole booking flow.
- Availability-Based Conversation Assignment — hands the conversation to a team at the right point in the flow.