

Step 1: Get your Postmark API token
Sign up or log in at Postmark, then under Account Settings → API Tokens, generate a Server API token.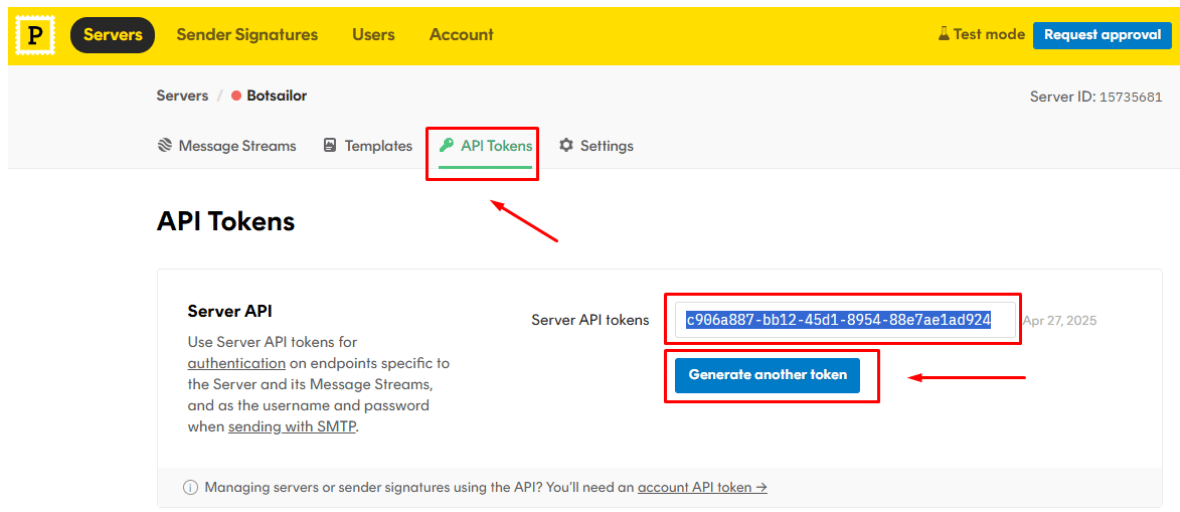
Step 2: Add Postmark as an email provider
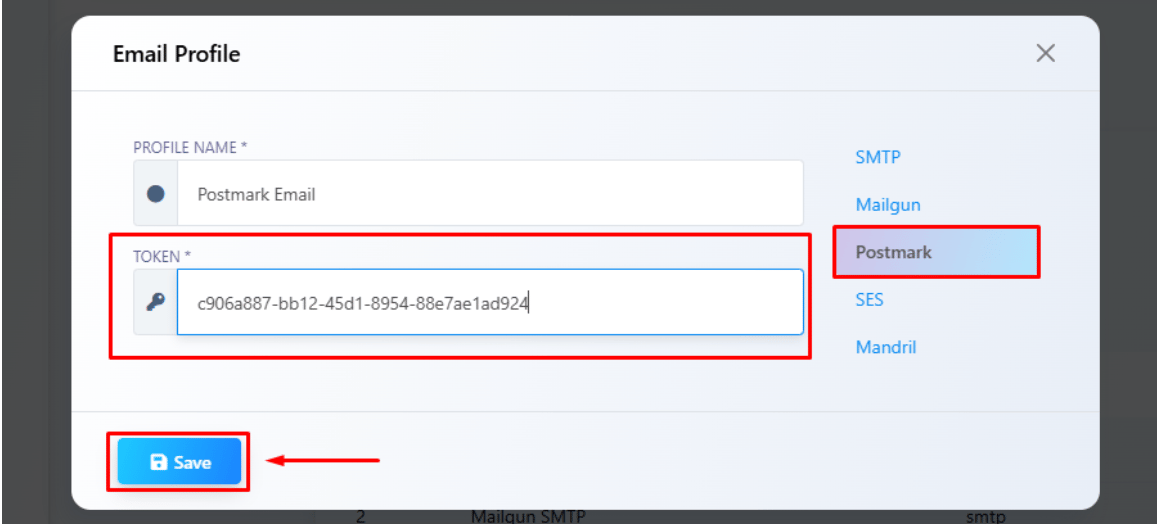
From Email Integration, click New, set Provider Type to Postmark, give the profile a name, and paste in the token. Click Save — the profile is now available anywhere Email Integration is used, e.g. the Email tab in Bot Settings, the same way as any other connected provider.Postmark’s own dashboard also offers a Templates feature with dynamic variables (e.g.
{{customer_name}}, {{order_number}}) for building the email itself on Postmark’s side. That’s
a Postmark-account feature, independent of the profile you connect here — verify with your
Postmark account whether you’re using their templates or ChatSyncs’ own Subject/Content fields
(as in Bot Settings → Email) before assuming either is wired up.Frequently asked
How do I connect Postmark to ChatSyncs?
How do I connect Postmark to ChatSyncs?
Generate a Server API token in Postmark under Account Settings → API Tokens, then add a
new Postmark profile in Email Integration and paste in the
token — see the steps above.
Why use Postmark instead of a plain SMTP provider?
Why use Postmark instead of a plain SMTP provider?
Postmark specializes in transactional email deliverability — order confirmations, account
verification, password resets — and connects with just an API token rather than SMTP
host/username/password.
Do I still need to verify a sending domain with Postmark?
Do I still need to verify a sending domain with Postmark?
Yes — Postmark requires a verified sender signature or domain before it will deliver mail,
same as any other provider. Set that up in your Postmark account first.
Related Documentation
- Email Integration — connecting any email provider and what it’s used for.
- How Do I Send an Automatic Email from My Bot? — using a connected profile inside a bot.
- Webhook Workflow — for routing events to external systems beyond a single email send.