

You need a verified Mailgun account with a verified sending domain before you start — Mailgun
won’t hand out working SMTP credentials for an unverified domain.
Step 1: Get your Mailgun SMTP credentials
In your Mailgun dashboard, go to Sending → Domains, choose your verified domain, then open SMTP credentials.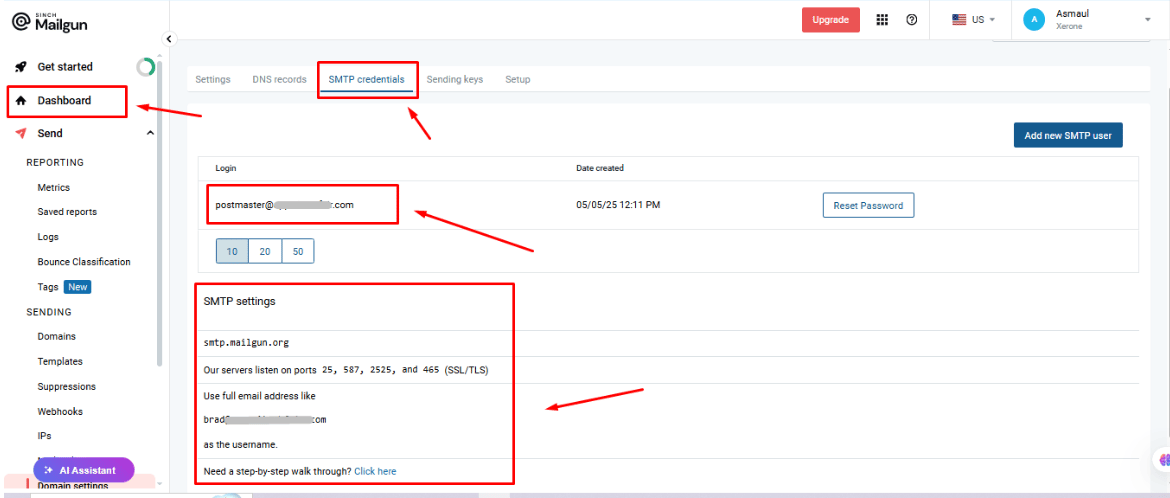
Step 2: Add Mailgun as an email provider
From Email Integration, click New, set Provider Type to SMTP, and fill in the form with your Mailgun values: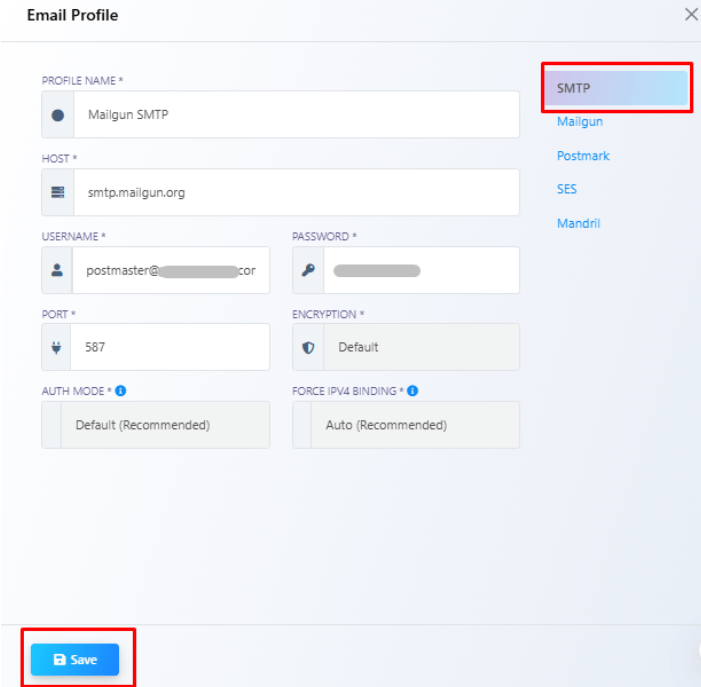
Click Save — the profile is now available anywhere Email Integration is used, e.g. the
Email tab in Bot Settings.
Frequently asked
How do I connect Mailgun to ChatSyncs?
How do I connect Mailgun to ChatSyncs?
Get your SMTP Login, Password, Host, and Port from Mailgun’s SMTP credentials tab, then
add them as a new SMTP profile in Email Integration — see
the steps above.
My Mailgun domain isn't verified yet — can I still connect it?
My Mailgun domain isn't verified yet — can I still connect it?
No — Mailgun only issues working SMTP credentials for a verified sending domain. Verify your
domain in Mailgun first (add the DNS records Mailgun gives you), then come back for the SMTP
credentials.
I lost my Mailgun SMTP password — now what?
I lost my Mailgun SMTP password — now what?
Regenerate it from the SMTP credentials tab in your Mailgun dashboard, then update the
Password field on the matching profile in Email Integration and Save again.
Related Documentation
- Email Integration — connecting any email provider and what it’s used for.
- How Do I Connect an SMTP Email Provider? — the generic field-by-field SMTP walkthrough (Zoho example).
- How Do I Send an Automatic Email from My Bot? — using a connected profile inside a bot.