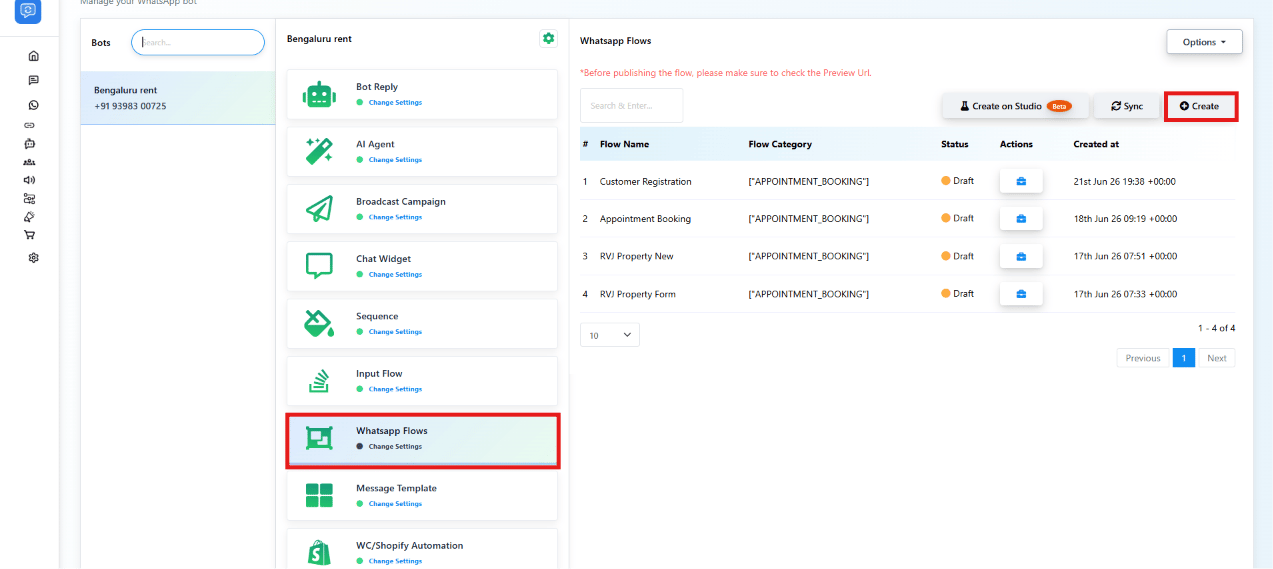
Create a WhatsApp Flow
Flow configuration
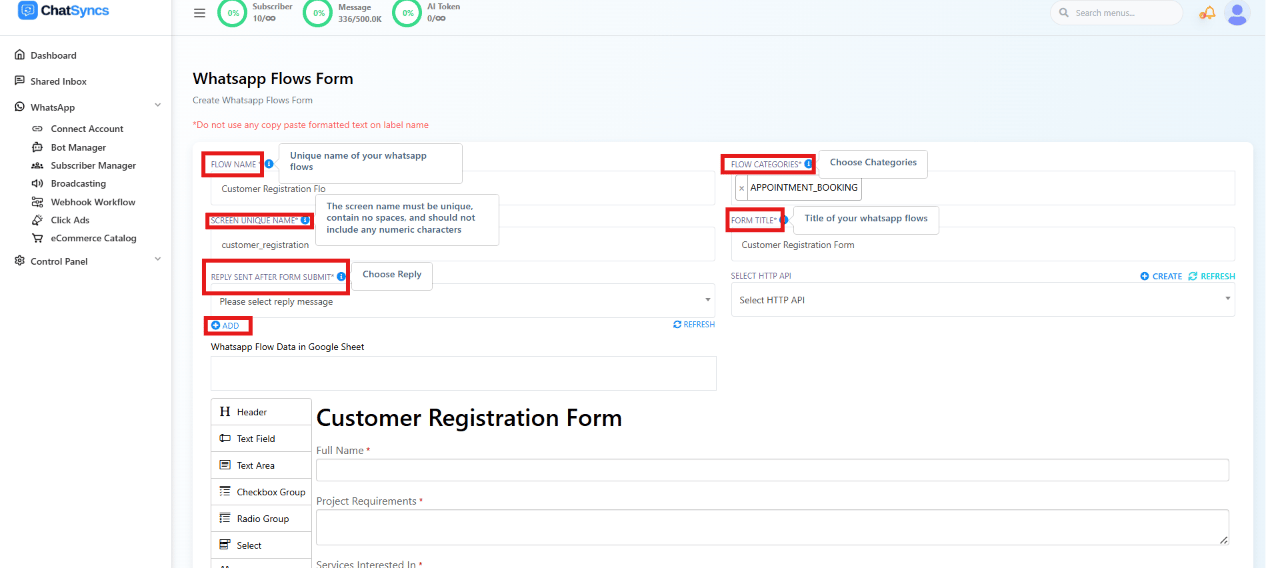
Before designing screens and fields, configure the flow’s settings:| Field | Purpose |
|---|---|
| Flow Name | Internal name to identify the flow inside the platform, e.g. Customer Registration Flow. |
| Flow Category | The category that best matches the flow, e.g. Lead Generation, Appointment Booking, Customer Registration. |
| Screen Unique Name | A unique internal identifier for the screen — letters and underscores only, no spaces or numbers, e.g. customer_registration. |
| Form Title | The title shown to the subscriber at the top of the flow, e.g. Customer Registration Form. |
| Reply Sent After Form Submit | The bot reply sent to the subscriber once they submit the form, confirming it was received. |
| Select HTTP API | An HTTP API to send the submitted form data to an external application (CRM, lead management software, ERP, etc.). |
| WhatsApp Flow Data in Google Sheet | Enable to save every submission directly into Google Sheets for reporting, lead management, and backups. |
Form components
Each flow is built by dragging components from the palette onto the form. Available components: Header, Text Field, Text Area, Checkbox Group, Radio Group, Select, Date Field, Submit Button.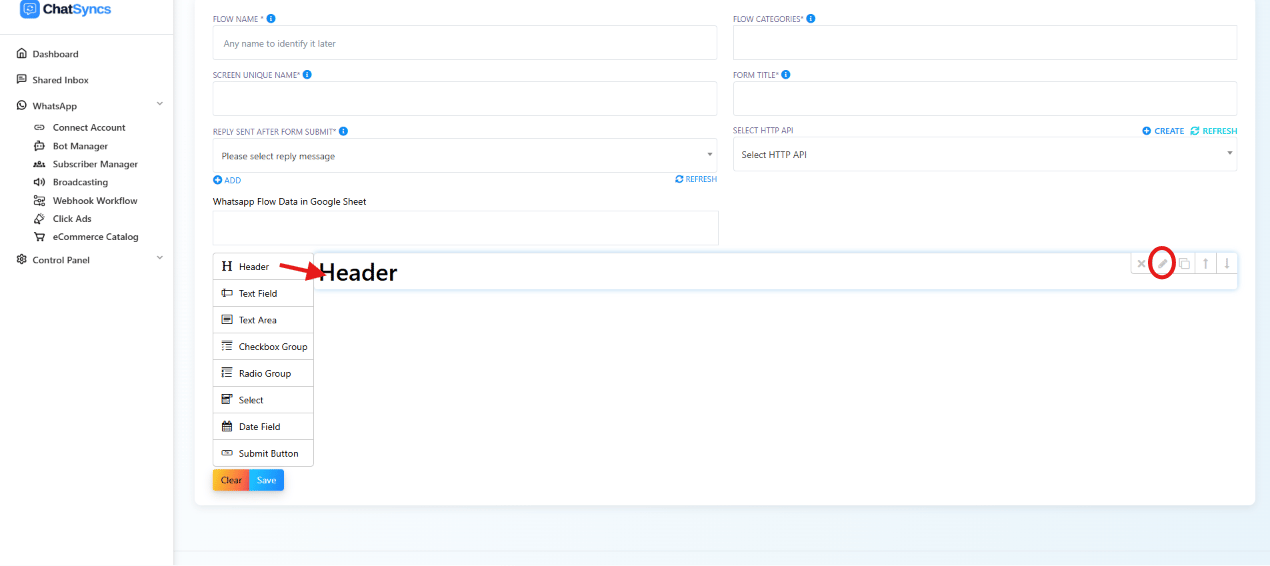
Header
Displayed at the top of the flow — use a clear title so subscribers understand the form’s purpose, e.g.Customer Registration Form.
Text Field
A single line of text — common for name, company name, city, or job title. Clicking a Text Field opens its settings panel: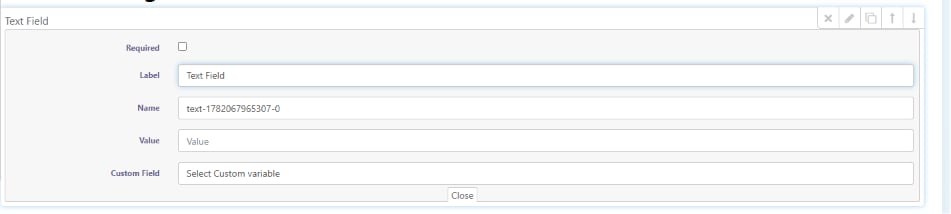
- Required — the subscriber can’t submit the form without filling this field in.
- Label — the text shown to the subscriber as the field’s title, e.g.
Full Name. - Name — an internal identifier the system uses; you normally don’t need to change it.
- Value — a default value prefilled when the form opens (the subscriber can edit or keep it) — useful for showing saved customer data and reducing typing.
- Custom Field — connects the field to a custom variable or subscriber field, so a previously saved value (e.g. a name already on file) can prefill automatically.

Text Area
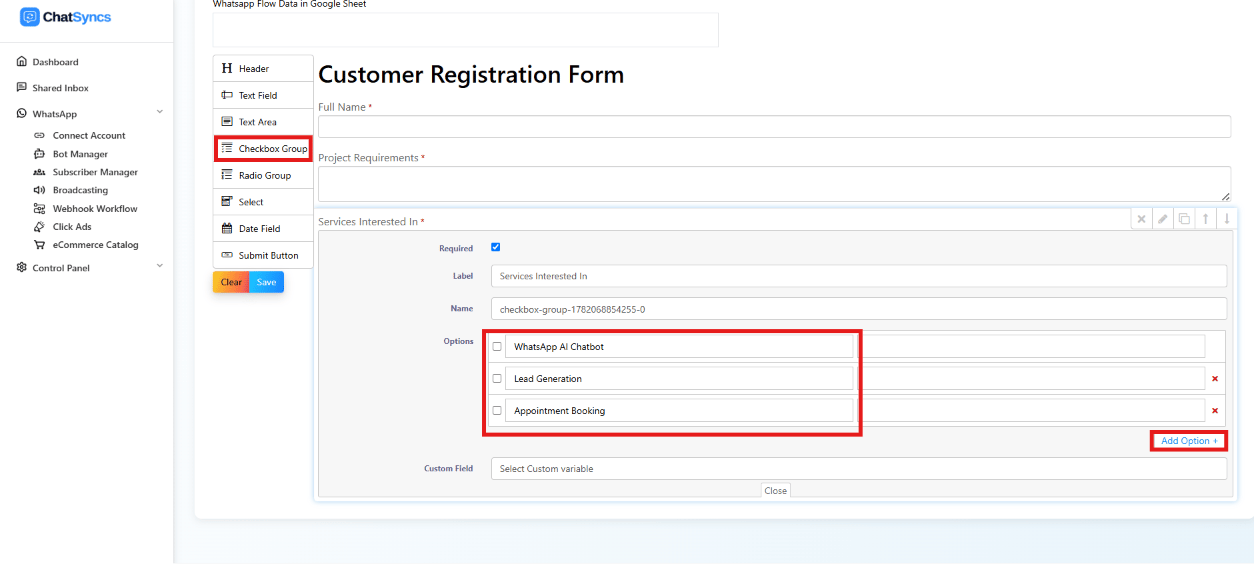
Allows longer free-text responses — common for feedback, comments, or project requirements.Checkbox Group
Lets the subscriber select multiple options, e.g.Which services are you interested in?
with options like AI Automation, WhatsApp Marketing, Chatbot Development. Add options
with Add Option.
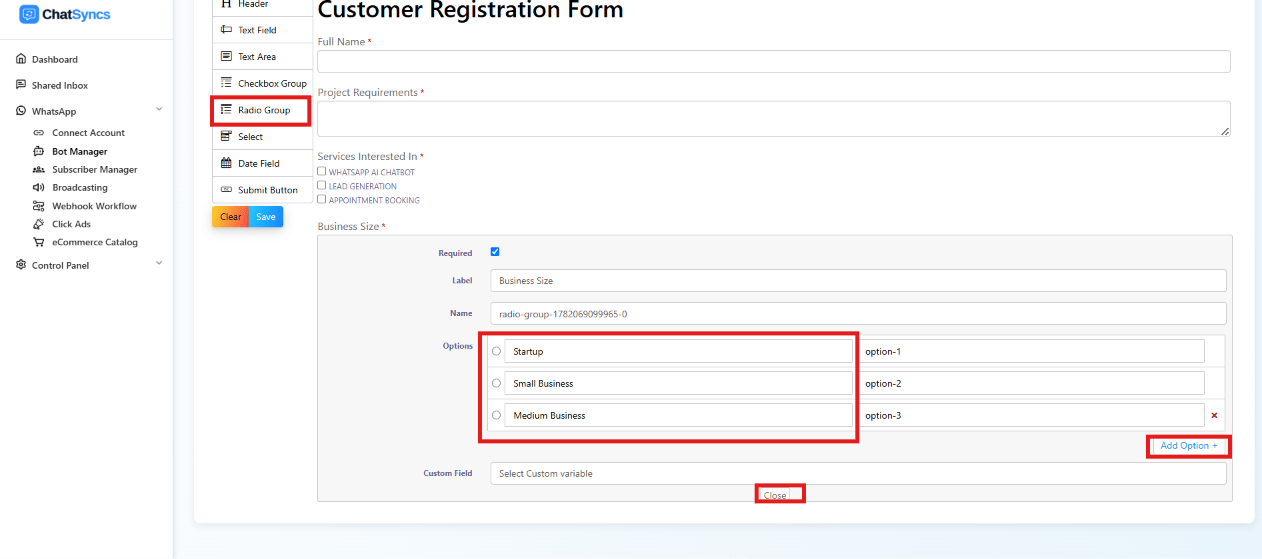
Radio Group
Lets the subscriber select only one option, e.g.Business Size with options Startup,
Small Business, Medium Business, Enterprise.
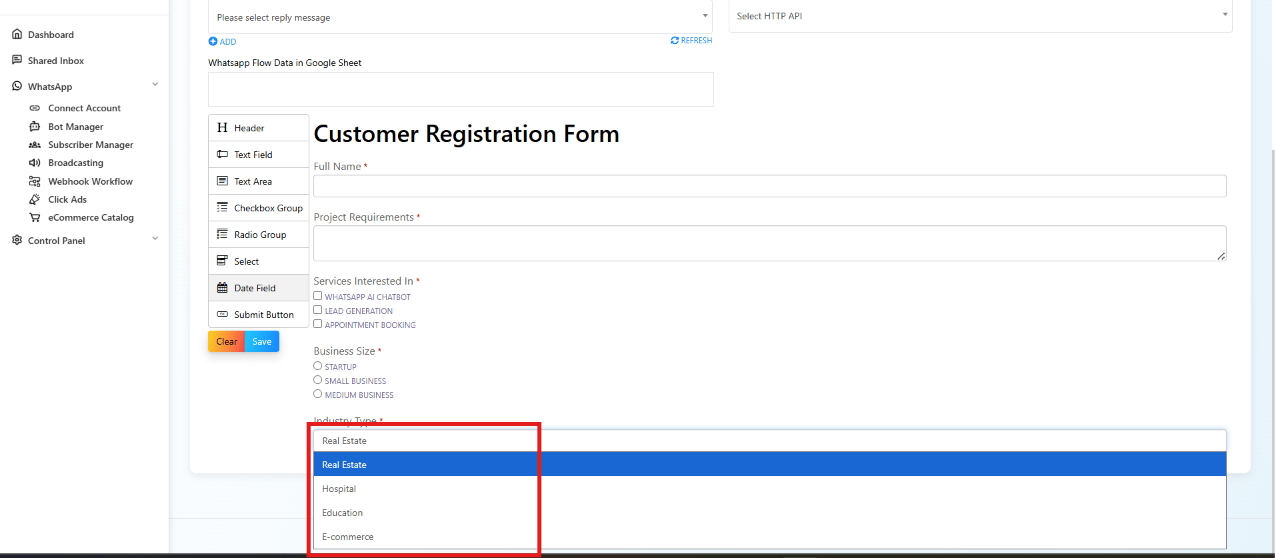
Select
Displays options in a dropdown — useful when there are many choices, e.g.Industry Type
with Real Estate, Hospital, Education, E-commerce.

Date Field
Lets the subscriber pick a date — common for appointment booking, event registration, delivery scheduling, or follow-up meetings.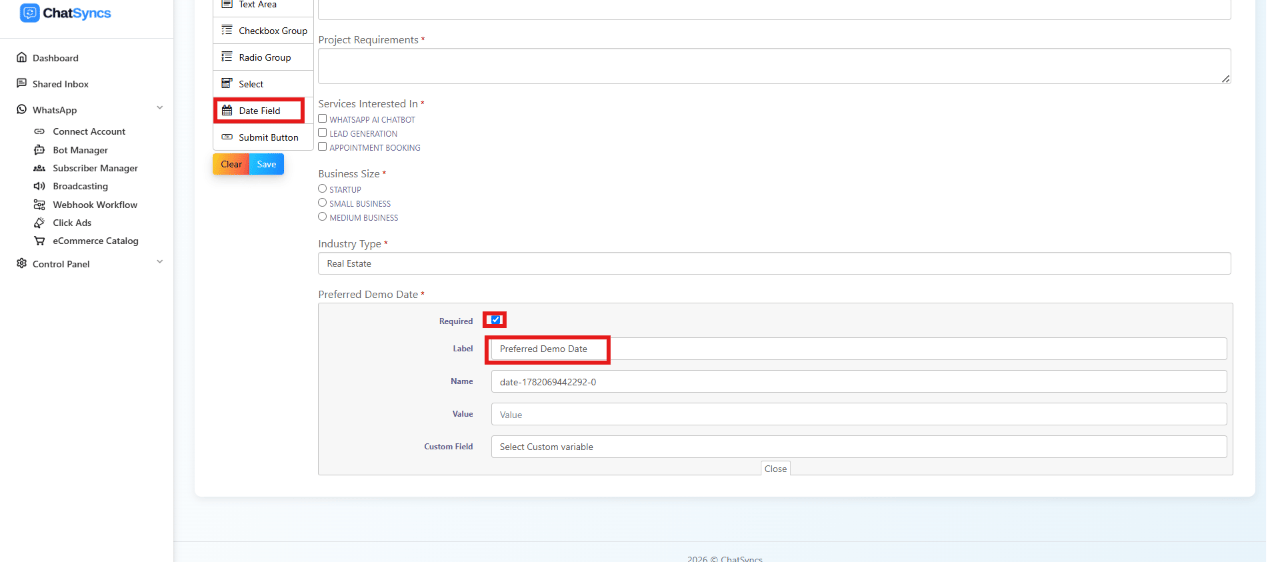
Submit Button
Completes the form and sends all collected data once clicked.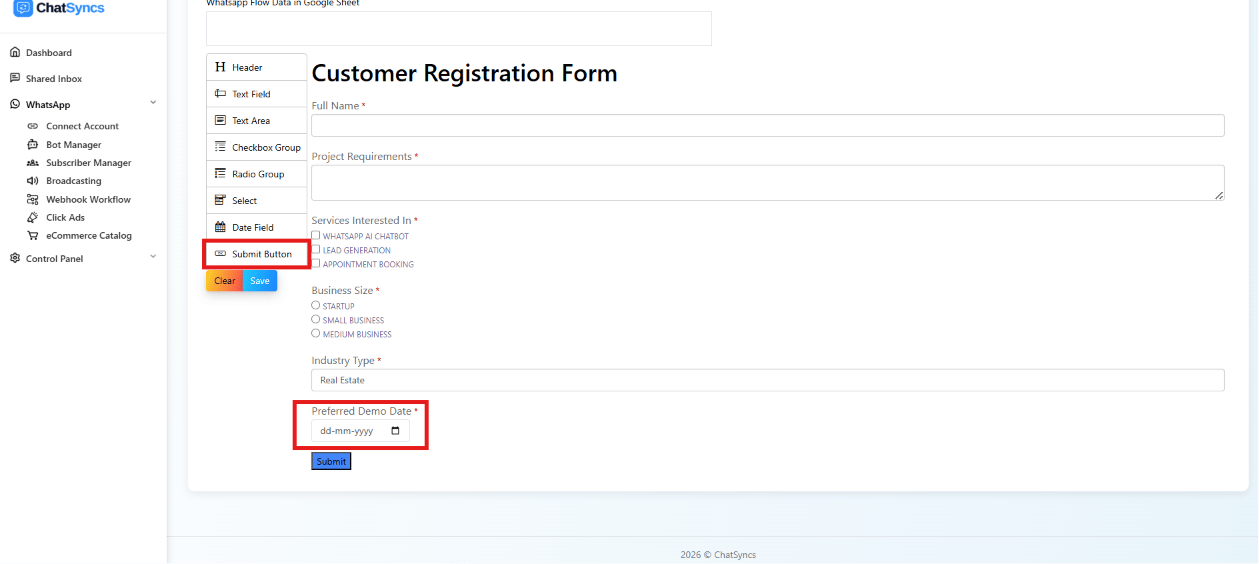
Field label length limit
Each field’s Label has a character limit of 20 characters. Going over it blocks saving the flow with a warning — but the warning itself doesn’t show you which label is too long or by how much, so you have to check each one: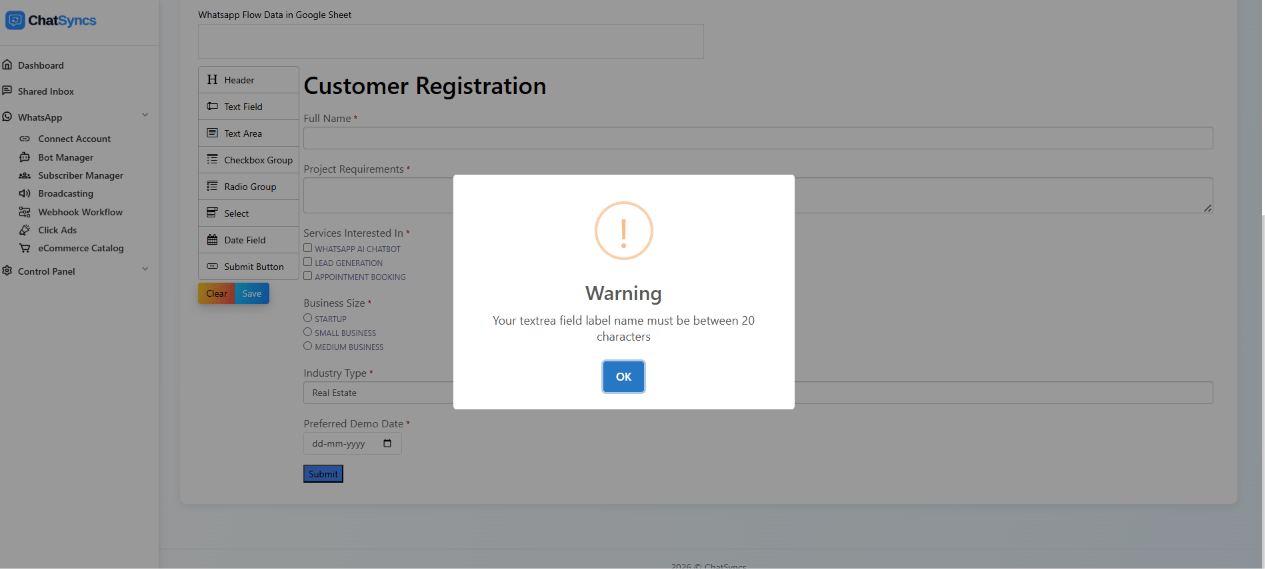
| Label | Character count | Over the 20-character limit? |
|---|---|---|
| Full Name | 9 | No |
| Project Requirements | 20 | No (exactly at the limit) |
| Services Interested In | 22 | Yes — 2 characters over |
| Business Size | 13 | No |
| Industry Type | 13 | No |
| Preferred Demo Date | 19 | No |
| Customer Registration | 21 | Yes — 1 character over |
Example: a complete registration form
Manage WhatsApp Flows
Saved flows appear under Bot Manager → WhatsApp Flows, with these actions: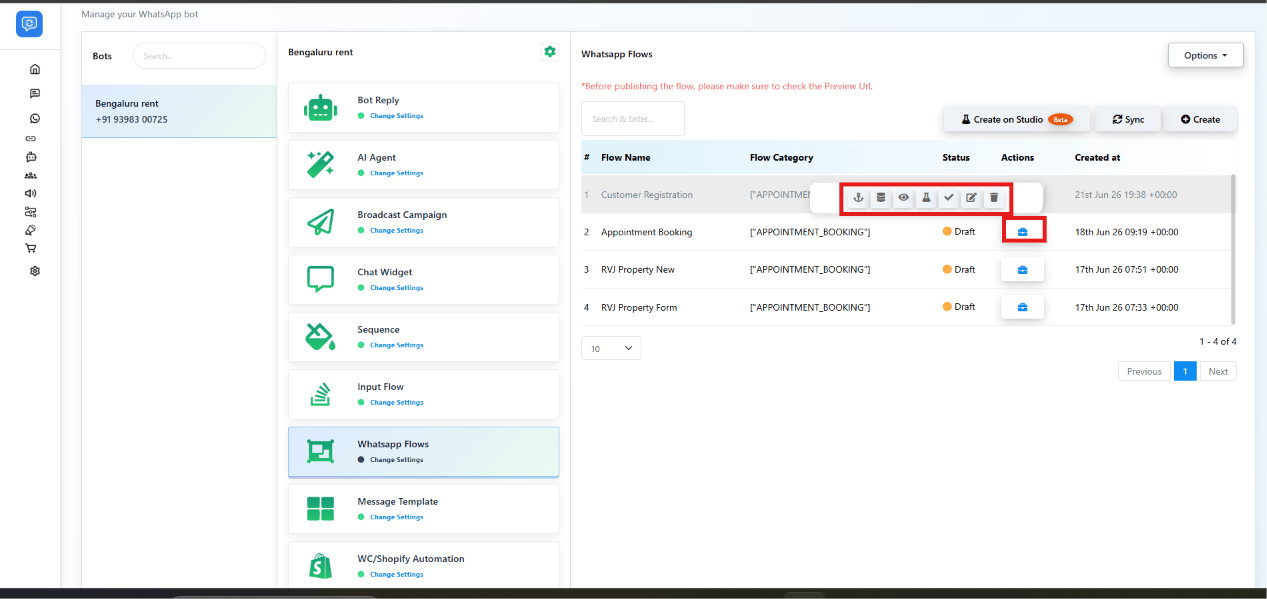
- Add Webhook — connect a webhook to send submitted data to a CRM, lead management tool, Google Sheets automation, or other third-party app.
- Report Data — view submitted responses: user submissions, form completion data, lead information, customer details.
- Preview Flow — test the form layout, field validations, and user experience before publishing.
- Open in Studio — open the flow builder to modify fields, labels, validation rules, buttons, or settings.
- Publish — push the flow to Meta so it can be used in WhatsApp templates and automations. Once approved, it’s available for production use.
- Edit — modify form content, questions, options, labels, or integrations.
- Delete — permanently remove the flow. Deleted flows cannot be recovered.
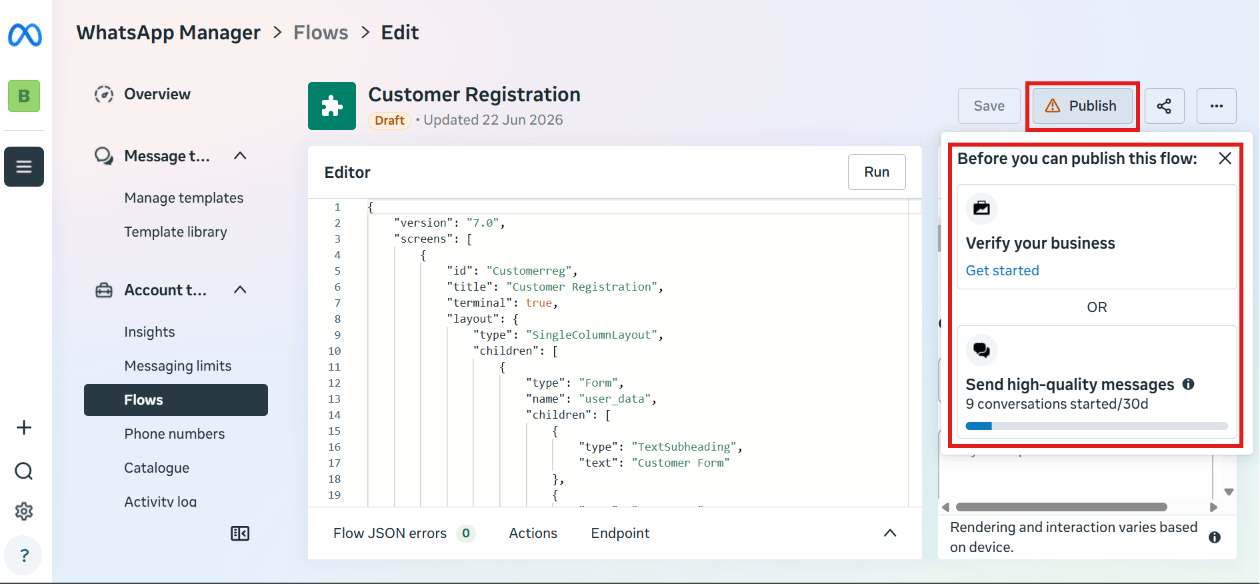
Publishing and Meta approval
A WhatsApp Flow must be published and approved by Meta before it can be used in production. Clicking Publish can fail if your Meta Business Account hasn’t met Meta’s requirements: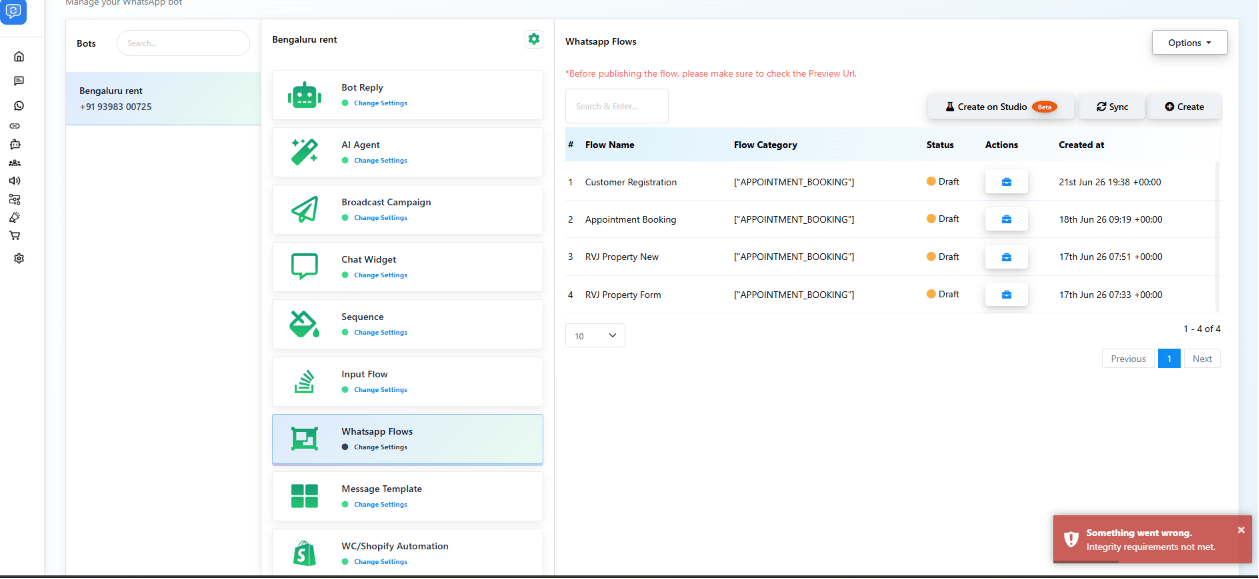
- Business Verification not completed — your Meta Business Portfolio must be verified before Meta will approve a flow.
- Messaging quality requirements not met — some accounts need to establish messaging quality and compliance first.
Frequently asked
How do I build a multi-field form inside WhatsApp?
How do I build a multi-field form inside WhatsApp?
Create a WhatsApp Flow in Bot Manager, configure the flow settings (name, category,
screen name, form title), then add components (Text Field, Checkbox Group, Radio Group,
Select, Date Field, Submit Button) and configure each one’s label and options.
Why does it say my field label is too long when I try to save?
Why does it say my field label is too long when I try to save?
Each field’s Label has a character limit. Shorten the label — the warning names the
field and the required range — and save again.
Where does submitted form data go?
Where does submitted form data go?
To wherever you’ve configured: the bot reply set in Reply Sent After Form Submit
confirms the submission to the subscriber, and the data itself can be sent to an
HTTP API, saved to Google Sheets, or forwarded via a webhook added from the
flow’s actions.
Why does publishing my WhatsApp Flow fail?
Why does publishing my WhatsApp Flow fail?
Most often because your Meta Business Account hasn’t completed Business Verification,
or hasn’t met Meta’s messaging quality requirements. Complete verification, keep your
account compliant, and retry.
Should I let the subscriber edit prefilled values?
Should I let the subscriber edit prefilled values?
Yes — set a default in Value to prefill known information, but subscribers can still
edit it before submitting. This reduces typing without locking in stale data.