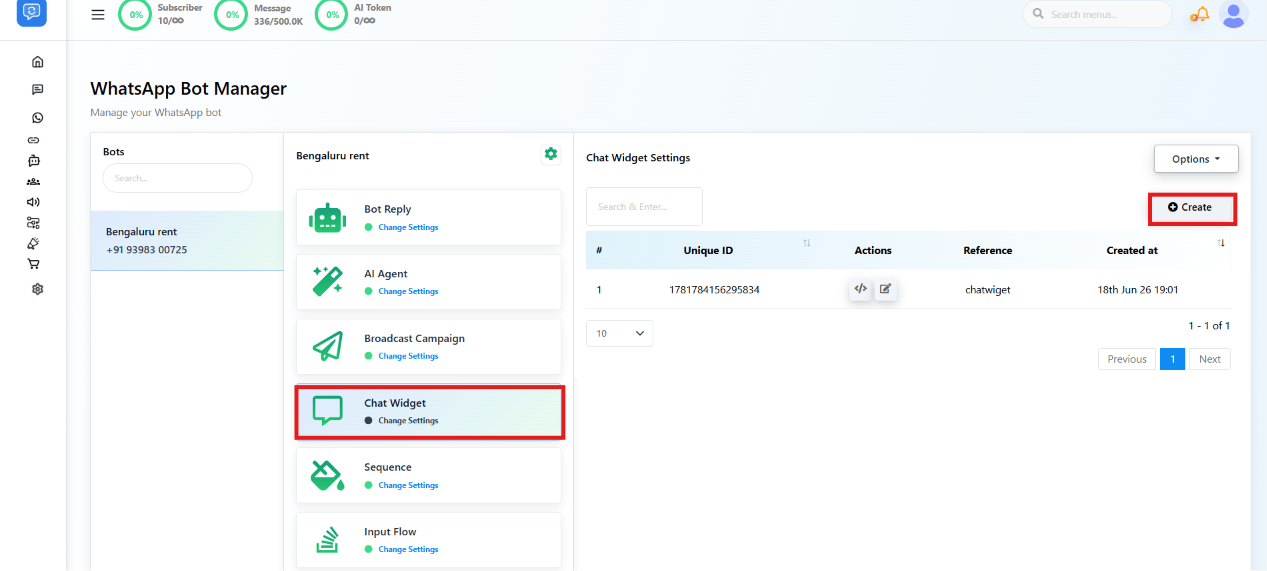
Create a chat widget
Configure the widget
Clicking Create opens the widget’s configuration panel:Branding
Upload a Chatbox Logo (PNG or JPG) and set the Chatbox Header Background and
Header Text Color to match your site.
Display Name & messages
Set the Display Name shown at the top of the widget (e.g.
Whatsapp Chat), the
Welcome Message visitors see when they open it (e.g. Hi there! How can we help?), and
a Pre-fill Message that auto-fills the WhatsApp message box (e.g.
Hi there, I need some information.).Position on the page
Set the Chatbox Position (Top-Left, Top-Right, Bottom-Left, or Bottom-Right), whether it
should Open on Startup, its Offset X/Y in pixels, and a delay before it appears
(Delaying Chatbox Initialization).
Button styling
Set the Button Text (e.g.
Start Chat), Button Background, Button Text Color,
Button Hover Background, Button Text Hover Color, and Button Size.Reference
Give the widget a unique Reference name using alphanumeric characters only, e.g.
whatsappwidget.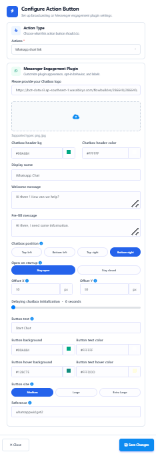
Build the widget’s conversation flow
Once saved, build what happens when a visitor starts the chat — the canvas works the same way as the Bot Reply flow builder. Drag on components and connect them to design the conversation: Text, Image, Video, Audio, Files, Interactive Messages, User Input, and AI Reply.
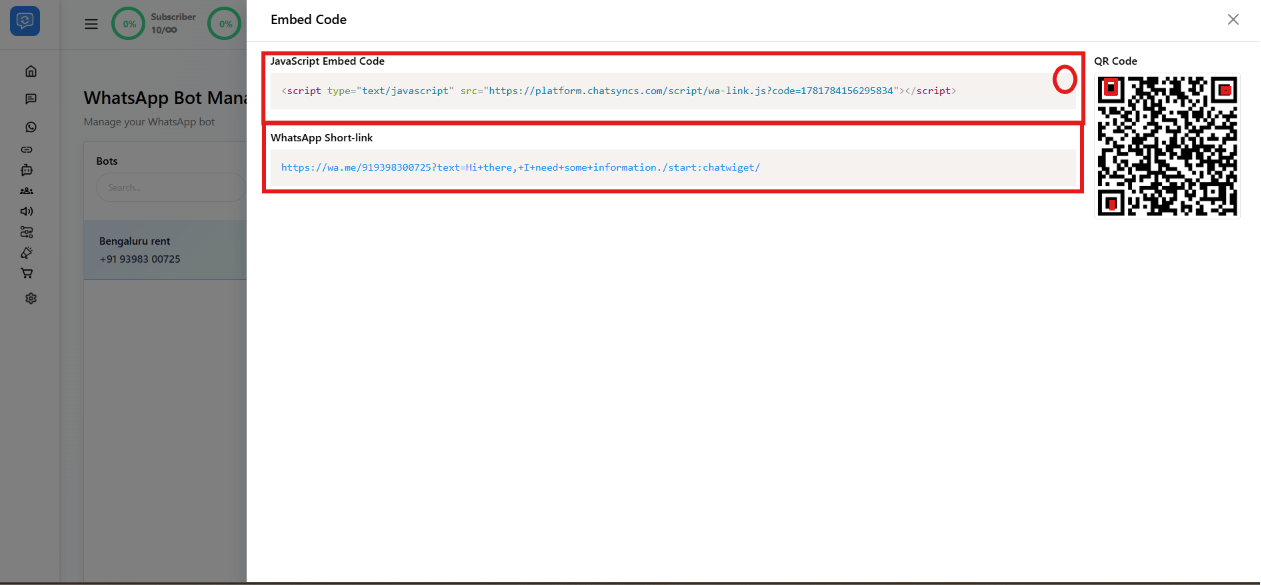
Get the embed code
Back in the Chat Widget list, use the action icons on your widget’s row to open its Embed Code.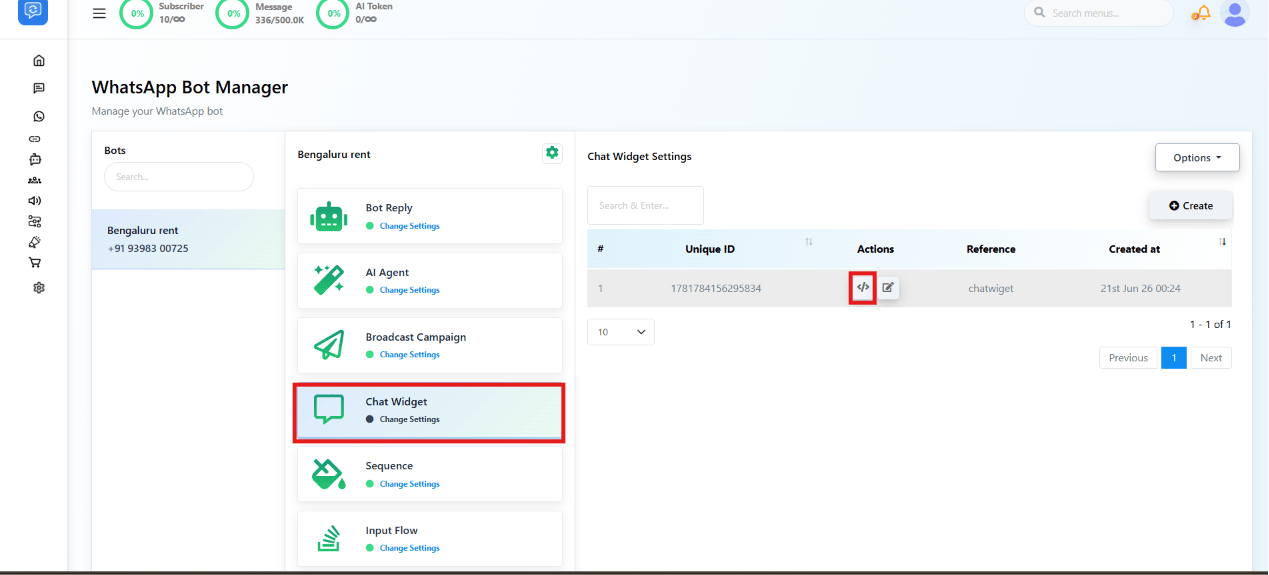
- JavaScript Embed Code — a
<script>tag to paste into your website’s HTML. - WhatsApp Short-link — a direct
wa.melink you can use on landing pages, emails, or social media instead of embedding the widget. - QR Code — scannable, useful for print materials or in-person displays.
How it looks on your website
Once the JavaScript snippet is added, the widget appears as a floating button. Clicking it opens the chat card with your welcome message and Start Chat button; clicking Start Chat redirects the visitor to WhatsApp with your pre-fill message ready to send.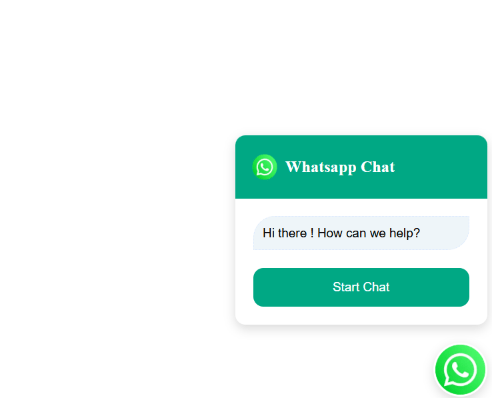

Frequently asked
How do I put a WhatsApp button on my website?
How do I put a WhatsApp button on my website?
Can I use the widget without embedding it on a website?
Can I use the widget without embedding it on a website?
Yes — the Embed Code dialog also gives you a WhatsApp Short-link and a QR Code.
Use the short-link on landing pages, emails, or social posts, or the QR code on printed or
in-person materials, without adding any code to a site.
What happens when a visitor clicks the widget?
What happens when a visitor clicks the widget?
It opens a chat card showing your Welcome Message and a Start Chat button. Clicking
Start Chat opens WhatsApp with your Pre-fill Message already typed in, ready for the
visitor to send.
What message types can I use in the widget's conversation?
What message types can I use in the widget's conversation?
Text, Image, Video, Audio, Files, Interactive Messages, User Input, and AI Reply — connected
on a canvas the same way as a Bot Reply flow.