

- Built from the same Message Templates page as any other template.
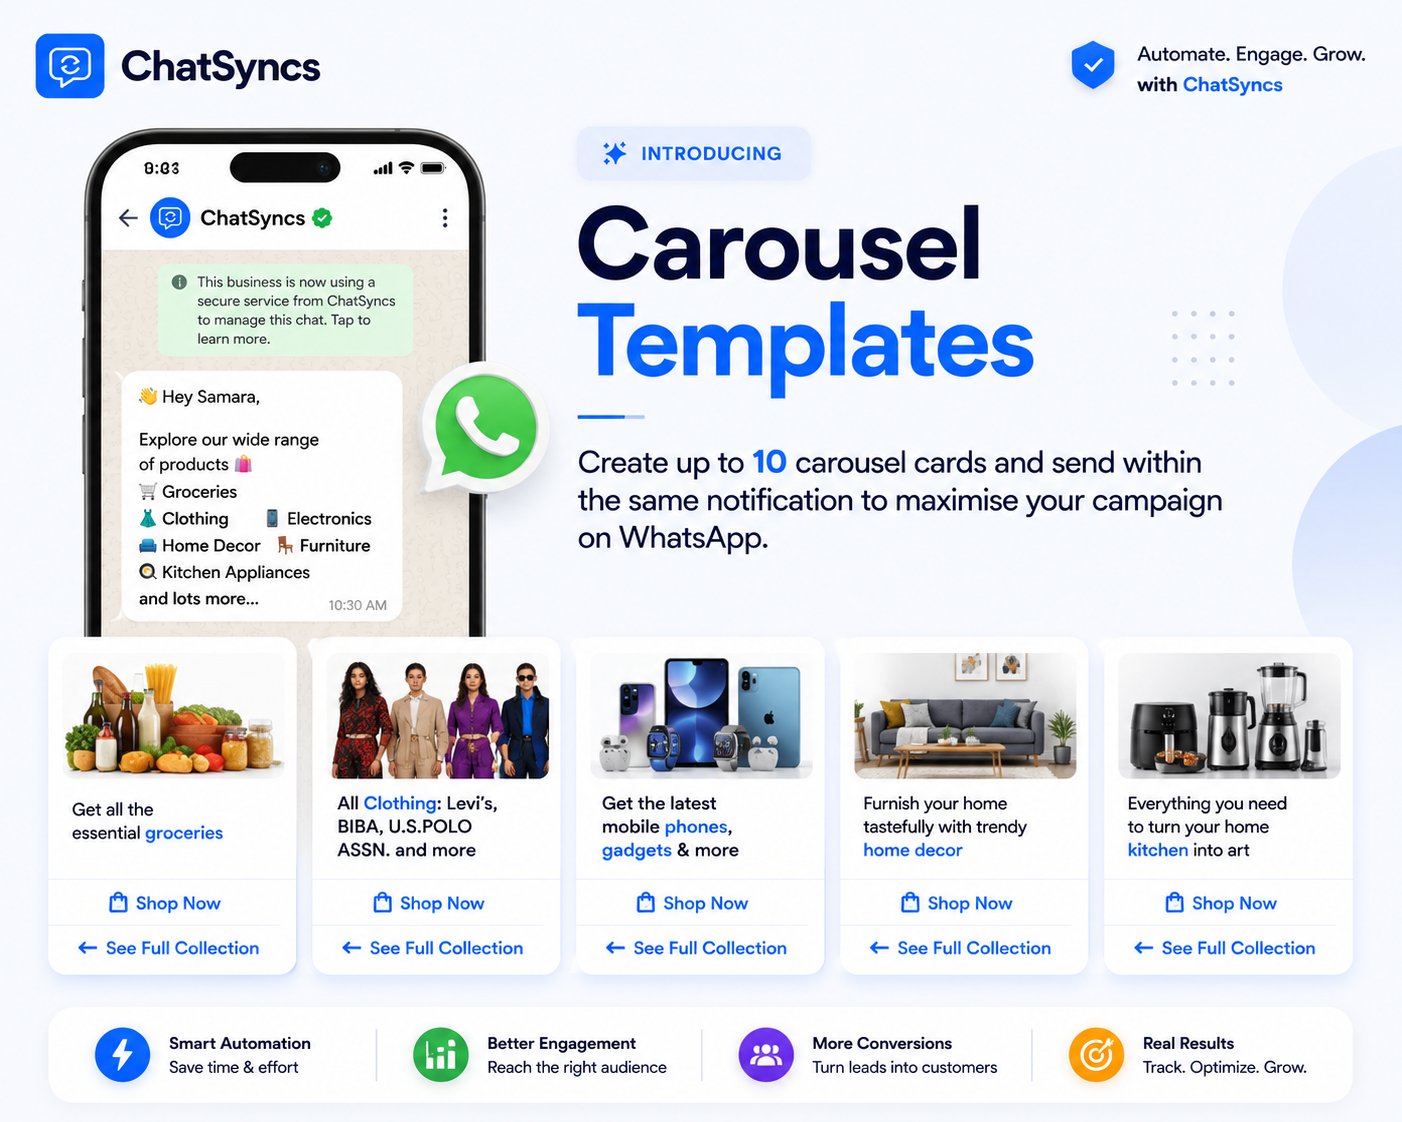
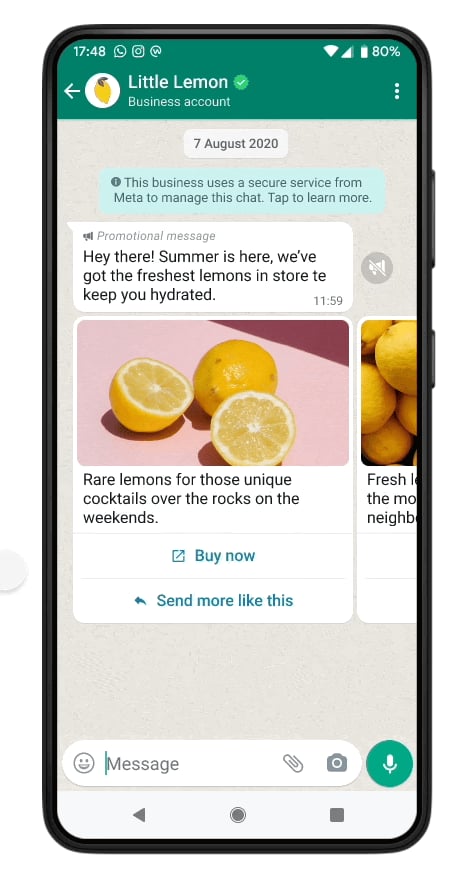
- This guide covers the full workflow: setup, video cards, product catalogs, sending, limits, and troubleshooting.
Before you start
You’ll need:- A connected WhatsApp Business Account (see How to Connect Your Number to ChatSyncs).
- Your carousel content ready — images or videos, card text, and button labels/URLs for each card.
- If you’re building a product carousel, your store connected to ChatSyncs first (see Connect a Store to ChatSyncs if you’re integrating a custom catalog via API).
Create a Carousel Media Template
1
Go to Message Templates
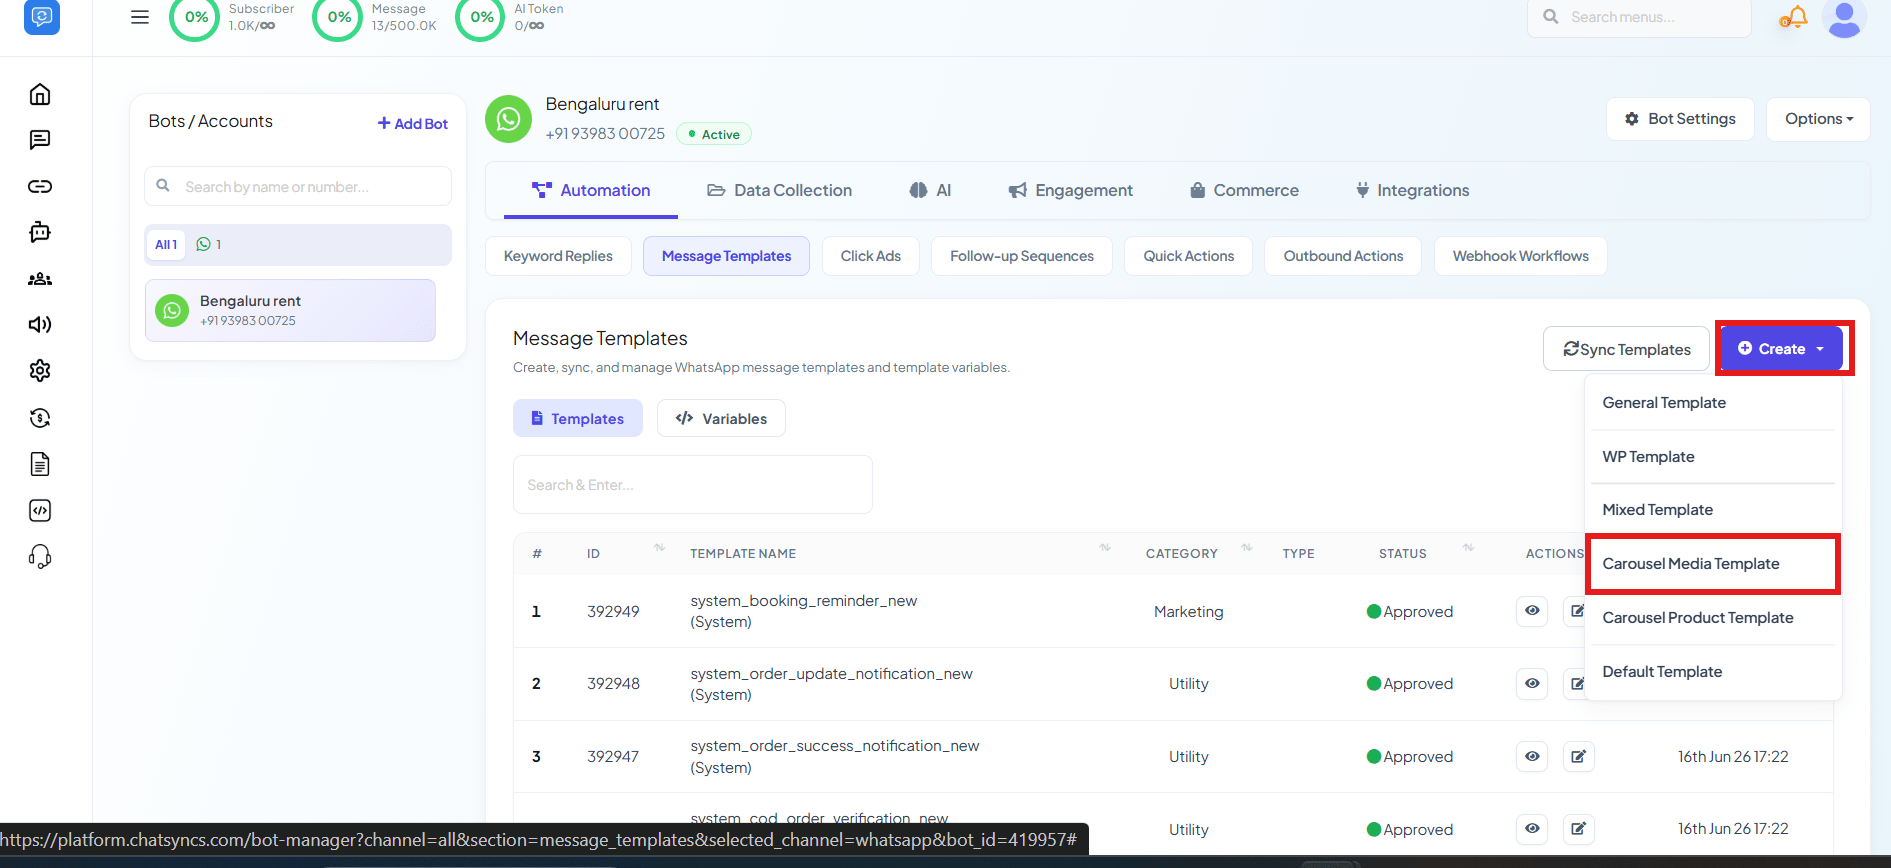
Open Chatbot Manager → Automation → Message Templates.
2
Click Create
Click Create and choose Carousel Media Template.
3
Name it and set the category
Give it a descriptive name (e.g. 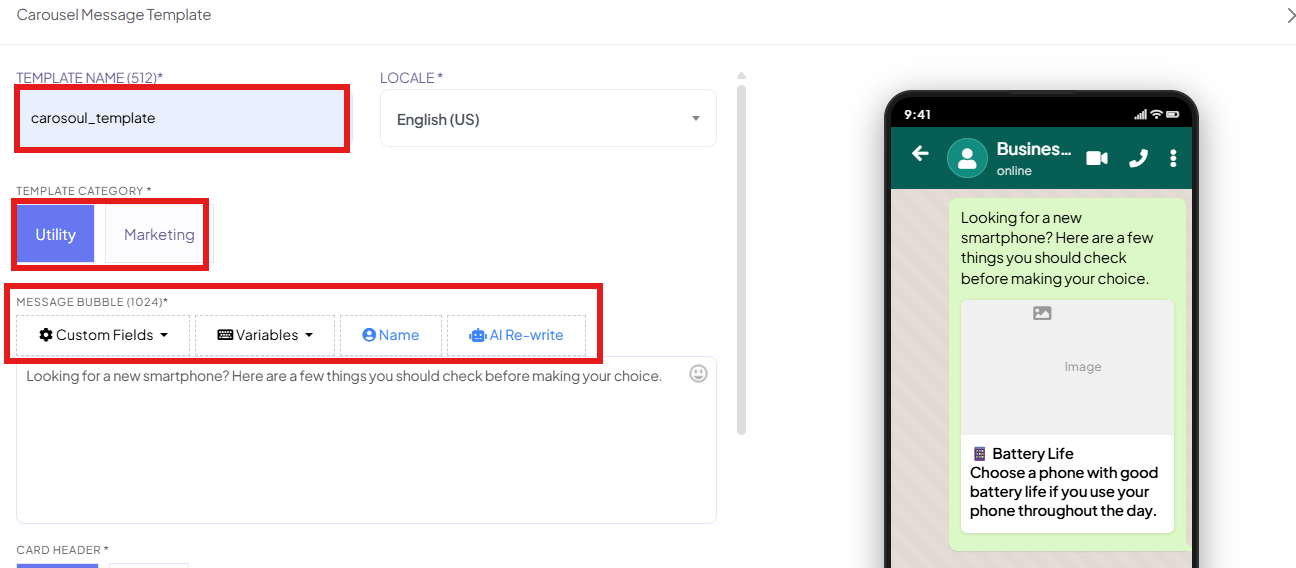
summer_sale_carousel) and pick Utility or
Marketing — carousels support both categories, the same as any other template. See
Guidelines for Utility and Marketing Templates for
which one fits your content.4
Write the message bubble
Add the intro text shown above the cards, using the same Custom Fields, Variables,
Name, and AI Rewrite toolbar as any other template — see Custom Fields, Variables,
Name, and AI Rewrite
for the exact syntax (
#field# for Custom Fields, #!variable!# for Template Variables).5
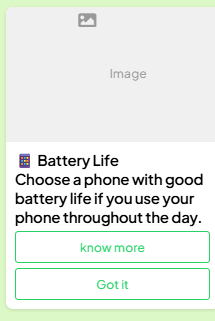
Configure each card
For every card, choose Image or Video as the header, add body text, and upload the media file.
6
Add buttons to each card
Give each card up to two buttons — URL (links to a webpage) or Quick Reply (sends a
predefined response).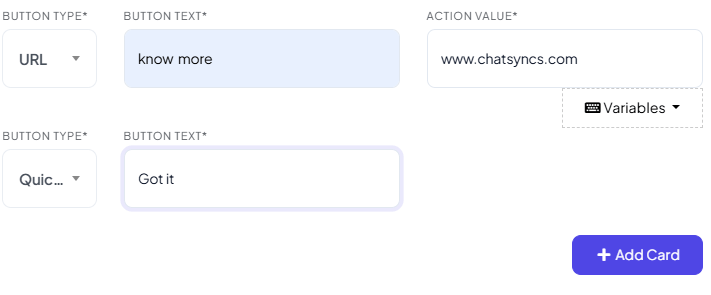
https://example.com/product/#!ProductID!#.7
Add more cards
Click Add Card to add the next one — repeat until you have all the cards you need (2–10).
8
Submit for approval
Save the template. Carousel templates typically take 24–48 hours for Meta’s first review — check status under Message Templates.
Using video instead of images
Change a card’s Card Header from Image to Video — everything else (body text, buttons) works the same way. Videos must be MP4 format, under 16 MB, using the H.264 codec.Carousel Product Templates (ecommerce)
If your store is connected, you can build a carousel that pulls products straight from your catalog instead of manually uploading each card’s image and text: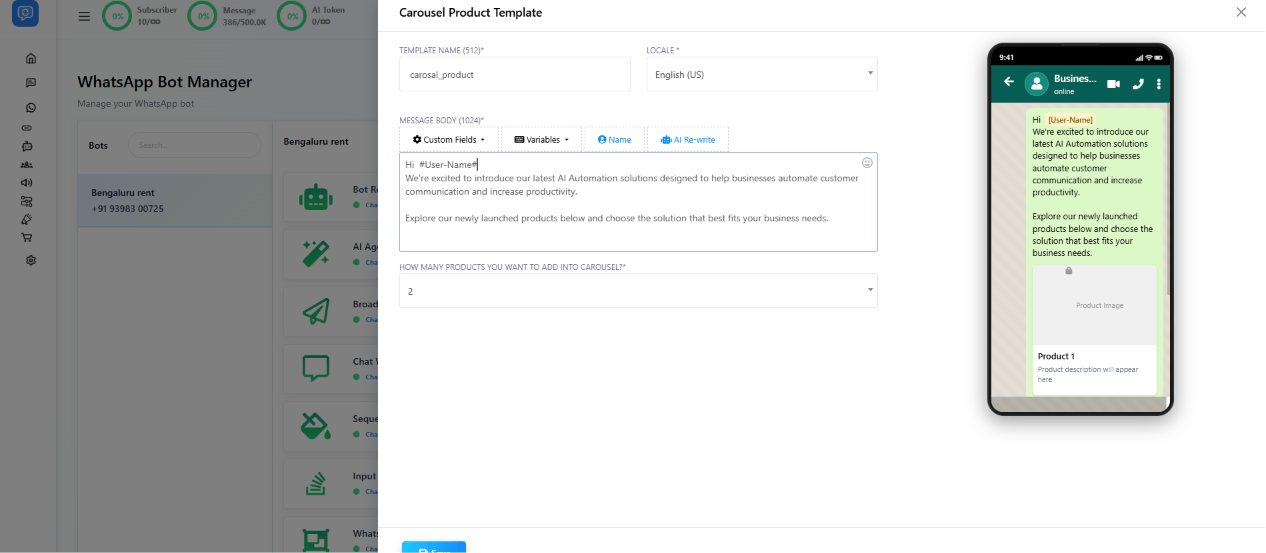
1
Connect your store
Make sure your ecommerce catalog is connected to ChatSyncs.
2
Create a Carousel Product Template
Pick Carousel Product Template from the Create menu, then select products from your catalog — image, name, and price are pulled in automatically.
3
Choose how many products
Set How many products you want to add into carousel? — from 1 up to 10.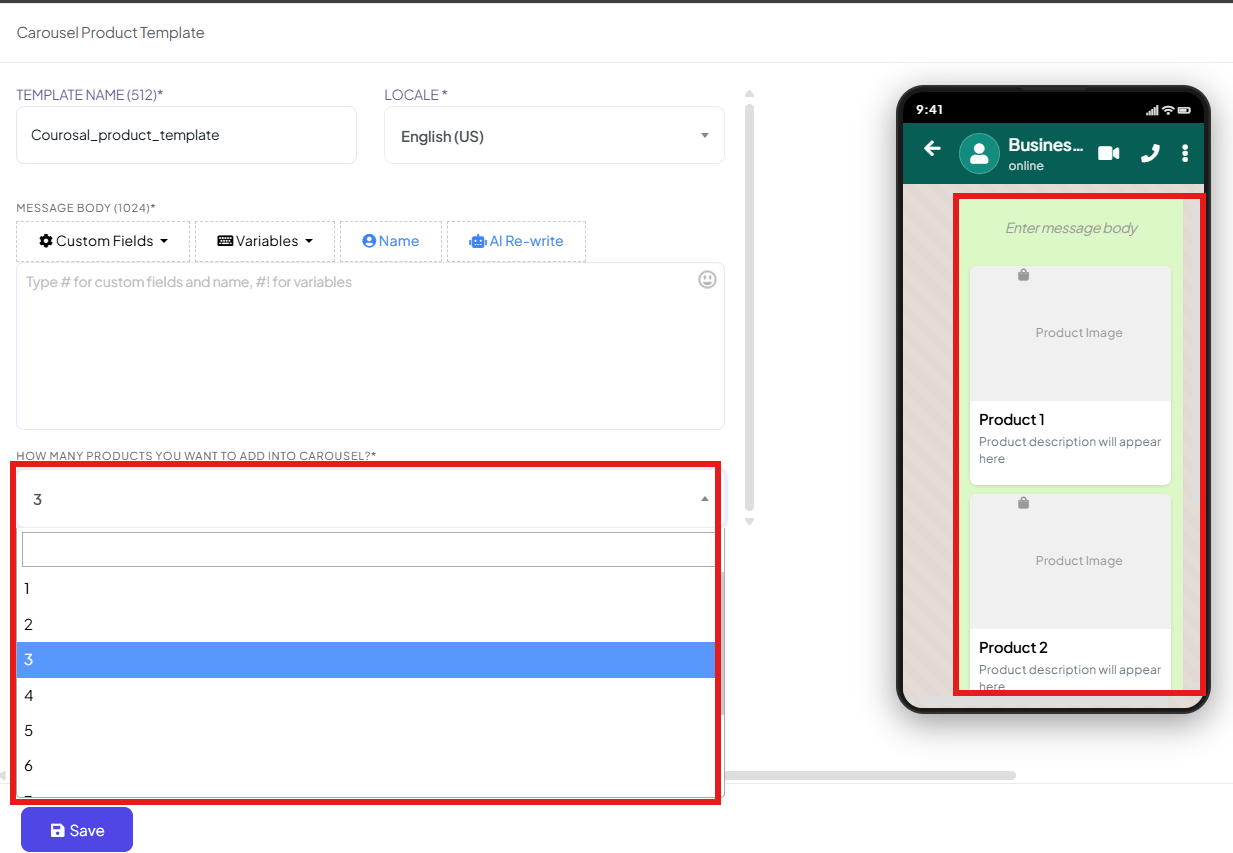
4
Use it in a bot flow
Wire it into a Keyword Replies flow (see How to Create a Keyword-Based WhatsApp Chatbot) so it’s sent automatically when a customer asks about products or browses your catalog.
Sending a carousel
Once Approved, a carousel template can be sent three ways:- Bot flows — attach it to a Keyword Replies flow (see How to Create a Keyword-Based WhatsApp Chatbot) with a keyword trigger, so a matching customer message sends the carousel automatically.
- Broadcasts — select the carousel template when creating a Broadcast Campaign.
- Live chat — send it directly to a subscriber from the ChatSyncs inbox during a conversation.
Limits and requirements
Tips for effective carousels
- Keep visuals consistent — same image dimensions, style, and layout across every card. Recommended size: 800×800 pixels.
- Use high-quality images. Clear, well-lit product photos outperform blurry or low-res ones.
- Write short card text. 160 characters is tight — highlight one point per card, not a paragraph.
- Use clear button labels. “Shop Now” or “View Details” beats a vague “Click Here.”
- Test before broadcasting. Send it to yourself or a test number first, and confirm every image loads, every button works, and cards display in the right order.
- Fewer, focused cards win. 3–5 well-chosen cards usually perform better than a full 10 that subscribers won’t swipe through.
Troubleshooting
The template won't save — what's wrong?
The template won't save — what's wrong?
Check that every card uses the same button order. If Card 1 has a URL button then a Quick
Reply, every other card must match that exact pattern.
Why was my carousel template rejected?
Why was my carousel template rejected?
Check it against Why Templates Get Rejected and How to Fix Them
— make sure every variable has sample data and images are clear, not misleading.
Media isn't displaying in the carousel.
Media isn't displaying in the carousel.
Check the image is JPEG or PNG under 5 MB, or the video is MP4 (H.264) under 16 MB, and that
the file uploaded successfully.
The carousel isn't sending from my bot flow or broadcast.
The carousel isn't sending from my bot flow or broadcast.
Confirm the template status is Approved under Message Templates. If you’re using a
bot flow, double-check the keyword trigger is set up and saved.