- Why this rule exists: so businesses can’t spam people with unlimited messages.
- The upside: once a template is approved, you reuse that same message again and again, for as many customers as you want — no re-approval needed each time.
- You run a clothing store.
- Every time an order ships, you want to tell the customer: “Your order has been shipped.”
- Instead of typing that by hand for every single person, you write it once as a template and get Meta’s approval one time.
- From then on, ChatSyncs sends it automatically — filling in each customer’s own name and a Variable like the order number or discount amount for them.
Variables are the whole point
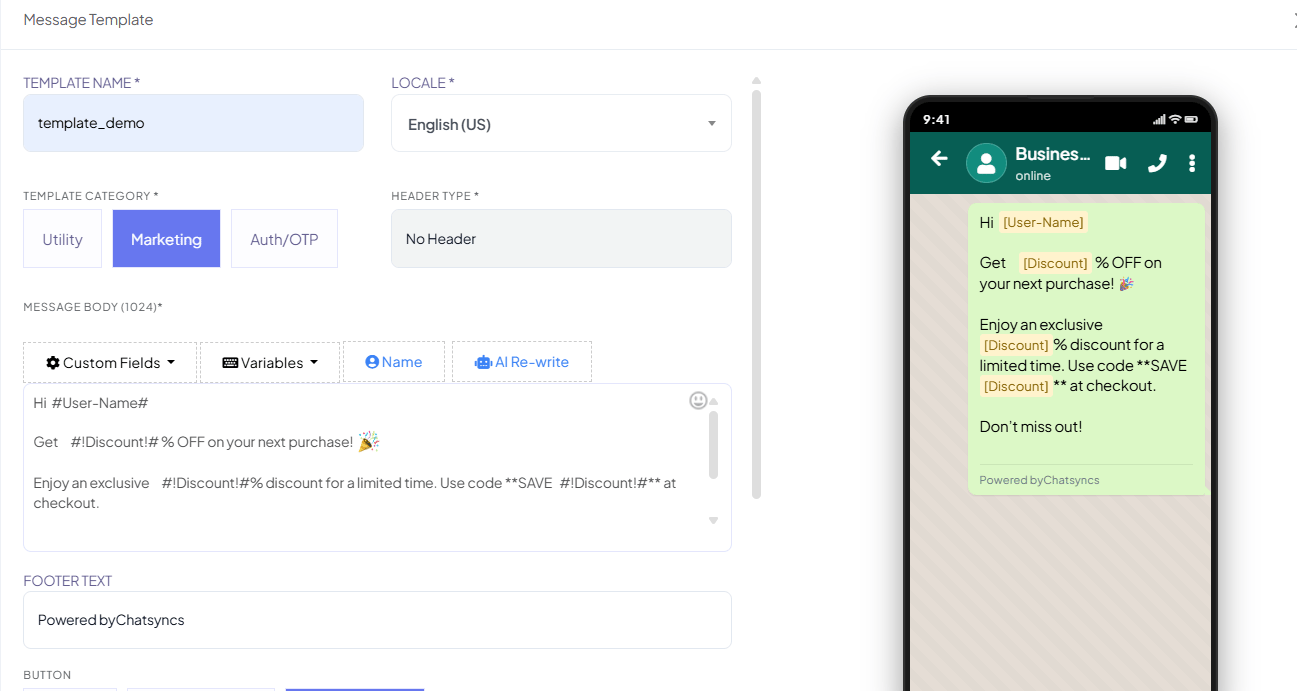
#!Discount!# in the template body, filled in with a
real value — a different one per customer, per send — the moment the message actually goes out.
The full syntax for every type of placeholder is in Custom Fields, Variables, Name, and AI
Rewrite further down — but since a Template
Variable is the reusable one you’ll reach for most, here’s how to create one before anything
else.
Create a Template Variable first
Why create one? A Custom Field only stores something permanent about a subscriber (their email, city). If what you need instead changes per message — a discount amount, an order total, a coupon code — and you want to reuse that same placeholder across multiple templates without redefining it each time, create a Template Variable once and insert it anywhere.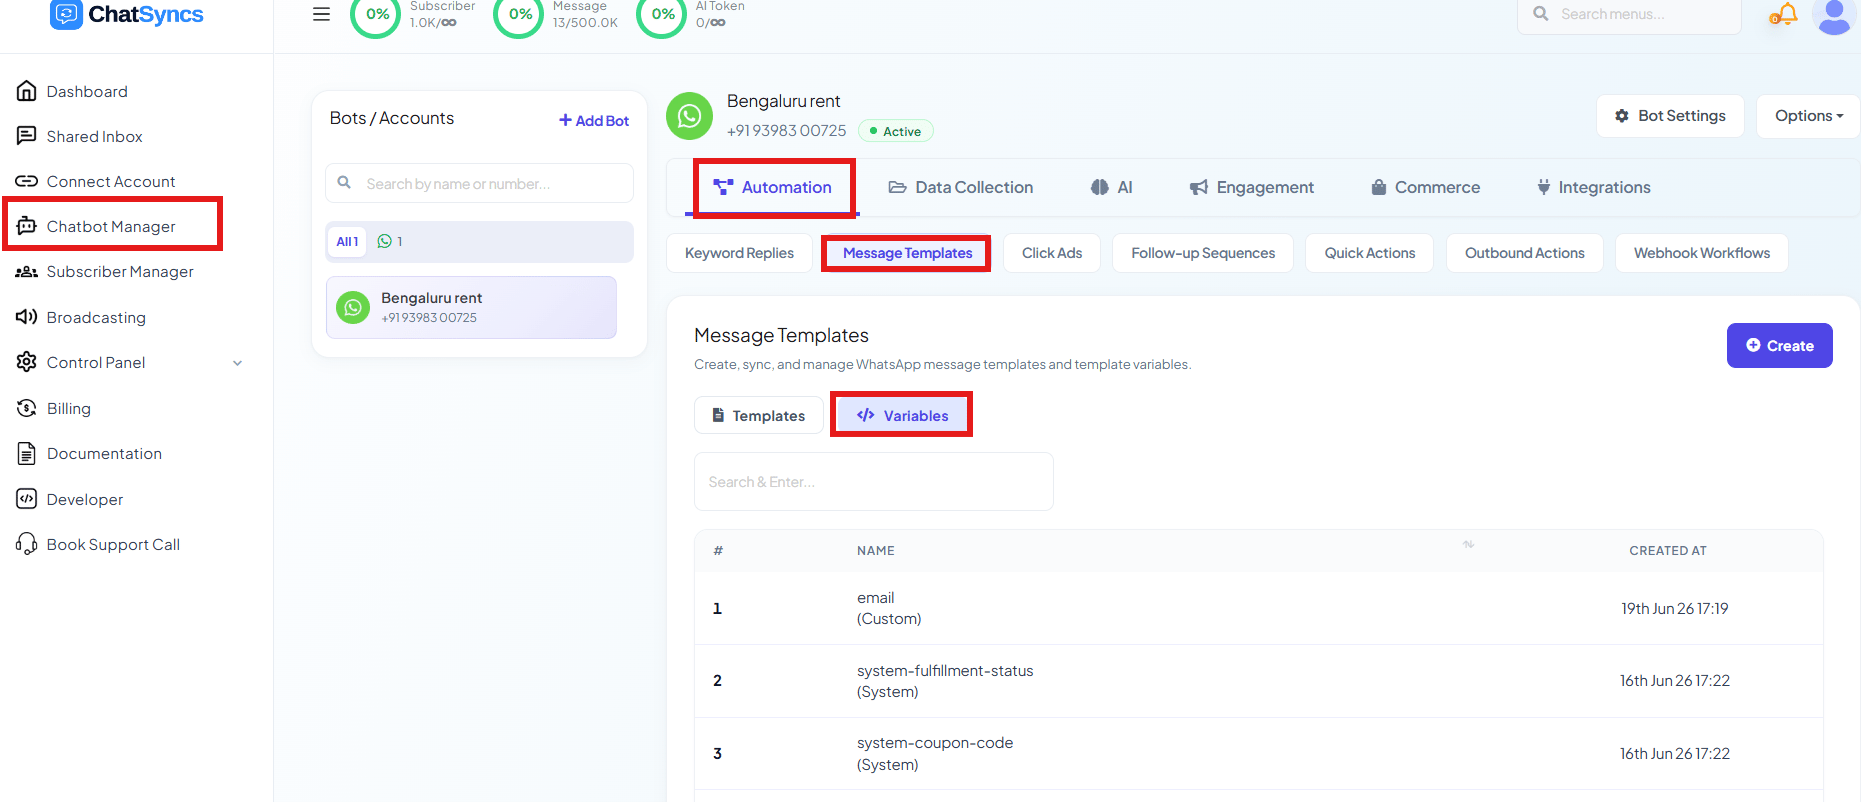
1
Open the Variables tab
Go to Chatbot Manager → Automation → Message Templates, then click Variables next to
Templates.
2
Click Create
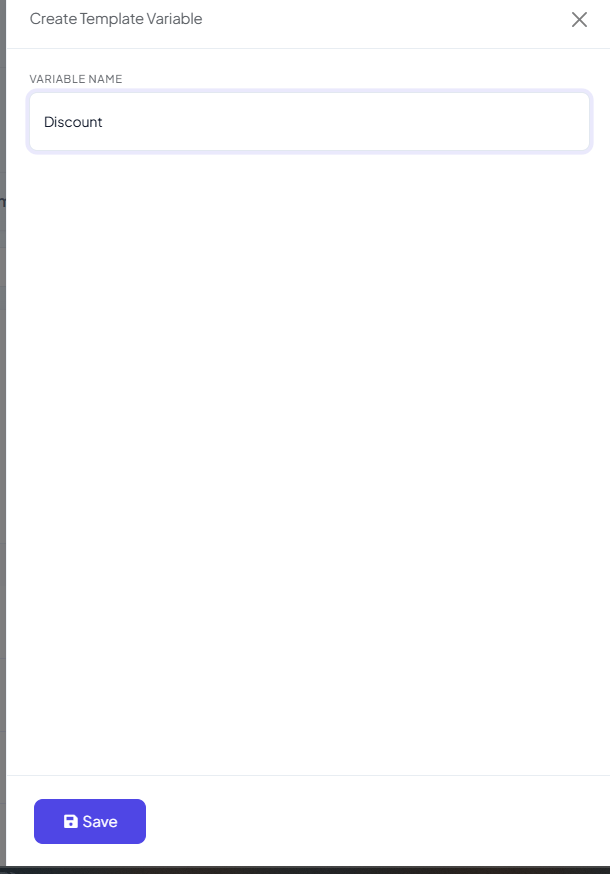
Discount, OrderID,
BookingID, CompanyName.3
Save
The variable now appears in the list and can be inserted into any template’s Message Body
using the Variables button in the toolbar.
#!VariableName!# syntax — note this is different from a Custom
Field’s single-# syntax:
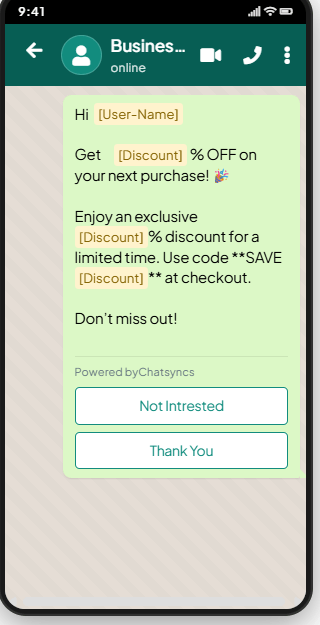
The customer receives:
Prerequisites
- A WhatsApp Business Account connected to ChatSyncs.
- A clear idea of your message content — including any variables, buttons, or footer text you need.
Open Message Templates
1
Open Chatbot Manager
Go to Chatbot Manager.
2
Open the Automation tab
Select Automation.
3
Click Message Templates
Select Message Templates from the sub-tabs.
4
Click Create
Click Create and pick a template type.
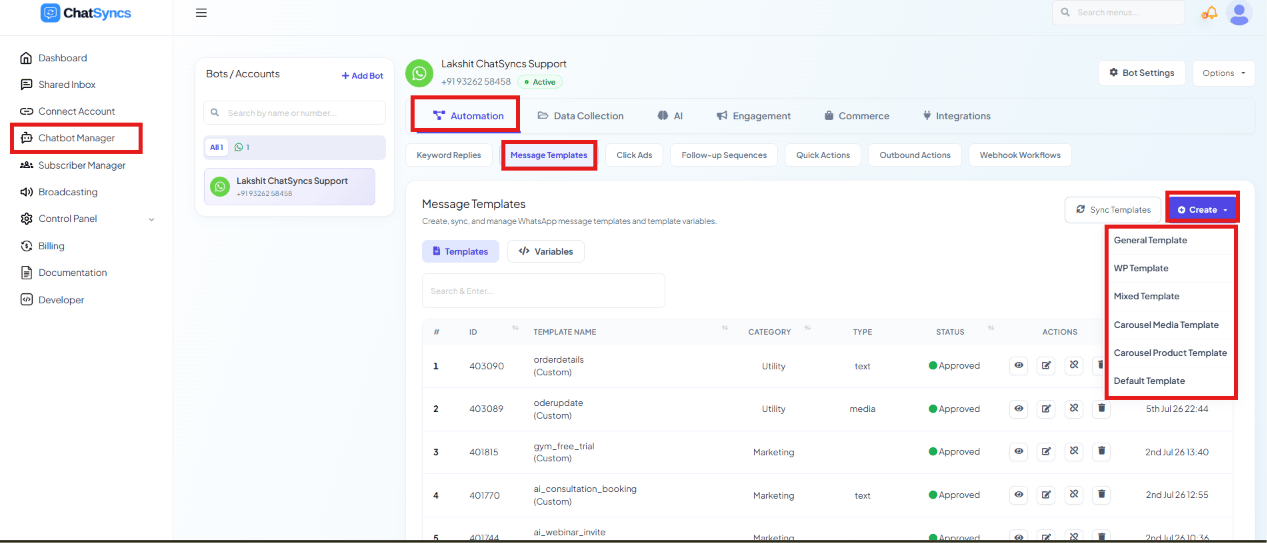
- General Template — the standard single-message template builder.
- WP Template — another single-message builder, mainly used for Marketing templates.
- Mixed Template — supports all three template categories (Marketing, Utility, Authentication/OTP) from one builder.
- Carousel Media Template and Carousel Product Template — swipeable multi-card templates; see How to Create and Use Carousel Media Templates for the full walkthrough.
- Default Template — system-created templates you don’t build yourself.
General Template
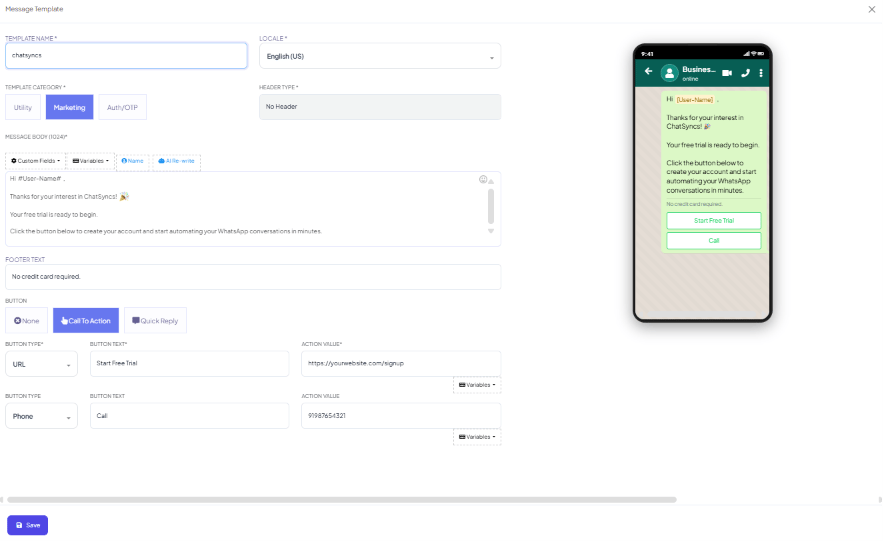
Mixed Template
A Mixed Template can be submitted as Marketing, Utility, or Authentication (OTP) — useful when you want one builder for any category instead of switching tools. See Utility vs. Marketing Templates for help choosing the right one.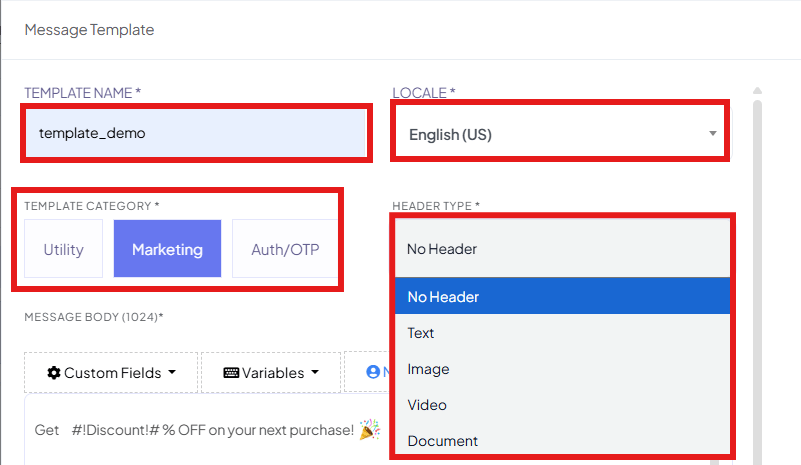
Every field has a length limit — see
Character Limits for Media Message Templates before you
write a long message.
Custom Fields, Variables, Name, and AI Rewrite
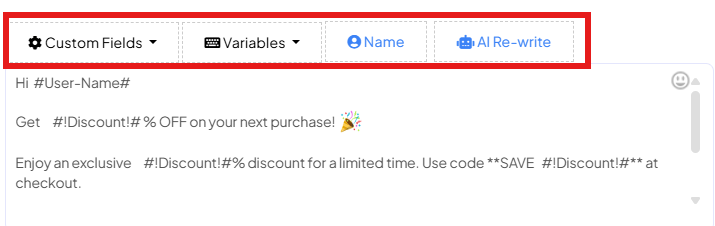
Example — a message built from all three placeholder types:
#User-Name# resolves to the subscriber’s name automatically, and #!Discount!#
resolves to whatever value you assign that Template Variable (see Add a reusable Template
Variable below) — the same variable can appear more than once
in one message.
See Template Variables vs Custom Variables — What’s the Difference? for the
full difference between a Custom Field and a Template Variable, and how each behaves when
sending via the API.
Buttons
Every builder has the same three Button options: None, Call To Action, or Quick Reply.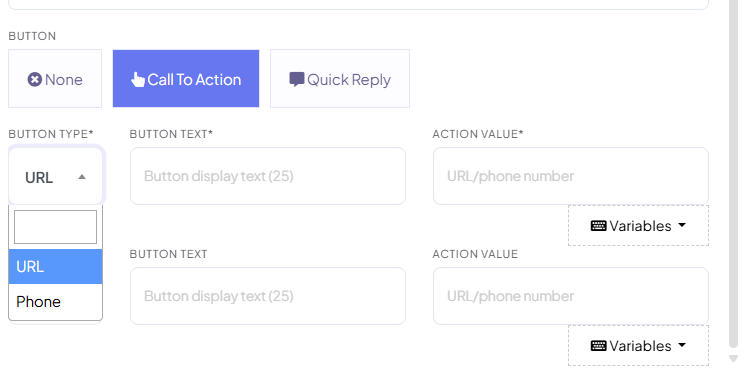
https://example.com/order/#!OrderID!#. Up to two Call To Action buttons can be added.
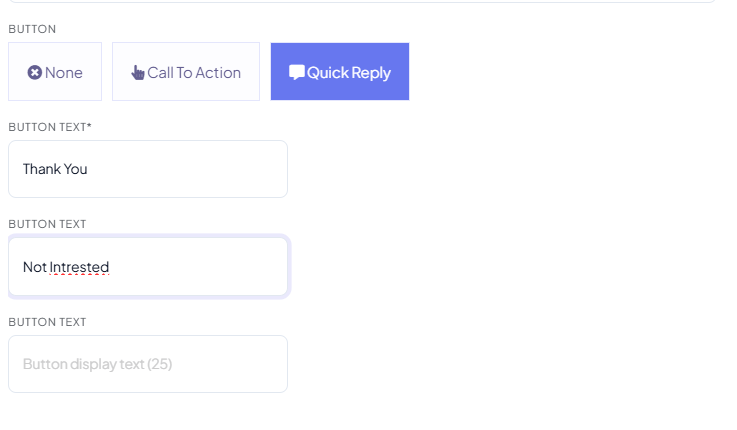
Thank You, Not Interested.
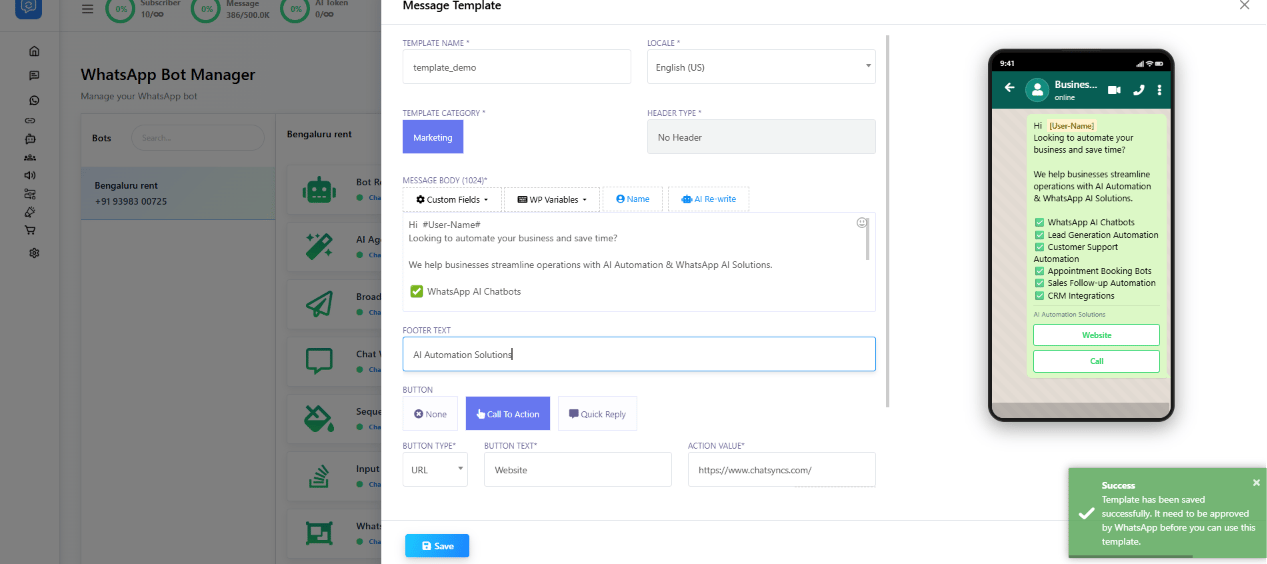
WP Template
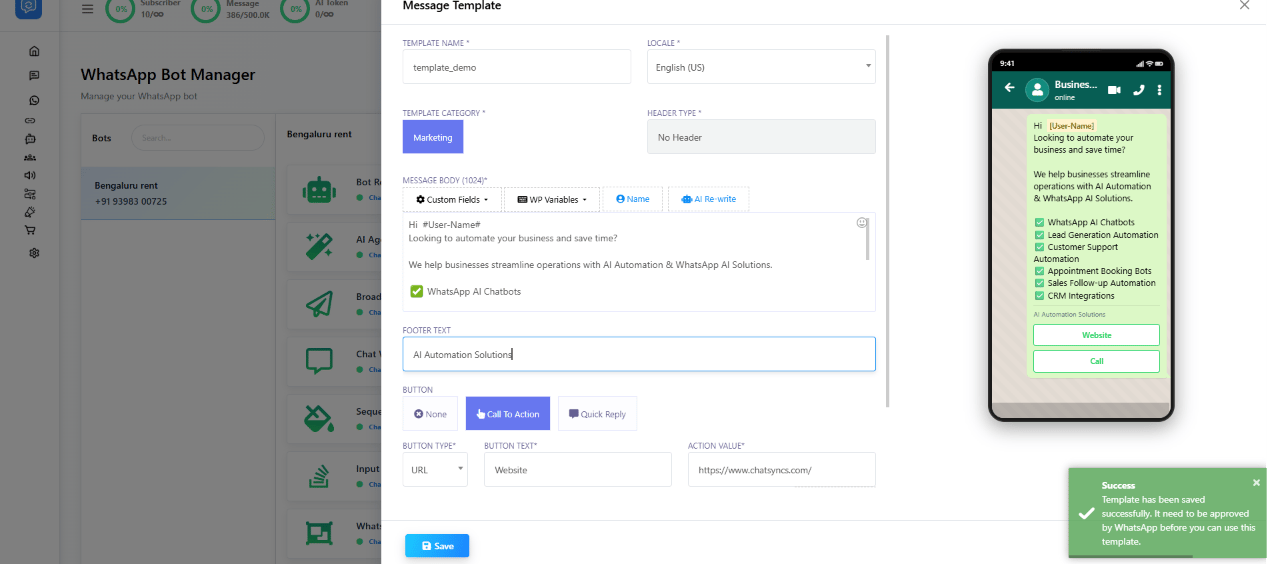
- Unique Template Name
- Locale selection
- Header options
- Custom Fields
- WP Variables (WP Template’s own variable picker, alongside Custom Fields)
- AI Rewrite
- Footer Text
- Call To Action buttons
- Quick Reply buttons
- Live preview
#phone# or
#email# (single #), and Template Variables like #!OrderID!# or #!BookingID!# (#!...!#)
— see Custom Fields, Variables, Name, and AI
Rewrite above for the full syntax reference.
Common use cases: promotional offers, product launches, property marketing, service
promotions, lead follow-ups.
Approval status & Sync Template
After saving, every template appears in the Message Templates list with a status — all custom templates must be reviewed by Meta before use: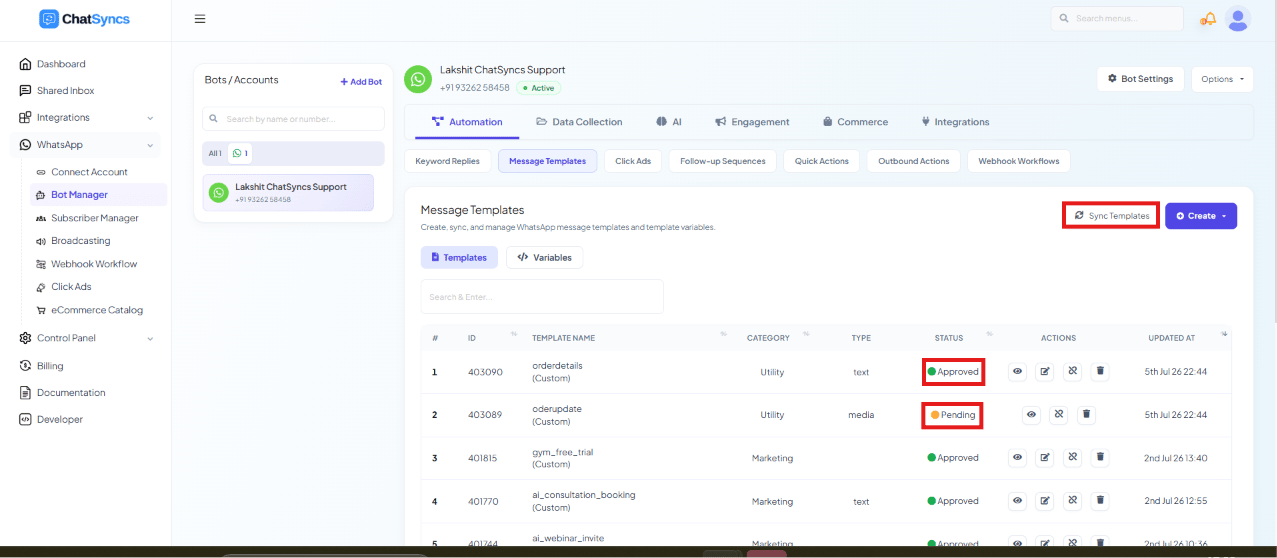
- Pending — the status right after saving, before it’s been sent to Meta for review.
- Submitted — sent to Meta and awaiting review; a template moves from Pending to Submitted once you click Sync Templates.
- Approved — ready to use in Keyword Replies, Broadcasting, Sequences, WhatsApp Flows, and AI Agent automations.
- Rejected — see Why Templates Get Rejected and How to Fix Them for the full status list (including Paused and Disabled), the fix, and how to resubmit.
Using the template
Once Approved, send it via:- Broadcasting — a one-to-many send to a segment of your subscribers, see Broadcast Campaign.
- Live chat — sent directly to one subscriber from the inbox.
- Shopify & WooCommerce messages — automated order/shipping messages, if you’ve connected a store.
- Keyword Replies, Sequences, WhatsApp Flows, and AI Agent automations — any automation that needs to message a customer outside the 24-hour window.
Broadcasting with Template Buttons
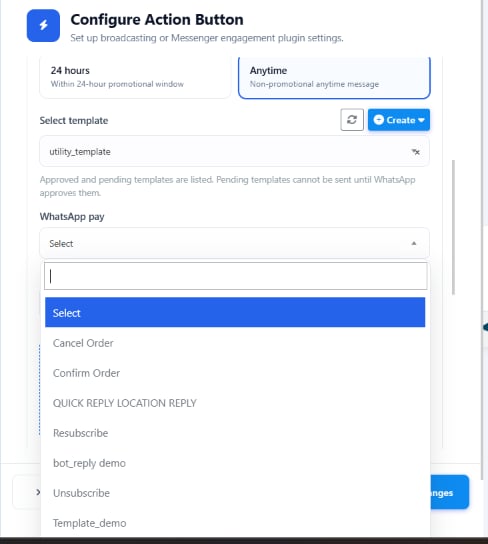
If a WhatsApp template contains buttons, it can be integrated with a Keyword Replies flow during broadcasting — tapping a template button hands the customer straight into that flow. Prerequisites:- A WhatsApp template with buttons, submitted and Approved by WhatsApp.
- The Keyword Replies flow you want the button to trigger, already built.
1
Open the Broadcast module
Go to Broadcasting.
2
Select the approved template
Pick the WhatsApp template with buttons.
3
Open Configure Action Button
Navigate to Configure Action Button.
4
Choose the messaging window
24 Hours (within the customer service window) or Anytime (non-promotional).
5
Select the Keyword Replies flow
Pick which flow the template’s button should trigger.
6
Save and start the broadcast
Save the configuration, then start the broadcast.
Flow:
Related Documentation
- Why Templates Get Rejected and How to Fix Them — statuses, the duplicate-and-resubmit flow, and a pre-submit checklist.
- Character Limits for Media Message Templates — header, body, footer, and button length limits.
- Utility vs. Marketing Templates — which Template Category to pick.
- Understanding Conversations and Their Types — how category choice affects what a template costs to send.
- How to Create and Use Carousel Media Templates — the full carousel walkthrough, limits, and troubleshooting.
- Create Templates in WhatsApp Manager and Sync to ChatSyncs — building templates in Meta’s own dashboard instead.
- Template Variables vs Custom Variables — What’s the Difference? — which one to use, and how each behaves in the API.
- Templates to Restart Conversations After Non-Working Hours — ready-to-use templates for a missed reply window.
- Understanding WhatsApp Quality Rating — how blocks and reports can get a template Paused or Disabled.
Frequently asked
How do I create a WhatsApp template in ChatSyncs?
How do I create a WhatsApp template in ChatSyncs?
Go to Chatbot Manager → Automation → Message Templates → Create, pick a template type
(General, WP, Mixed, Carousel Media, Carousel Product), fill in the name, category, body,
and any buttons, then save. It’s submitted to Meta automatically and needs approval before
use.
Do I need a Template Variable for every template?
Do I need a Template Variable for every template?
No — only if part of the message changes every time you send it (a name, an order number).
A template with fully static text needs no variables at all.
Why is my template stuck on Submitted?
Why is my template stuck on Submitted?
Meta is still reviewing it. Click Sync Templates to pull the latest status — new
WhatsApp Business accounts can take up to 24 hours or longer for the first review.
How do I personalize a template with a customer's name or order number?
How do I personalize a template with a customer's name or order number?
Use the Name button for the subscriber’s name (
#User-Name#), a Custom Field for
other subscriber data like an order number (#orderid#), or a Template Variable for a
reusable placeholder (#!Discount!# — note the #!...!# syntax, different from a Custom
Field’s single #). Assign each a real value before sending, and it’s automatically
replaced per customer.What's the difference between a Carousel Media and Carousel Product template?
What's the difference between a Carousel Media and Carousel Product template?
Carousel Media is general-purpose — any cards with image/video and text, good for
showcases or campaigns. Carousel Product is built specifically for selling products, with a
Product Image, Name, Description, and Button on every card.
Can I use AI to write my template content for me?
Can I use AI to write my template content for me?
Yes — click AI Rewrite inside the Message Body (or a carousel’s Message Bubble/Card
Body) to generate or improve the wording automatically.
What's the difference between General Template, WP Template, and Mixed Template?
What's the difference between General Template, WP Template, and Mixed Template?
All three are single-message builders with largely the same fields (Template Name, Locale,
Category, Header Type, Message Body, Footer Text, Buttons, live preview) — pick whichever
entry point you land on in the Create menu.
Why can't I send my new template yet?
Why can't I send my new template yet?
It needs Meta’s approval first. Check its status on the Message Templates list — see
Why Templates Get Rejected and How to Fix Them if it
shows Rejected.