

- If you want to keep using WhatsApp on your phone (the Business App) and ChatSyncs at the same time, see How to Connect Your WhatsApp Business App to ChatSyncs instead.
- If your number is already active on the WhatsApp app and you want to move it onto ChatSyncs instead of keeping both, see How to Migrate from WhatsApp App to a ChatSyncs Business Account instead.
- If you want a brand-new number used only on ChatSyncs, not on your phone, keep reading — this page covers that path.
Before you start
- A Facebook account with access to the business.
- A phone number not already active on WhatsApp or WhatsApp Business (if it was, delete that number from WhatsApp permanently and wait a few hours first).
- A Meta Business Portfolio — the account container that holds your business’s WhatsApp setup. Embedded signup can create one for you on the spot if you don’t have one yet (just a name, your first/last name, and a website).
Connect a brand-new number (Cloud API)
Video walkthrough: connecting a virtual number via the Cloud API.
Open Connect WhatsApp
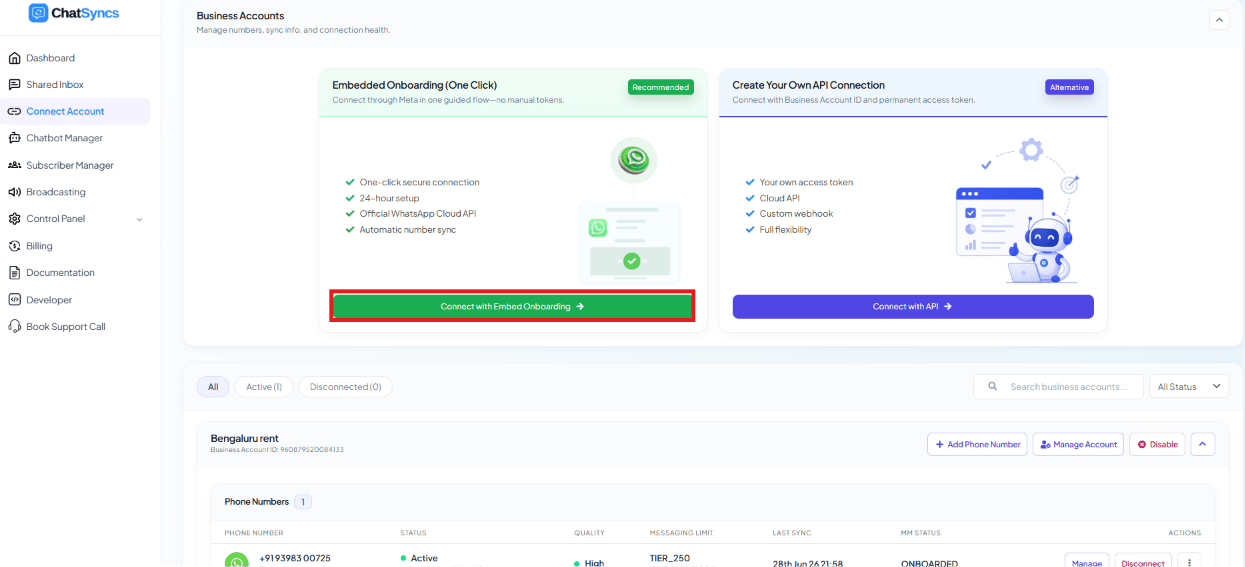
Business Accounts — Embedded Onboarding (recommended) vs. Create Your Own API Connection.
Choose catalog permissions
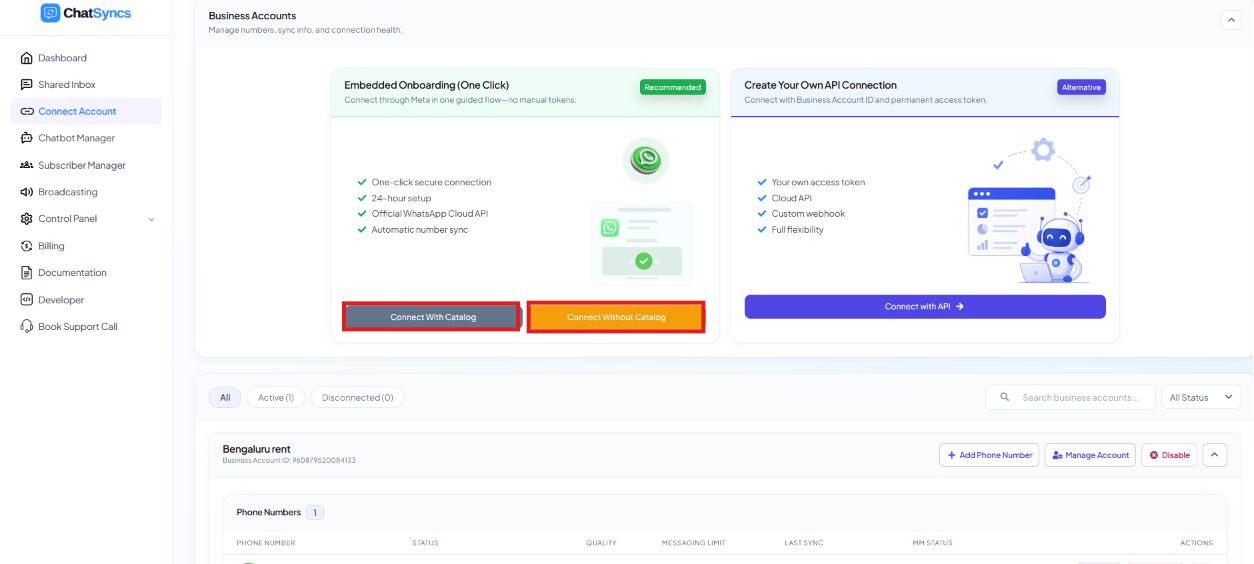
Connect With Catalog vs. Connect Without Catalog.
Log in with Facebook
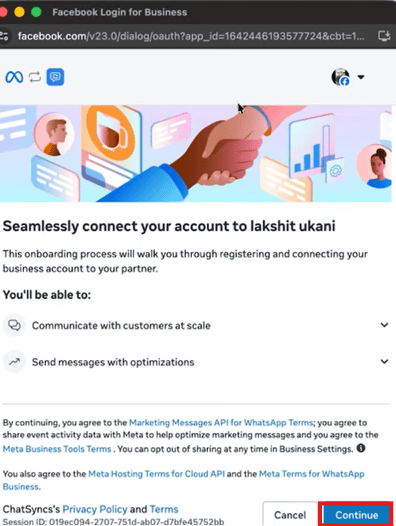
Meta's embedded signup consent screen — click Continue to proceed.
Select or create a Business Portfolio
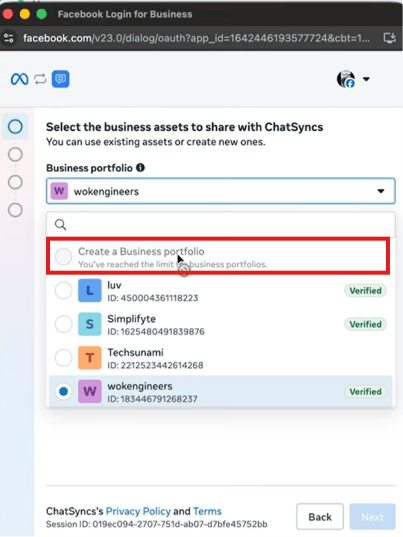
Select the business portfolio to share with ChatSyncs.
Pick 'Create a WhatsApp Business account'
- Create a WhatsApp Business account (first option) → a brand-new number, usable only on ChatSyncs, not on your phone. Pick this one.
- Connect a WhatsApp Business App (second option) → this is the How to Connect Your WhatsApp Business App to ChatSyncs path instead, for keeping a number on your phone too — don’t pick this here.
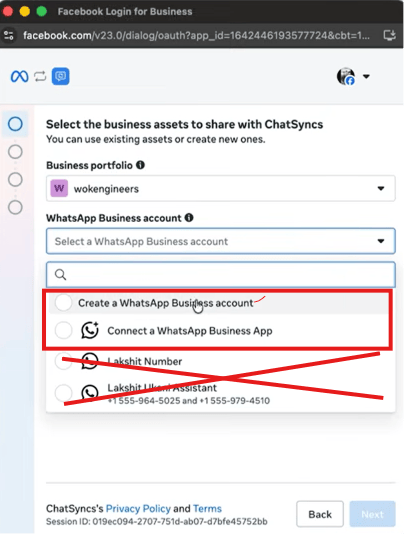
The WhatsApp Business account dropdown — first option keeps the number ChatSyncs-only, second option is Coexistence. Crossed-out numbers are already connected elsewhere.
Enter business information
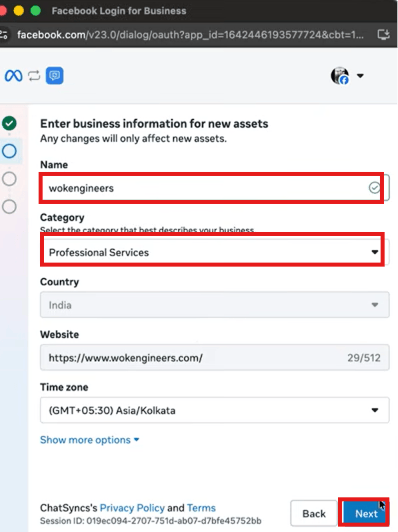
Business information for the new WhatsApp Business account.
Add a new number
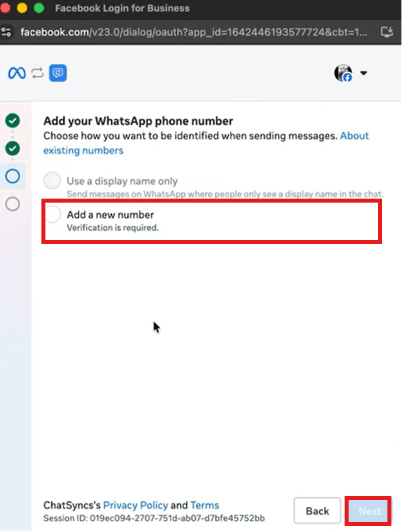
Add a new number, rather than using a display name only.
Enter the number, display name, and verify
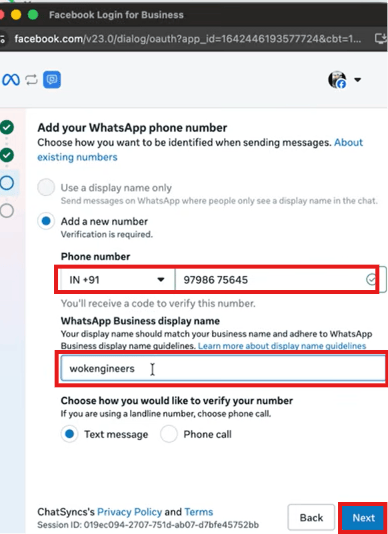
Phone number, WhatsApp Business display name, and verification method.
Done
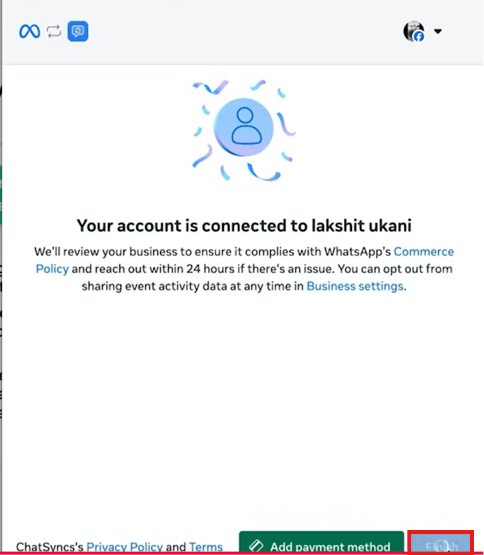
Meta's final confirmation once the account is connected.
Frequently asked
What's the difference between the Cloud API path and Coexistence?
What's the difference between the Cloud API path and Coexistence?
I got an error saying I need to unlink my number first — what do I do?
I got an error saying I need to unlink my number first — what do I do?
I don't have a Meta Business Portfolio yet — do I need to create one first?
I don't have a Meta Business Portfolio yet — do I need to create one first?
What if embedded signup isn't available for my account?
What if embedded signup isn't available for my account?