
- This step happens on Meta’s side, once per Business Portfolio — not inside ChatSyncs.
- Meta bills you directly for WhatsApp conversations, not ChatSyncs. See What WhatsApp API Pricing Really Means for the plain-English breakdown, or Conversation Categories & Pricing for the full API-level rate table.
- Meta requires a payment method on file before it lets messages send past the free tier.
Set it up
1
Open your Business Portfolio's settings
In Meta Business Suite, click your business portfolio name
in the top-left switcher, then click the gear icon next to it to open Settings.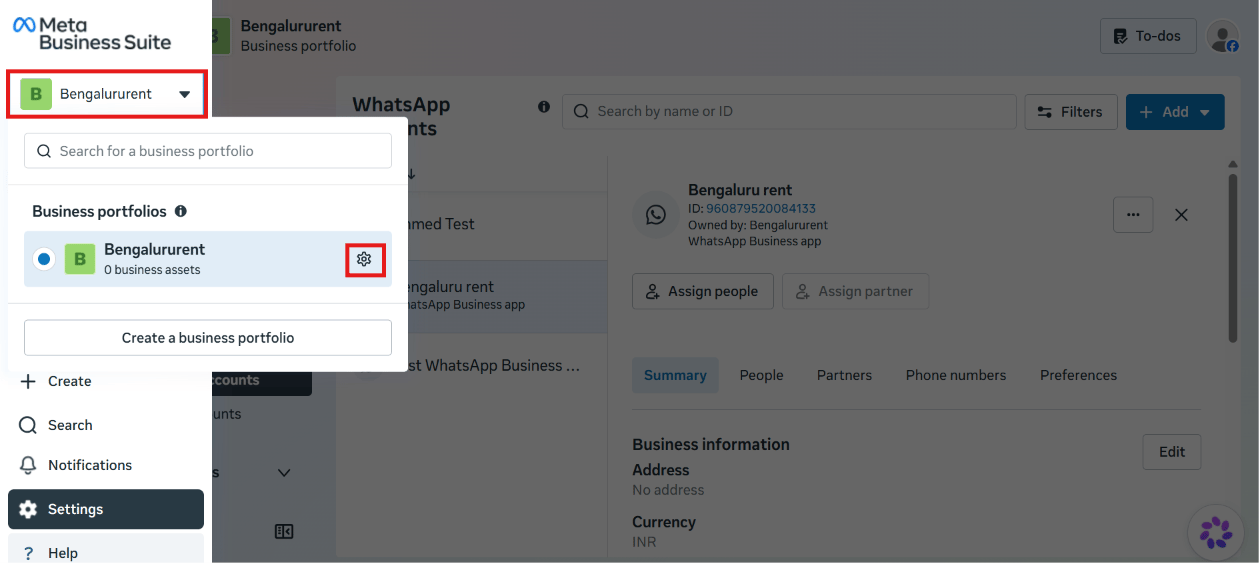
2
Open your WhatsApp account's payment settings
Under Accounts → WhatsApp accounts, select the WhatsApp Business account you want to
bill. Its current Payment method (if any) shows on the right. Click Payment
settings.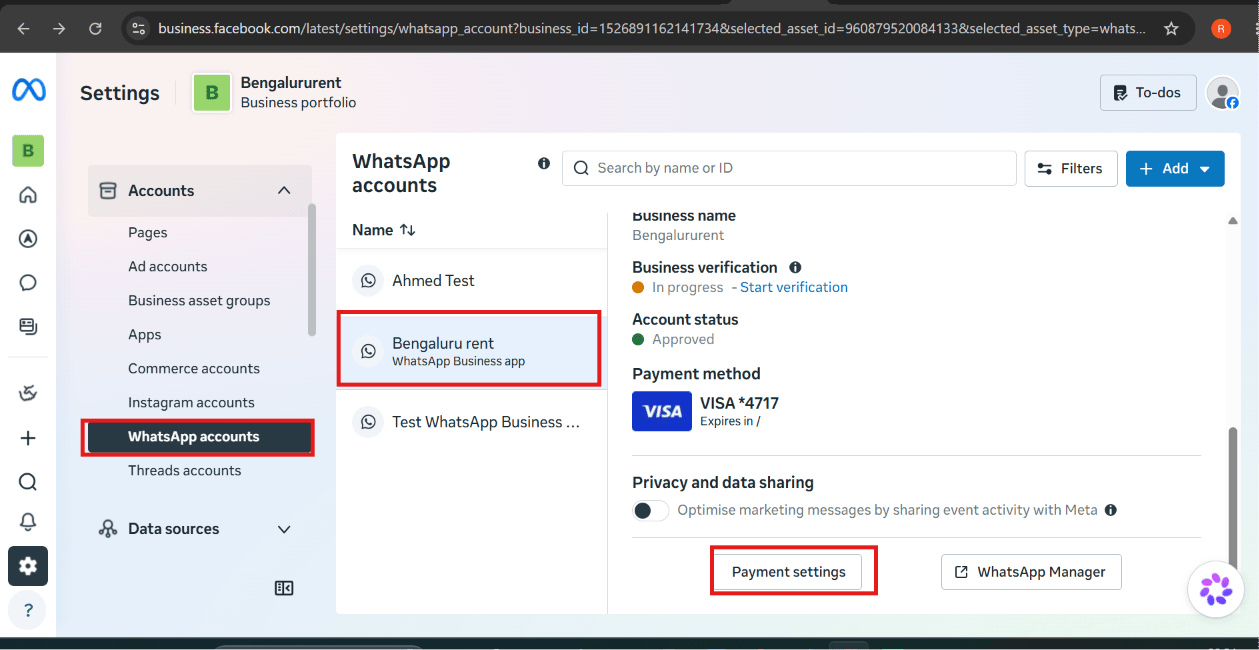
3
Add a payment method
This opens Billing & payments. Under Payment methods, click Add payment method.
You can have more than one card on file — Meta uses whichever is marked Default.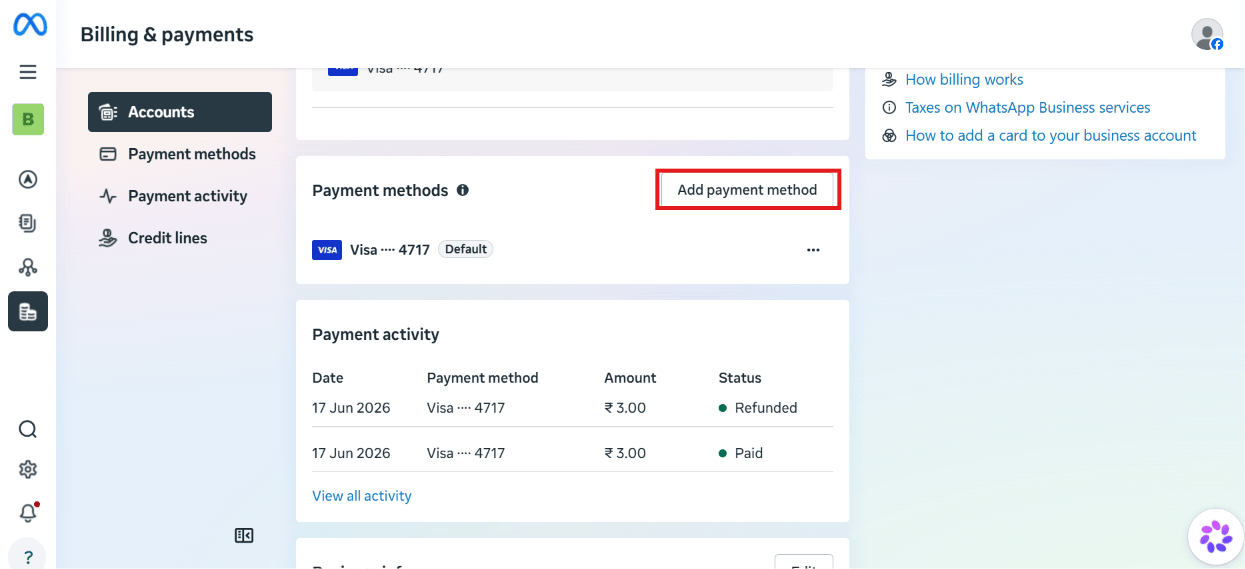
4
Set your location and currency
In the Add payment information dialog, choose the Country/region, Currency, and
timezone, then click Next.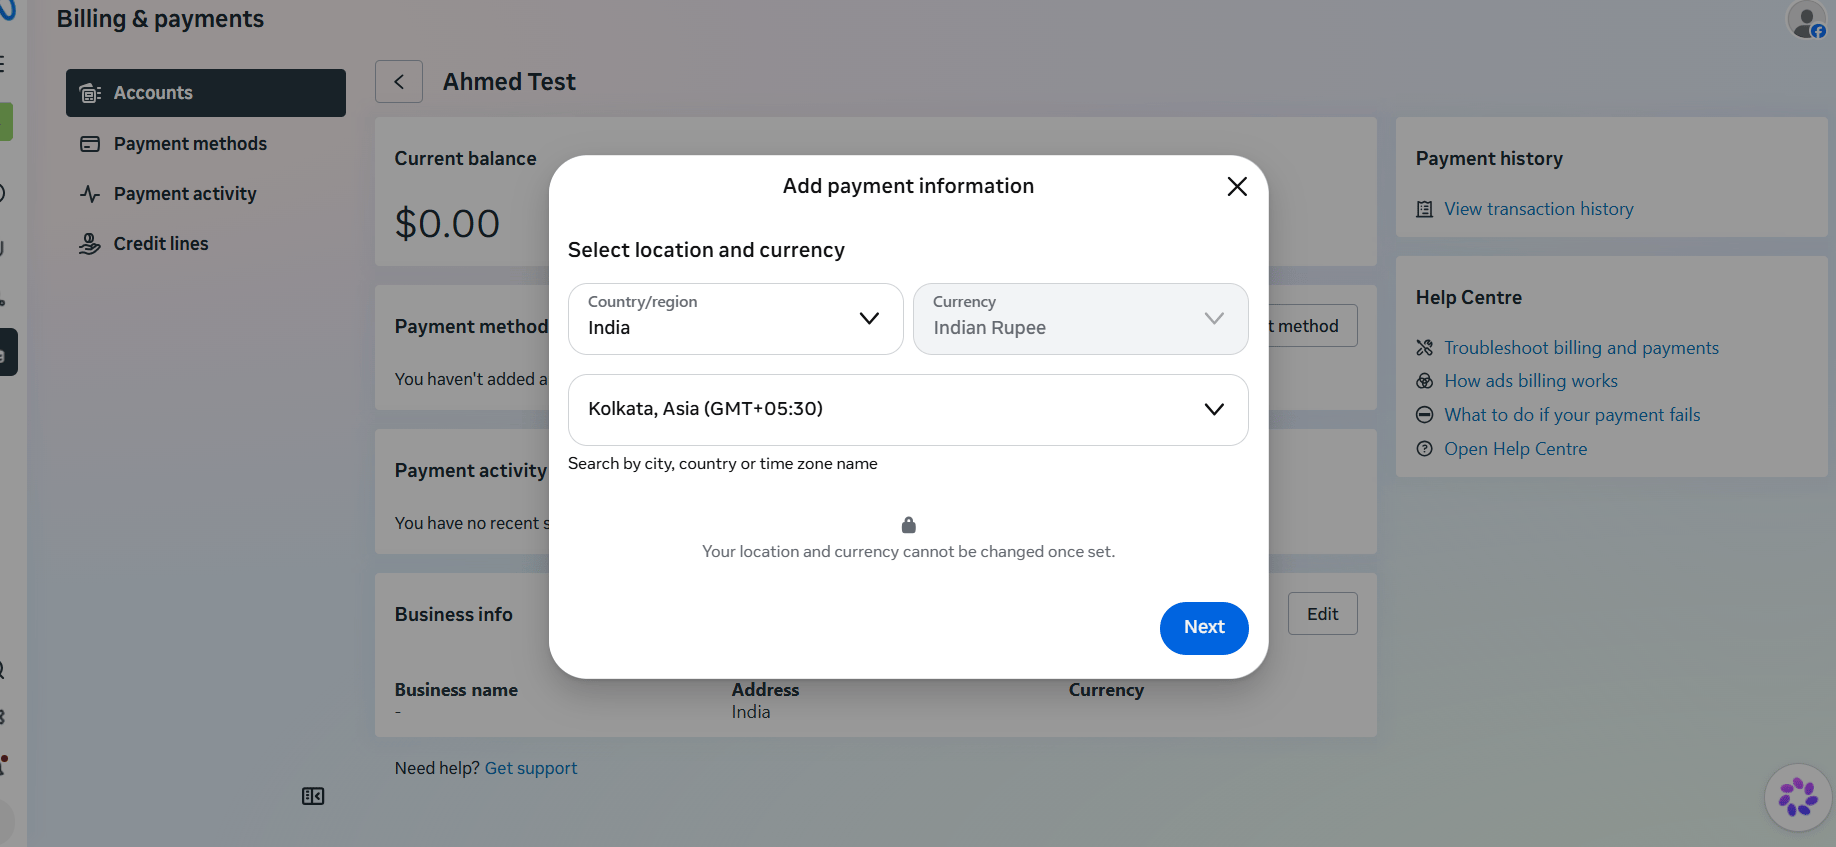
5
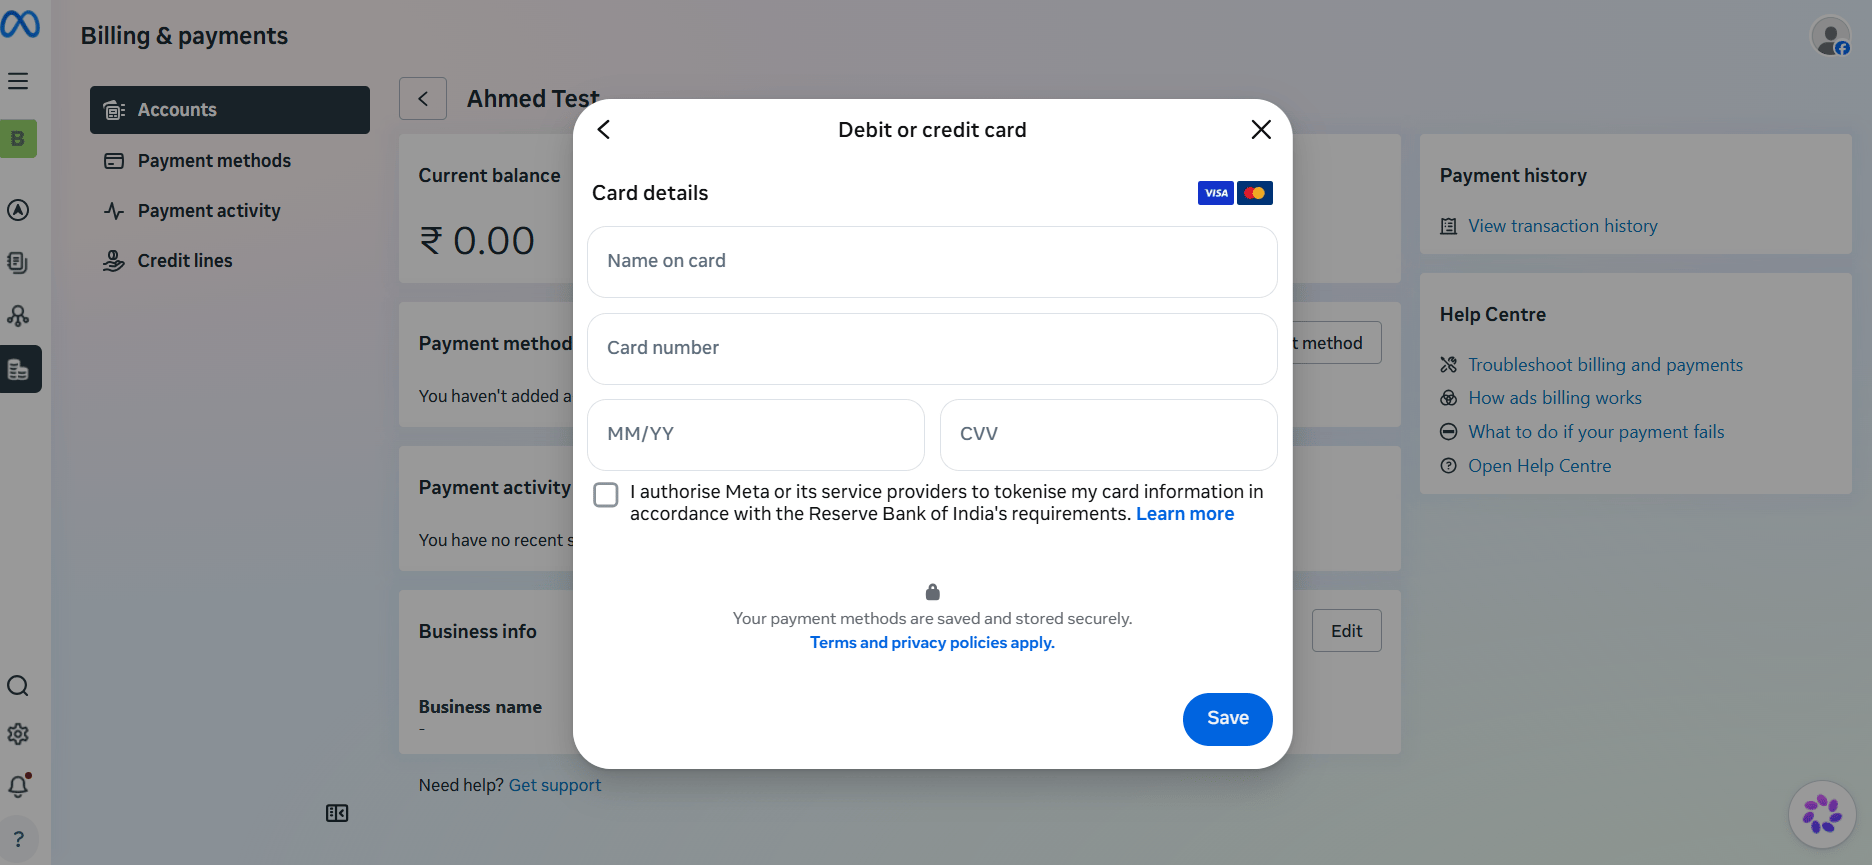
Enter your card details
On the Debit or credit card screen, fill in the Name on card, Card number,
expiry (MM/YY), and CVV, check the authorization box, then click Save.