

Turn on AI Agents
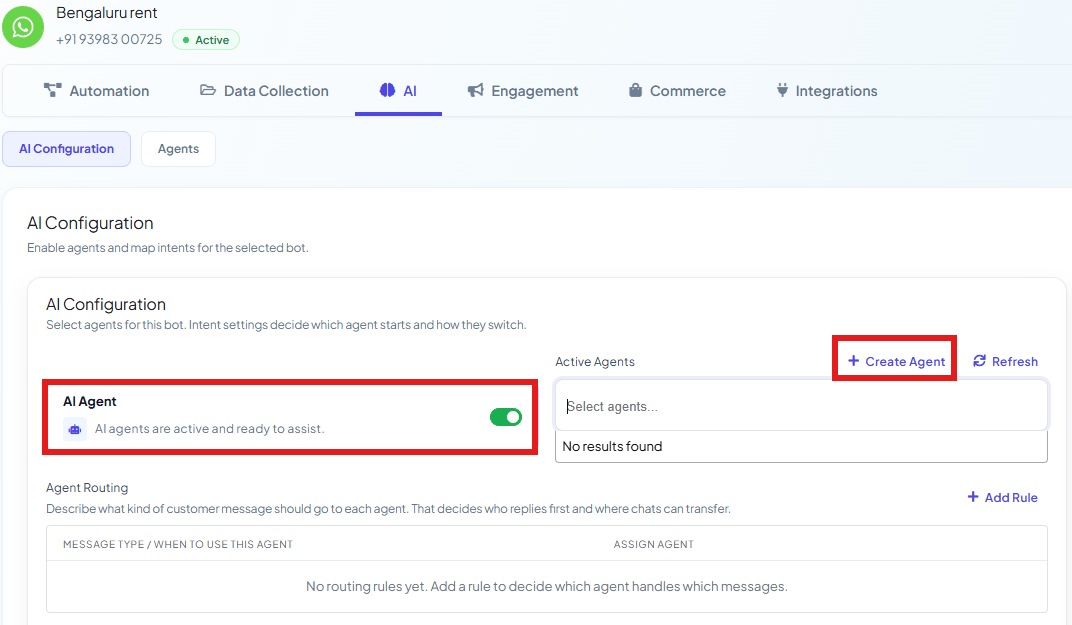
1
Open Chatbot Manager
Select Chatbot Manager.
2
Open the AI tab
Select AI, then the AI Configuration sub-tab.
3
Turn it on
Turn on the AI Agent toggle — “AI agents are active and ready to assist.”
Create your first AI agent
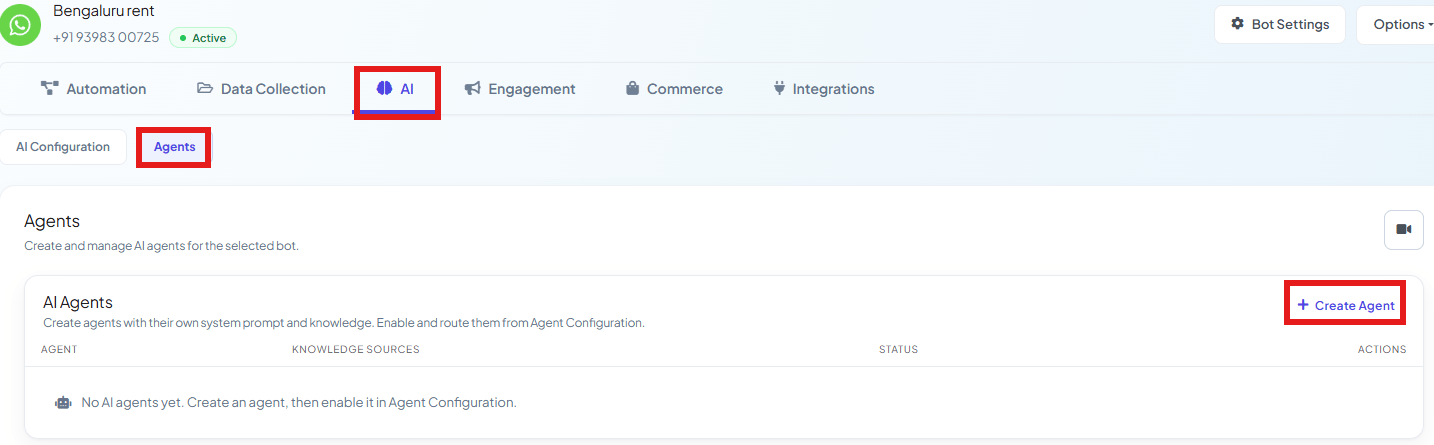
1
Open the Agents tab
In Chatbot Manager → AI, select the Agents sub-tab. Every agent you’ve built appears
here with its knowledge source count and status.
2
Click Create Agent
Opens the Create AI Agent form.
3
Name it
Give it a clear Name, e.g.
Sales Advisor Agent. The Slug auto-generates from the
name if you leave it empty (e.g. sales-agent) — this is the internal identifier used when
referencing the agent elsewhere (like transferring a conversation to
it).4
Describe what it does (optional)

5
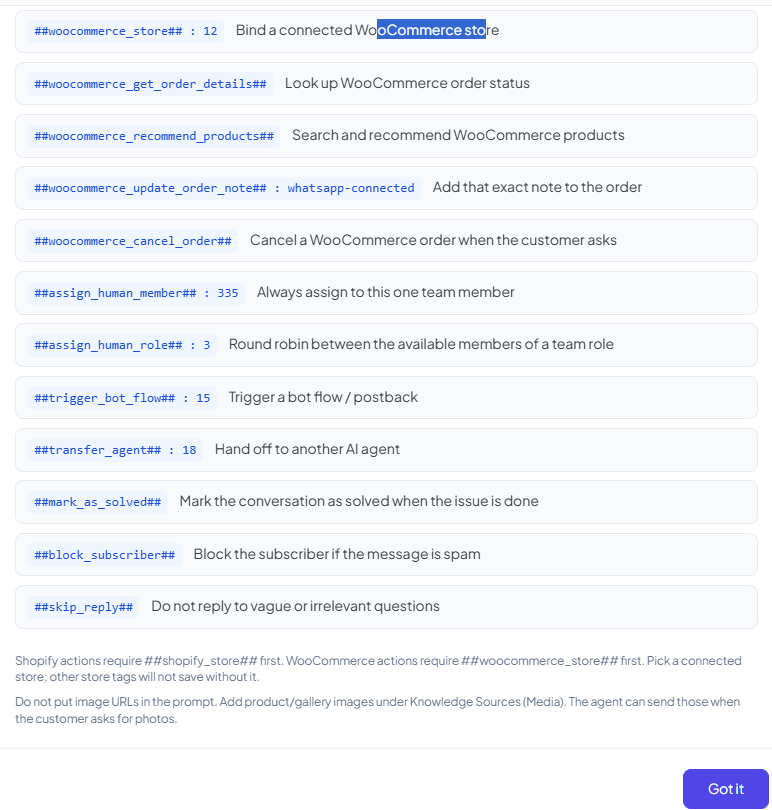
Write the System Prompt

Sales Advisor Agent created above:##action## it triggers, right below
it. That’s what turns a passive chatbot into a digital worker that actually completes
tasks.Two more patterns, so you can see how the shape of a prompt changes with the job:A Support Agent — simpler, focused entirely on answer-or-escalate:##action_name## syntax — type ## in the
box to autocomplete an action, then pick a label/sequence/etc. from the list that appears: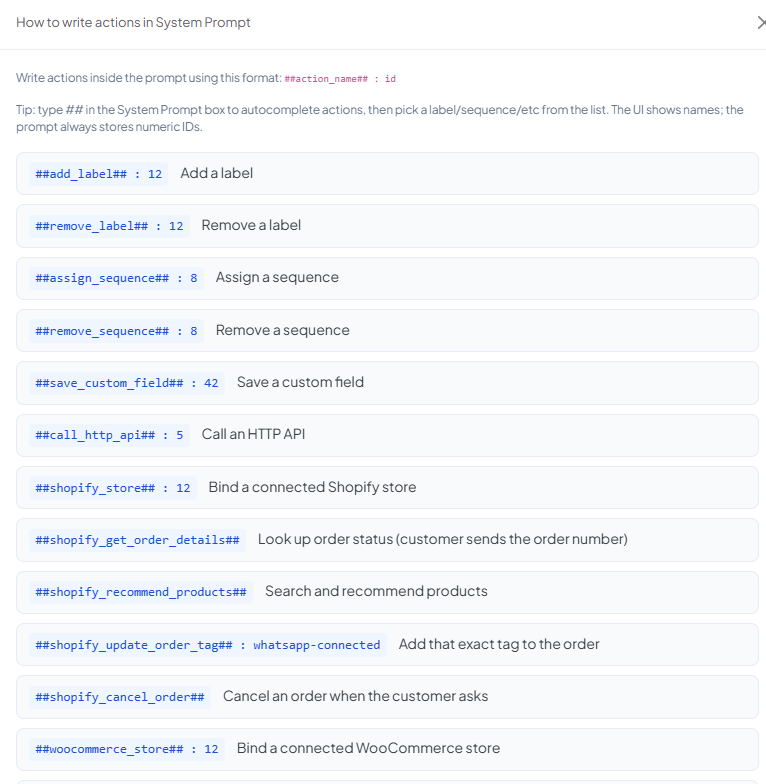
6
Add Knowledge Sources
Right now, your agent can only work from the System Prompt you just wrote — it has no real
business knowledge yet. If a customer asks something specific, like “are you open on
Sunday?” or “do you have this in red?”, it has nothing to answer from. Knowledge
Sources fix that: they’re where you feed the agent your actual business information, so it
answers from real facts instead of guessing.Scroll down on the same Create AI Agent form to the Knowledge Sources panel: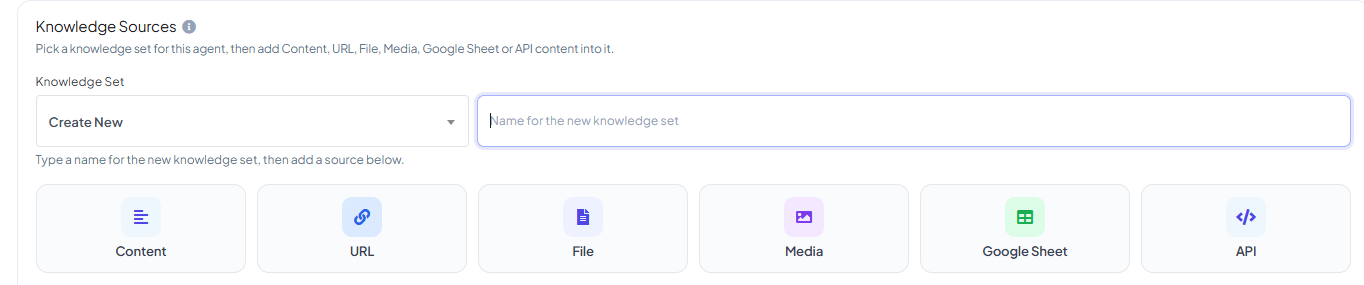
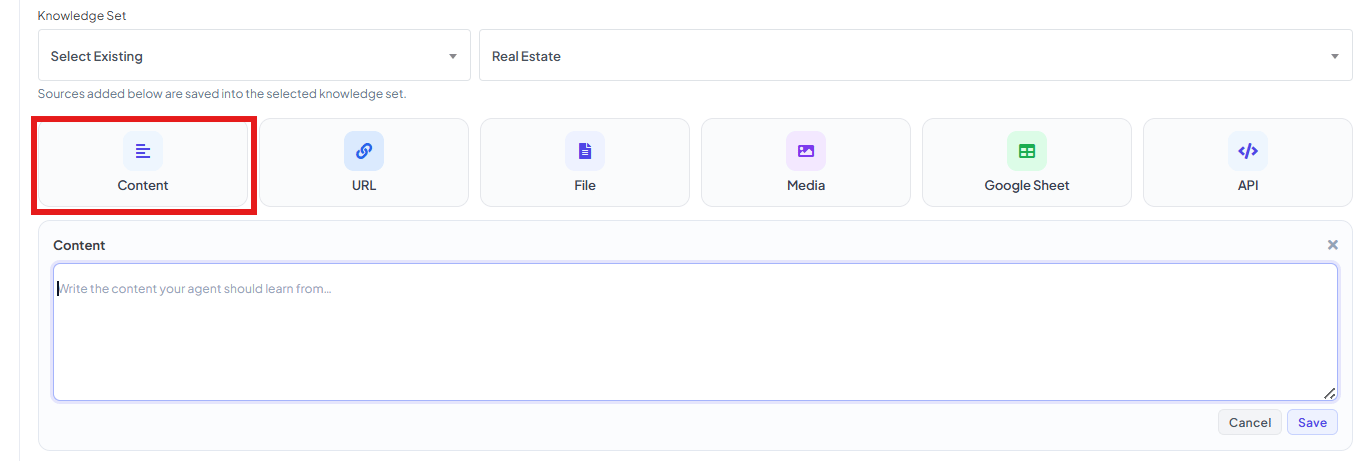
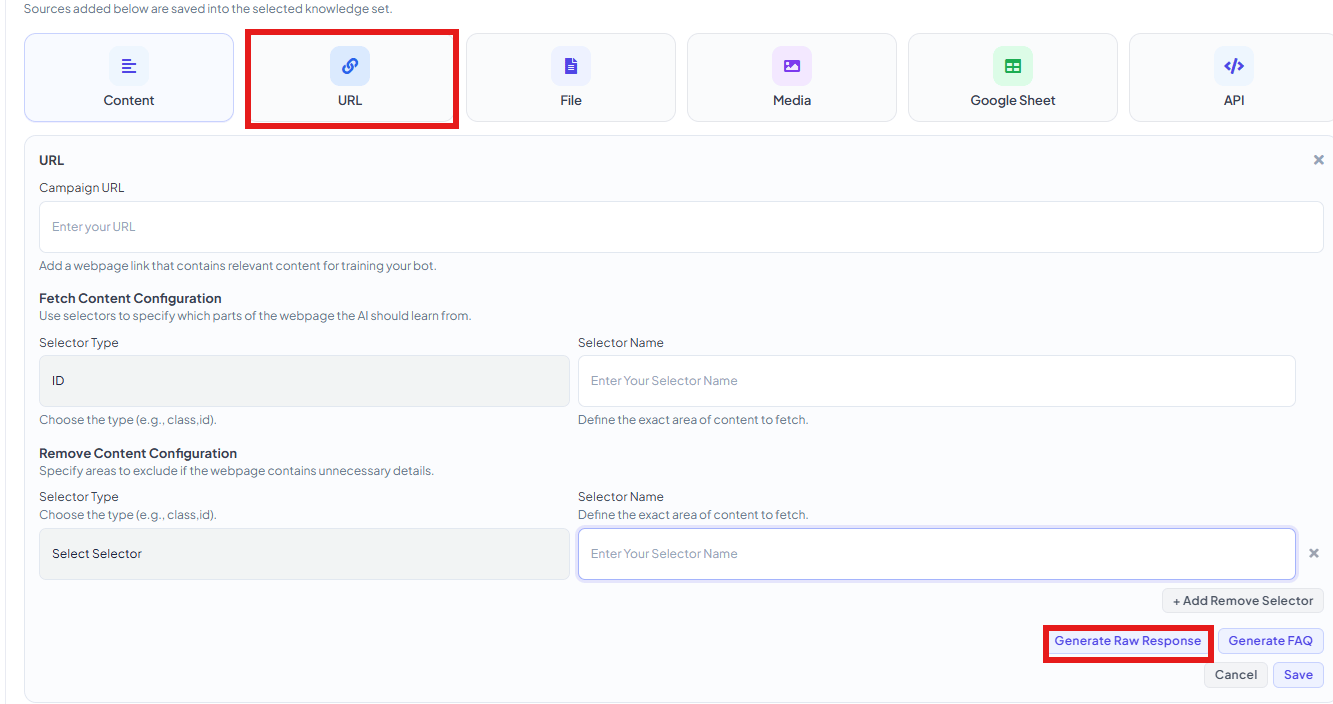
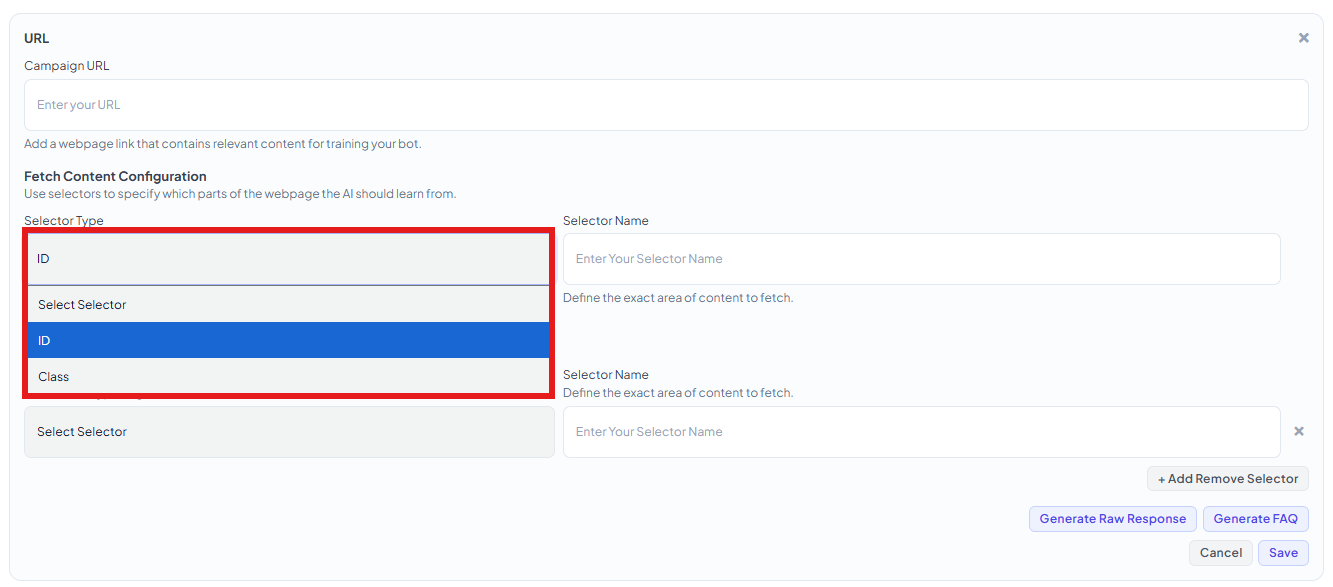
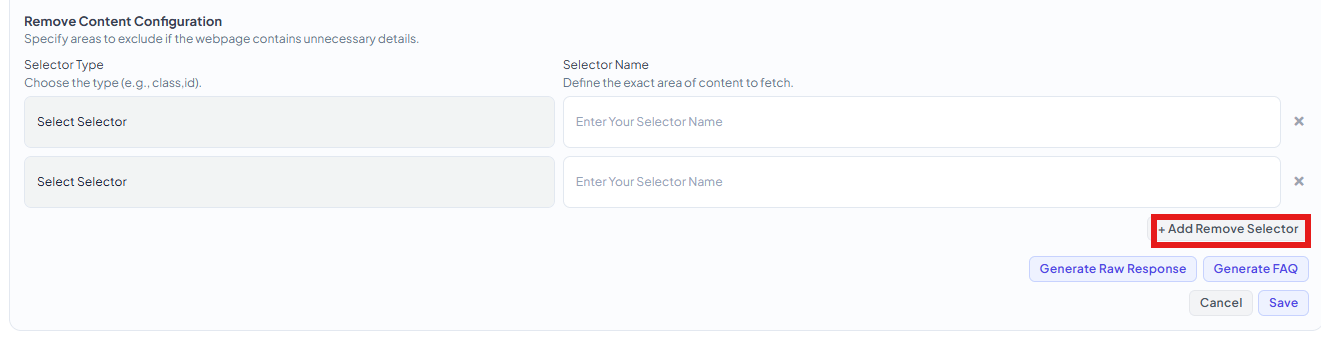
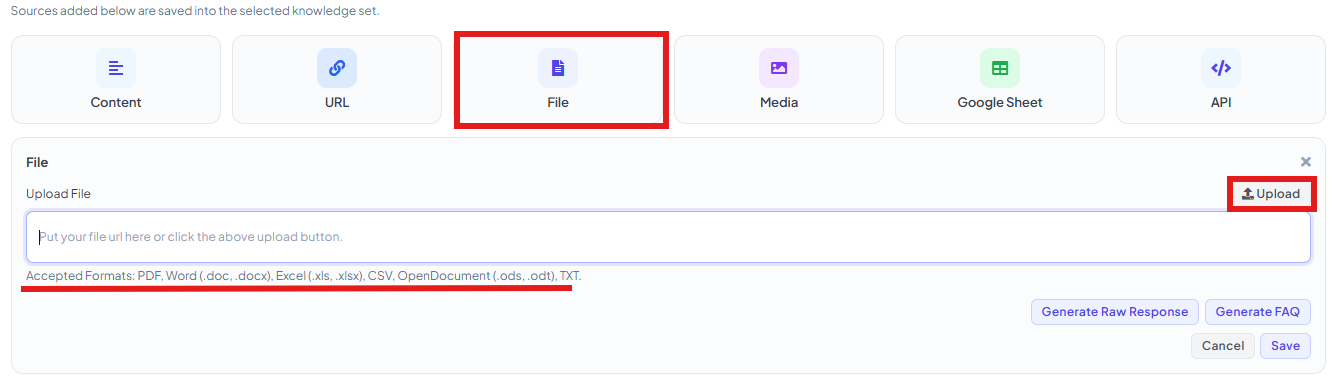
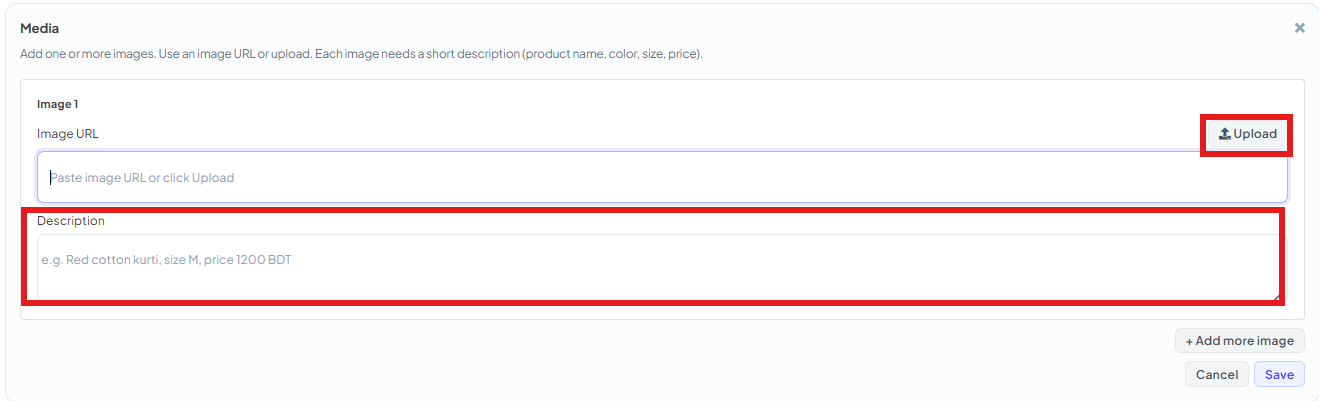
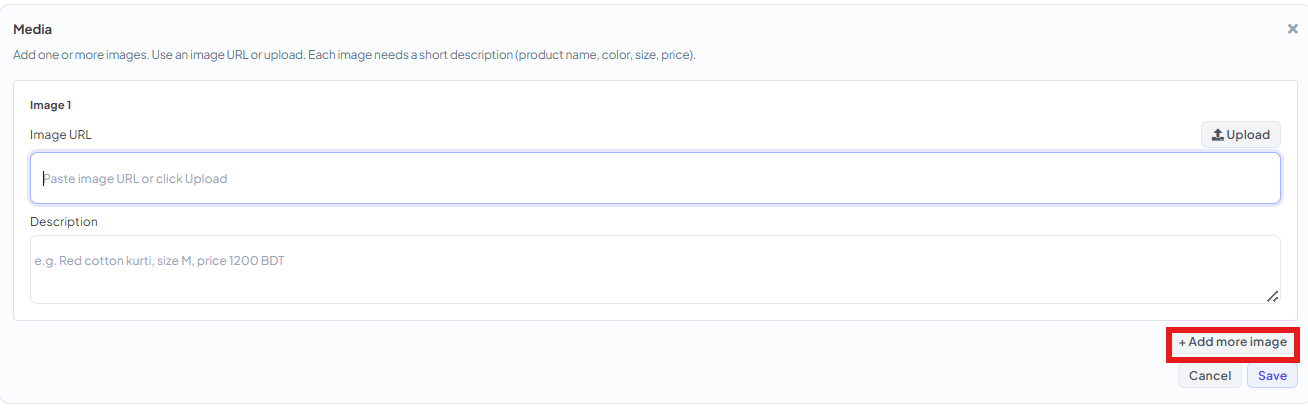
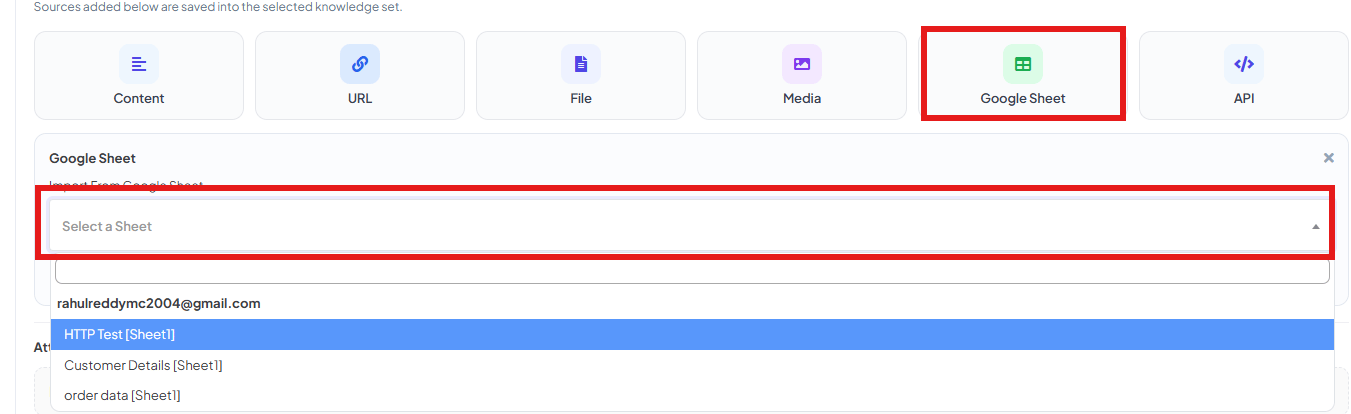

ID or Class as the Selector Type, then enter that
exact ID or class name from the page’s code):.doc/.docx), Excel (.xls/.xlsx), CSV, OpenDocument
(.ods/.odt), or TXT file, like a product catalog or a training manual:7
Save
The agent now appears in the Agents list and in the Active Agents dropdown back on
AI Configuration.
Turn your new agent on
Creating an agent doesn’t make it start replying — it still needs to be switched on for this bot, back on the AI Configuration sub-tab.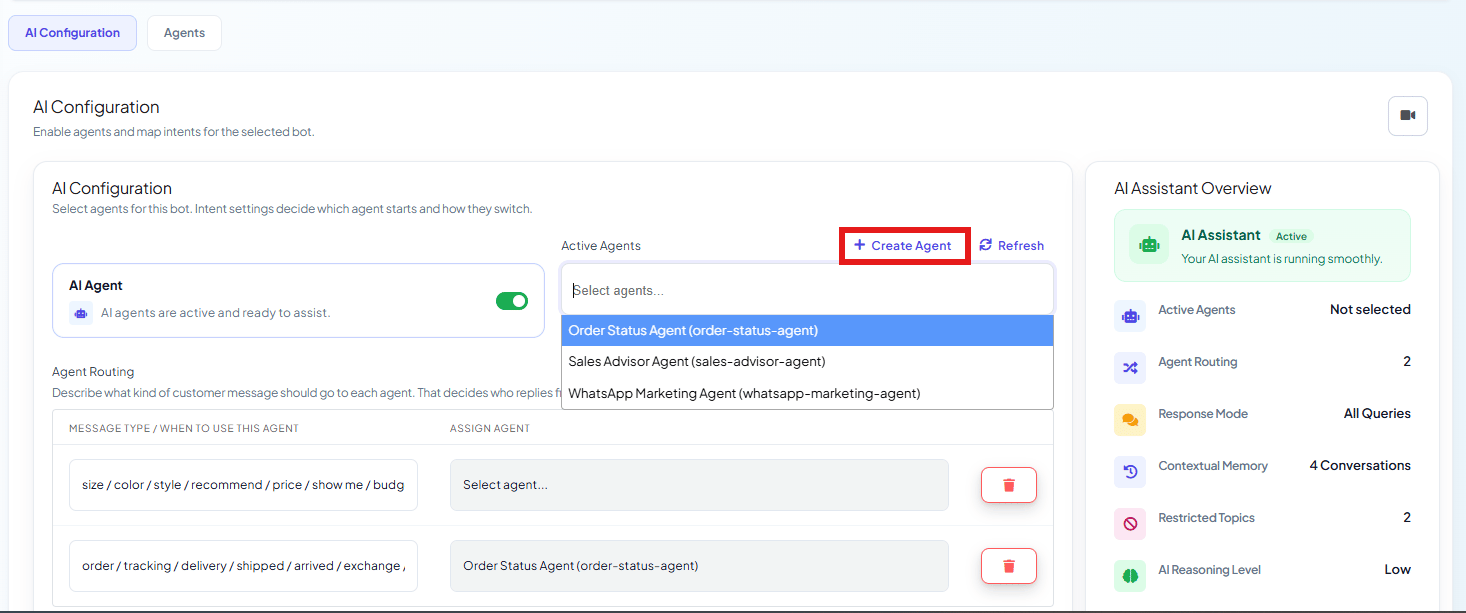
1
Go back to AI Configuration
Select the AI Configuration sub-tab again.
2
Open Active Agents
Click the Active Agents field — it’s a multi-select, so you can turn on more than one agent for the same bot.
3
Pick your new agent
Select the agent you just created. If it’s not in the list, click Refresh.
Frequently asked
What's the difference between the Slug and the Name?
What's the difference between the Slug and the Name?
Name is what you see in the UI. Slug is the internal identifier (auto-generated from
the name if left empty) used to reference this agent elsewhere, like in a
transfer_agent
action — see AI Agent Actions.I created an agent but it's not answering anything — why?
I created an agent but it's not answering anything — why?
Check three things: it’s added to Active Agents on the AI Configuration tab, the AI
Agent toggle is on, and it has at least one knowledge source attached — see How to Train
Your AI Chatbot — if it’s meant to answer from trained
content rather than just its System Prompt.
Do I need more than one agent?
Do I need more than one agent?
No — a single agent with a broad System Prompt and one Knowledge Set works fine for most
bots. Multiple agents are worth it once different types of questions need very different
instructions or actions — see How Do I Build a Multi-Agent AI
Workforce?.
Related Documentation
- AI Agents — the section overview, and what to build next.
- How to Train Your AI Chatbot — the full Knowledge Source reference.
- AI Agent Actions — the full
##action##syntax reference.