

How to set it up
1
Open the WhatsApp Flows list
Go to Chatbot Manager → Data Collection → WhatsApp Flows. You’ll see every flow with its
name, category, status, and a row of action icons.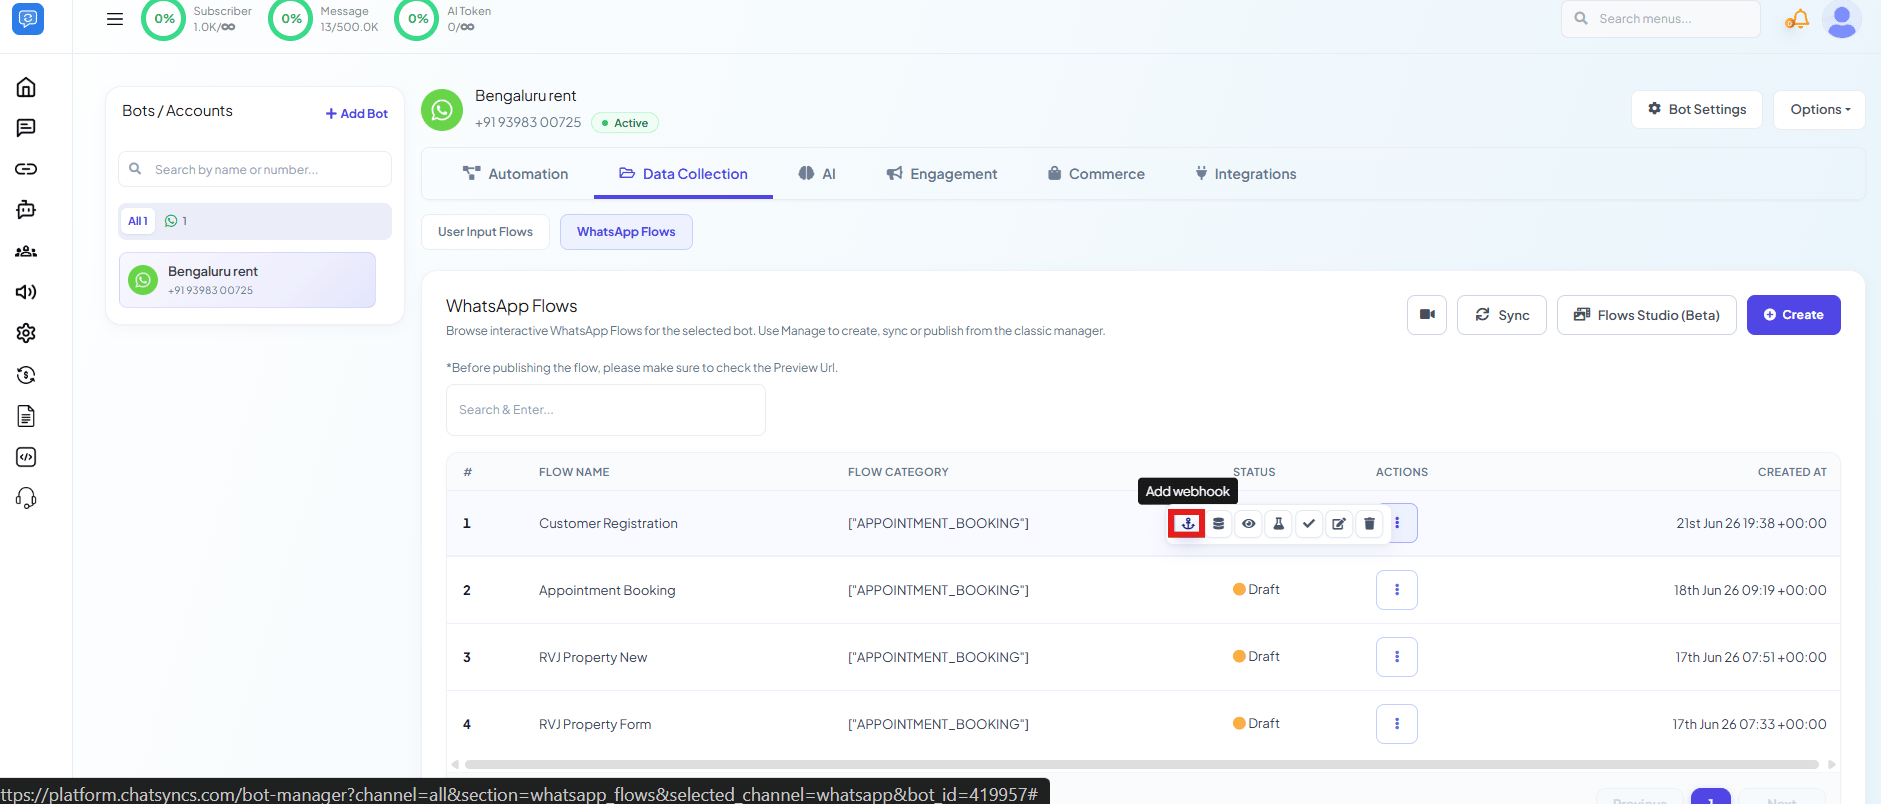
2
Click the webhook icon
On the flow you want to connect, click the anchor-shaped Add webhook icon in its Actions
column. This opens the WhatsApp Flow Webhook panel for that flow.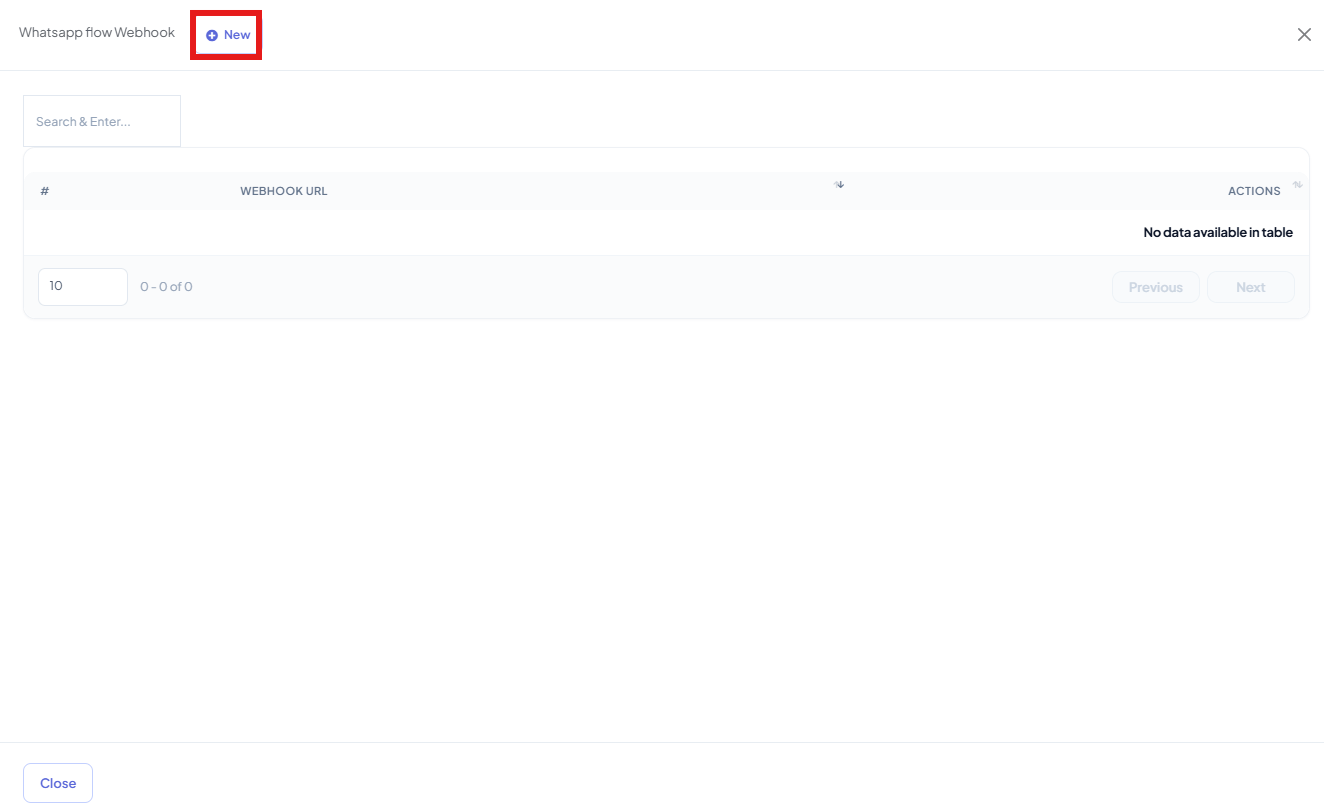
3
Click New and add your URL
Click New, paste your webhook endpoint into the Webhook URL field, and click
Save.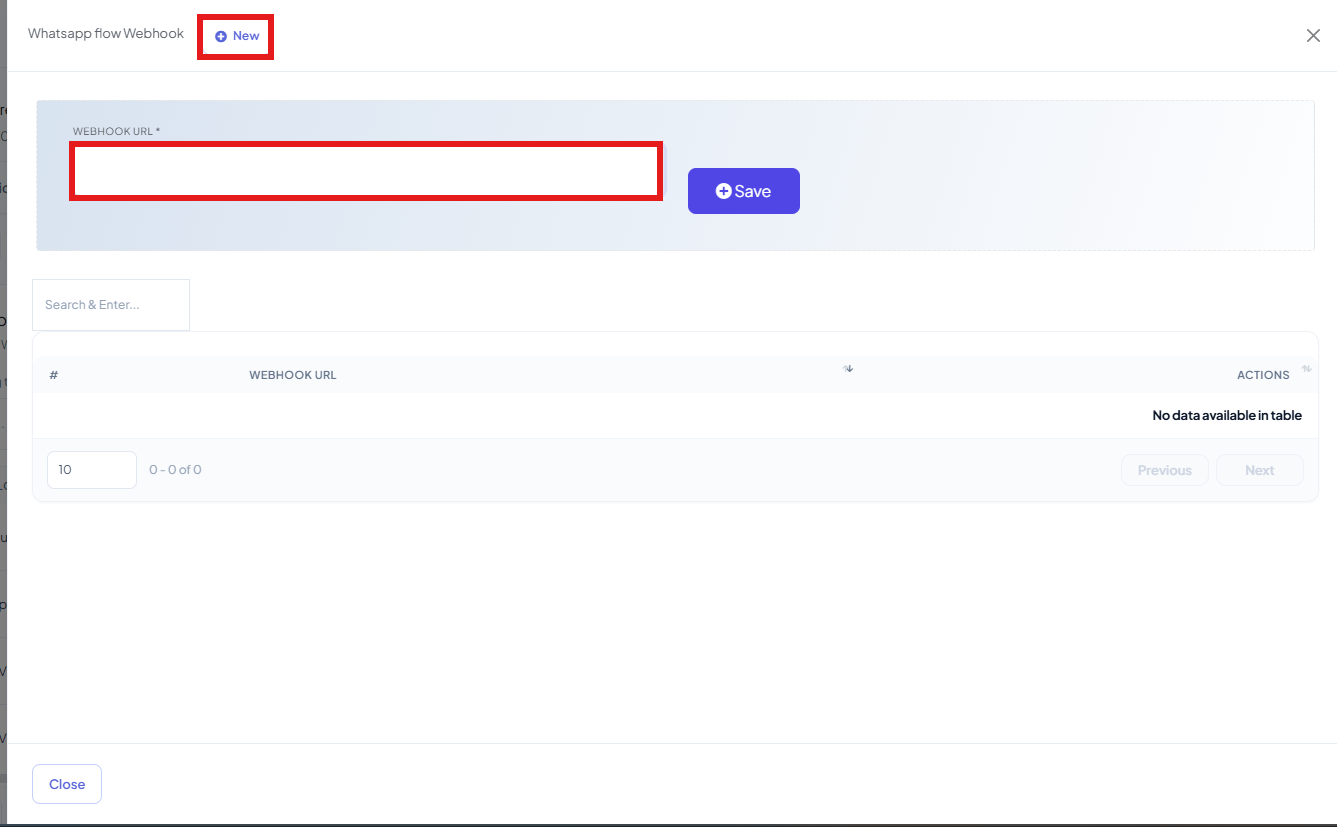
4
Repeat to add more URLs
Click New again for each additional system that should receive the same submission —
every URL on the list gets its own copy of the data.
Frequently asked
What data gets sent to the webhook?
What data gets sent to the webhook?
The same submitted form data as the flow itself collected — every field the customer filled
in, sent as JSON in the POST body.
Can I send the same flow's submissions to more than one place?
Can I send the same flow's submissions to more than one place?
Yes — add as many webhook URLs as you need on the same flow. Each one gets its own copy of
every submission.
What's the difference between this and the Select HTTP API field on the flow?
What's the difference between this and the Select HTTP API field on the flow?
Select HTTP API (inside the flow’s own configuration) sends data through one HTTP API
you’ve already saved in ChatSyncs. This WhatsApp Flow Webhook panel is separate — it lets
you attach raw webhook URLs directly to the flow without creating an HTTP API first, and
supports more than one URL.
Does the flow need to be published first?
Does the flow need to be published first?
Yes — attach webhook URLs to a flow that’s already published, so submissions have somewhere
to send data as soon as customers start using it.