

1
Create a new workflow
Go to Chatbot Manager → Automation → Webhook Workflows and click Create. Fill in the
workflow details: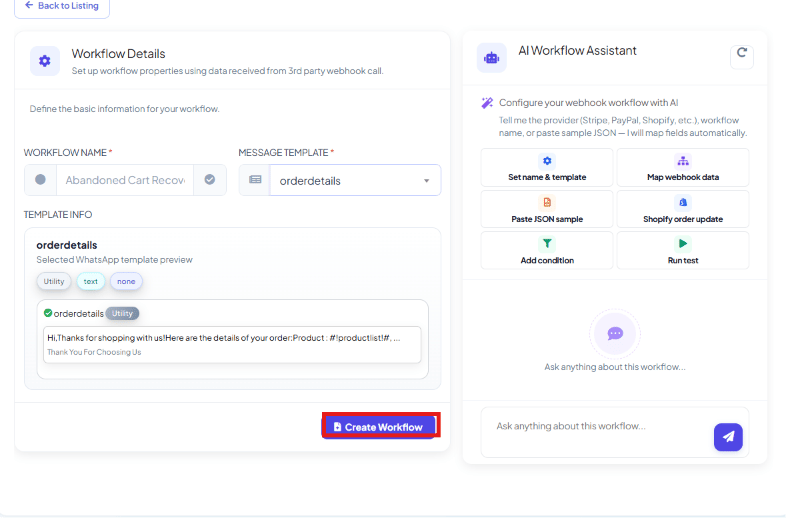
- Workflow Name — a recognizable name, e.g.
Cal.com Booking Confirmation. - Select Number — the WhatsApp number to send messages from.
- Select Template — the approved message template to use.
2
Get the callback URL
After saving, ChatSyncs generates a unique Webhook Callback URL, e.g.
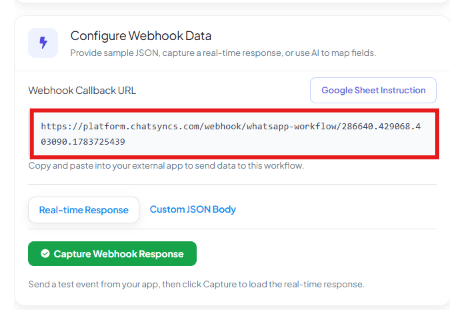
https://platform.chatsyncs.com/webhook/whatsapp-workflow/xxxxxxx. Copy it and paste it into
your third-party app’s webhook or notification settings — for example, in Cal.com that’s
Settings → Webhooks → Event Triggers.3
Capture a test response
Click Capture Webhook Response — this tells ChatSyncs to start listening for the next
call to this workflow’s URL.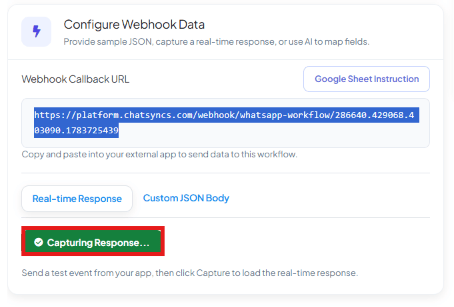
4
Map the data to template variables
Once ChatSyncs receives the test payload, the Webhook Response Mapping section lists
every field it found: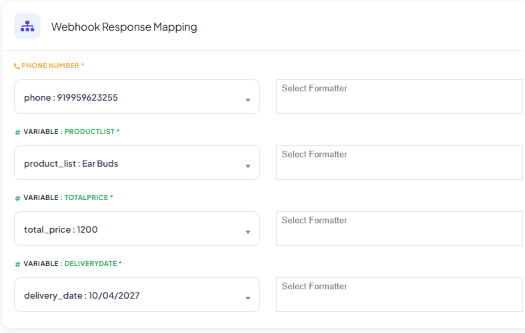
- Phone Number — select the JSON path that holds the recipient’s phone number. This is required — without it ChatSyncs has no destination for the message.
- Variables — for each template variable (e.g.
USERNAME,BOOKINGDATE,MEETINGLINK), select the matching JSON path from the webhook response, e.g.payload > attendees > 0 > name→ the customer’s name. - Data Formatters — optionally transform a field before sending (e.g. reformat a date).
ChatSyncs maps the field name, not the sample value. A dropdown showing
customer_name : Rahul Reddy means “use whatever comes in under the customer_name key”
— not literally “Rahul Reddy” every time. A later submission with a different name fills the
template automatically, as long as the field name stays the same.5
Verify and activate
After saving, the workflow appears on the dashboard. Its Verified column shows whether a
successful test webhook has been received. Once verified, the workflow is live and sends
messages automatically every time the webhook fires.
Frequently asked
Why isn't my workflow detecting any fields?
Why isn't my workflow detecting any fields?
Click Capture Webhook Response before triggering the test event, not after — ChatSyncs
only reads fields from a call made while it’s actively capturing.
Can I test a workflow without a live third-party app connected yet?
Can I test a workflow without a live third-party app connected yet?
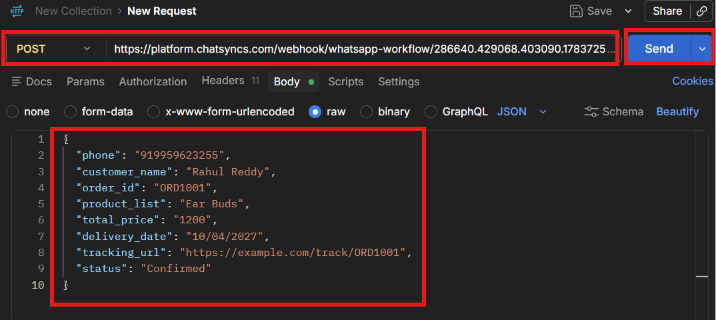
Yes — use the Custom JSON Body tab to paste a sample payload, or send a POST request to
the callback URL yourself from Postman or curl.
Do I need to remap fields if future events send different values?
Do I need to remap fields if future events send different values?
No — ChatSyncs maps by field name (the JSON key), not the sample value shown during
setup. Only a renamed or removed field breaks the mapping.
What happens if the Phone Number field isn't mapped?
What happens if the Phone Number field isn't mapped?
The workflow can’t send anything — Phone Number tells ChatSyncs who to message, so it’s
required before the workflow can go live.