

Send the message with a delay
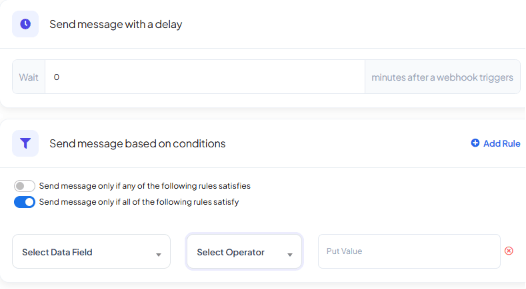
0 sends immediately.
Example: A customer books a meeting for 3:00 PM. Instead of confirming the instant the
booking lands, set a 30-minute delay so the message reads more like a considered reminder than
an instant auto-reply.
Send the message only under certain conditions
Instead of a message for every call, conditions let you decide whether a particular one should actually trigger a send.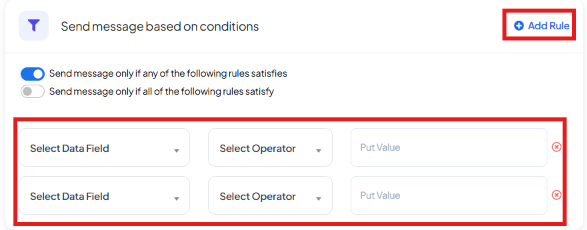
- Select Data Field — which webhook field to check (only fields your app actually sends will be useful here).
-
Select Operator — how to compare the field to your value:
- Put Value — the value to compare against.
- Any (OR logic) — the message sends if at least one rule matches.
- All (AND logic) — every rule must match before the message sends.
consultation — internal
team meetings booked through the same calendar shouldn’t trigger a customer message.
Actions after a successful call
Once a message sends successfully, the workflow can also update the subscriber automatically: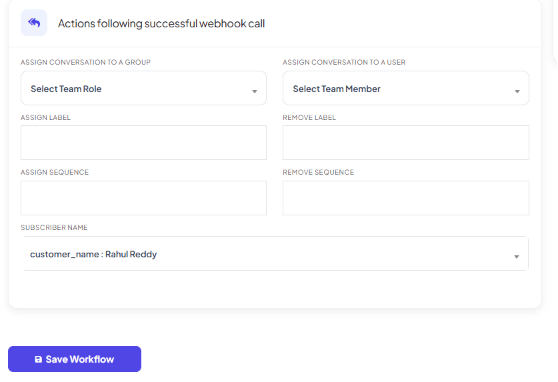
- Assign Conversation to a Group — route the conversation to a team (e.g. Sales, Support).
- Assign Conversation to a User — assign it to one specific team member.
- Assign Label / Remove Label — tag or untag the subscriber for segmentation and filtering.
- Assign Sequence / Remove Sequence — start or stop an automated sequence for them, see How to Build Automatic Follow-Up Chatbots on WhatsApp in ChatSyncs.
- Subscriber Name — map a webhook field to set the subscriber’s display name in ChatSyncs.
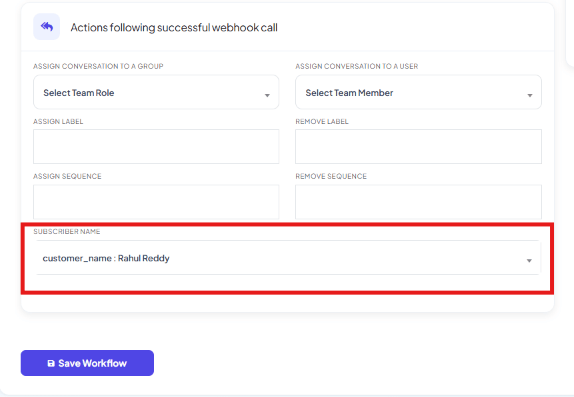
New Lead label — all from one
successful call, no manual follow-up.
Click Save Workflow once everything is configured.
Frequently asked
Can I stop a workflow from sending on every single call?
Can I stop a workflow from sending on every single call?
Yes — use Send message based on conditions to only send when a field matches a rule.
Can I delay a message instead of sending it the instant the webhook fires?
Can I delay a message instead of sending it the instant the webhook fires?
Yes — set Wait under Send message with a delay to the number of minutes to hold
before sending.
0 sends immediately.What's the difference between Any and All when combining rules?
What's the difference between Any and All when combining rules?
Any sends if at least one rule matches (OR logic). All requires every rule to match
before it sends (AND logic).
Can a webhook call route the conversation to a specific team automatically?
Can a webhook call route the conversation to a specific team automatically?
Yes — under Actions Following Successful Webhook Call, use Assign Conversation to a
Group (a team) or Assign Conversation to a User (one teammate).