

When to use a Google Sheet import
Use this instead of a CSV file when your contact list already lives in a Google Sheet you keep updated — connect the sheet once, and ChatSyncs reads the data directly instead of you exporting and re-uploading a file every time the list changes. Example: An event team keeps a live Google Sheet where new sign-ups get added by a registration form all week. Instead of exporting a fresh CSV every day, they connect the sheet once and re-run Import from CSV → Import from Google Sheet each morning — only the newly-added rows turn into new subscribers, since existing ones are matched and simply updated.Importing from a Google Sheet doesn’t sync live — it’s a manual re-import you trigger whenever
you want the latest rows pulled in, not an automatic background sync.
Import from a Google Sheet
1
Open Export/Import → Import from CSV
From the Subscriber Manager list, open Export/Import, then Import from CSV — this opens the same modal used for every import type.
2
Select a Label and Bot
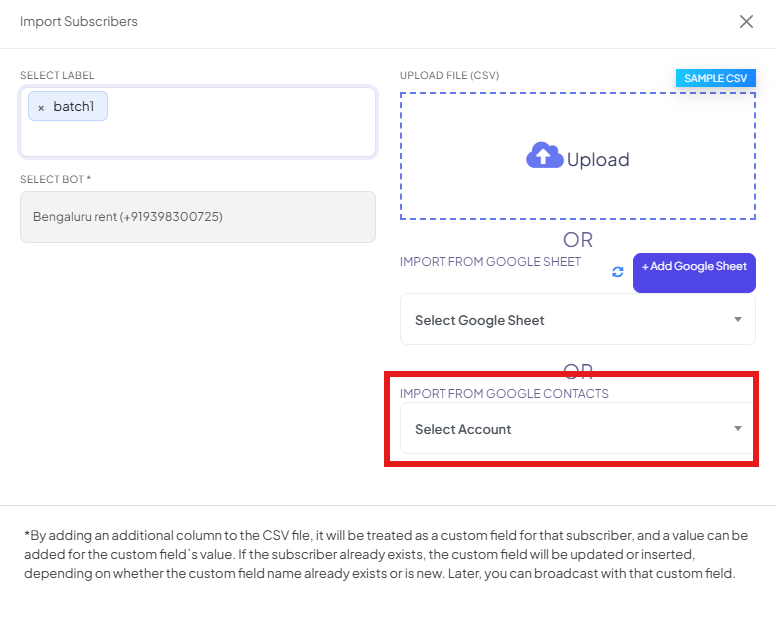
Select Label is optional; Select Bot is required.
3
Choose Import from Google Sheet
Use + Add Google Sheet to connect the specific spreadsheet you want to import from, then pick it from Select Google Sheet.
4
Map each column
Match the sheet’s columns to ChatSyncs fields, the same way as a CSV upload — see below.
5
Confirm the import
Confirm — the imported contacts appear in the Subscriber Manager list.
+, no
scientific notation); they apply to a Google Sheet import in exactly the same way, since the
underlying data still goes through the same Map the columns step.
Contacts already saved in your phone or Google account, with no spreadsheet at all? See
How to Import Contacts from Google Contacts instead.
Expected result: Every matching row becomes a subscriber in Subscriber Manager, ready to
label, message, or enroll in a sequence immediately — the same end result as a CSV import, just
without a file to prepare first.
Frequently asked
Do the same phone number formatting rules apply as a CSV import?
Do the same phone number formatting rules apply as a CSV import?
Yes — country code mandatory, plain digits, no
+ or spaces. See
Import Using CSV for the full detail;
the same Map the columns step is used for both.Does importing from a Google Sheet update existing subscribers, or create duplicates?
Does importing from a Google Sheet update existing subscribers, or create duplicates?
It matches by phone number — an existing subscriber’s record (and its custom fields) gets
updated rather than duplicated.
Do I need to keep the Google Sheet connected after importing once?
Do I need to keep the Google Sheet connected after importing once?
The connection stays available for future imports from the same sheet, so you can re-run
the import later (e.g. after adding new rows) without reconnecting it from scratch.
If I add new rows to my Google Sheet, do they import automatically?
If I add new rows to my Google Sheet, do they import automatically?
No — importing is manual. Add your new rows, then go back to Export/Import → Import from
CSV → Import from Google Sheet and re-run it; only new or changed rows affect anything,
since existing subscribers are matched and updated rather than duplicated.
Related Documentation
- Subscriber Manager — the subscriber list and full Options menu.
- How Do I Import Subscribers Using a CSV File? — the column format and phone-number rules shared by both import methods.
- How to Import Contacts from Google Contacts — for importing straight from your Google account’s saved contacts instead of a spreadsheet.
- How Do I Add a Subscriber Manually? — for adding one contact at a time instead.
- How Do I Manage Custom Fields and Labels? — how imported columns become custom fields.