> ## Documentation Index
> Fetch the complete documentation index at: https://docs.chatsyncs.com/llms.txt
> Use this file to discover all available pages before exploring further.
# Introduction to Team Management in ChatSyncs
> How multiple people can share one ChatSyncs account safely, each with their own login and their own limits on what they can do.
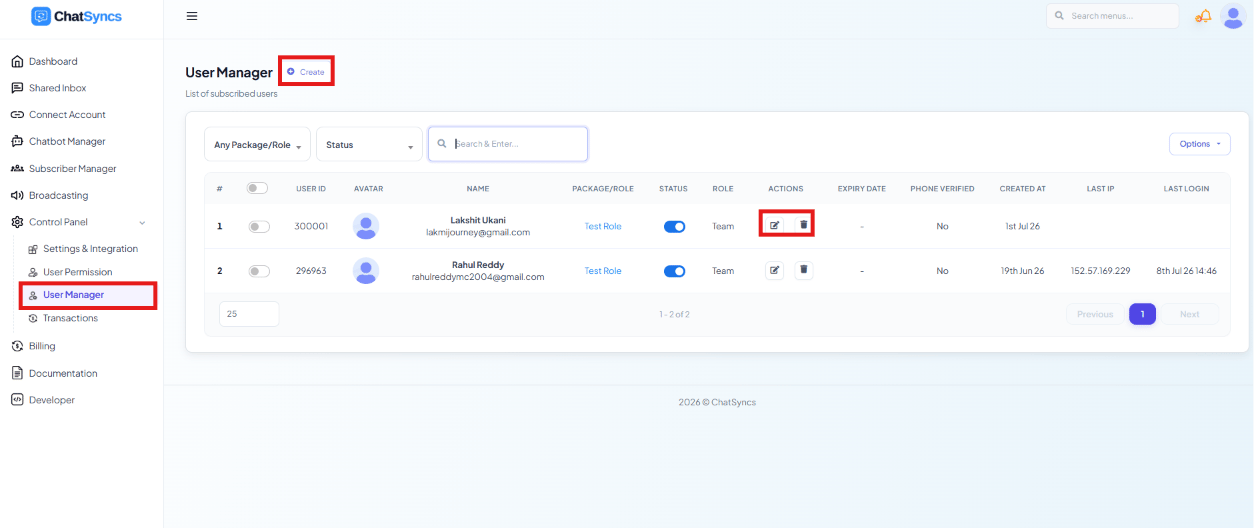
**Team Management** is how more than one person works inside a single ChatSyncs account — each
with their own login, and each limited to only what their job needs.
It has two parts, and they work together:
* **Team Roles** — a permission package that decides *what* a person is allowed to do. Built in
[How to Set Up User Roles and Permissions](/learn/chatsyncs-team-management/set-up-user-roles-and-permissions-in-chatsyncs).
* **Team Members** — the actual people, each given a login and assigned one Team Role. Built in
[How to Add and Manage Team Members](/learn/chatsyncs-team-management/add-and-manage-team-members-in-chatsyncs).
**Example:** A clothing store creates two roles first — **Customer Support** (Live Chat and
Subscribers only) and **Marketing** (Broadcast and Templates only). Then it creates two team
members: Priya gets the Customer Support role, Arjun gets the Marketing role. Both log in with
their own email and password, but Priya only sees Live Chat and Subscribers, while Arjun only
sees Broadcast and Templates.
 Define what each role is allowed to do, feature by feature.
Create the actual people, and assign each one a role.
## Do this in order
Go to [How to Set Up User Roles and Permissions](/learn/chatsyncs-team-management/set-up-user-roles-and-permissions-in-chatsyncs) and define what it
can access — e.g. `Admin`, `Customer Support`, `Marketing`.
Go to [How to Add and Manage Team Members](/learn/chatsyncs-team-management/add-and-manage-team-members-in-chatsyncs), fill in their
details, and assign the role you just created.
Give the employee their email and password. They'll only see the modules their assigned
role allows.
Create the role before the team member — a role has to already exist to be assigned during
team member creation.
## Frequently asked
A **Team Role** is a permission package — the rules. A **Team Member** is an actual person
with a login, assigned one of those roles.
Yes — roles are assigned at the moment a team member is created, so the role needs to exist
first.
Yes — as many team members as needed can be assigned the same Team Role, e.g. three support
agents all on the Customer Support role.
In [How to Add and Manage Team Members](/learn/chatsyncs-team-management/add-and-manage-team-members-in-chatsyncs) — either delete their
account or set their status to disabled to revoke access while keeping their history.
Define what each role is allowed to do, feature by feature.
Create the actual people, and assign each one a role.
## Do this in order
Go to [How to Set Up User Roles and Permissions](/learn/chatsyncs-team-management/set-up-user-roles-and-permissions-in-chatsyncs) and define what it
can access — e.g. `Admin`, `Customer Support`, `Marketing`.
Go to [How to Add and Manage Team Members](/learn/chatsyncs-team-management/add-and-manage-team-members-in-chatsyncs), fill in their
details, and assign the role you just created.
Give the employee their email and password. They'll only see the modules their assigned
role allows.
Create the role before the team member — a role has to already exist to be assigned during
team member creation.
## Frequently asked
A **Team Role** is a permission package — the rules. A **Team Member** is an actual person
with a login, assigned one of those roles.
Yes — roles are assigned at the moment a team member is created, so the role needs to exist
first.
Yes — as many team members as needed can be assigned the same Team Role, e.g. three support
agents all on the Customer Support role.
In [How to Add and Manage Team Members](/learn/chatsyncs-team-management/add-and-manage-team-members-in-chatsyncs) — either delete their
account or set their status to disabled to revoke access while keeping their history.